6-27
DSR-70/70P
P 1.4x3.5
MD chassis
Mounting surface (rear)
Mounting surface
Capstan motor
Capstan shaft
Protruded area
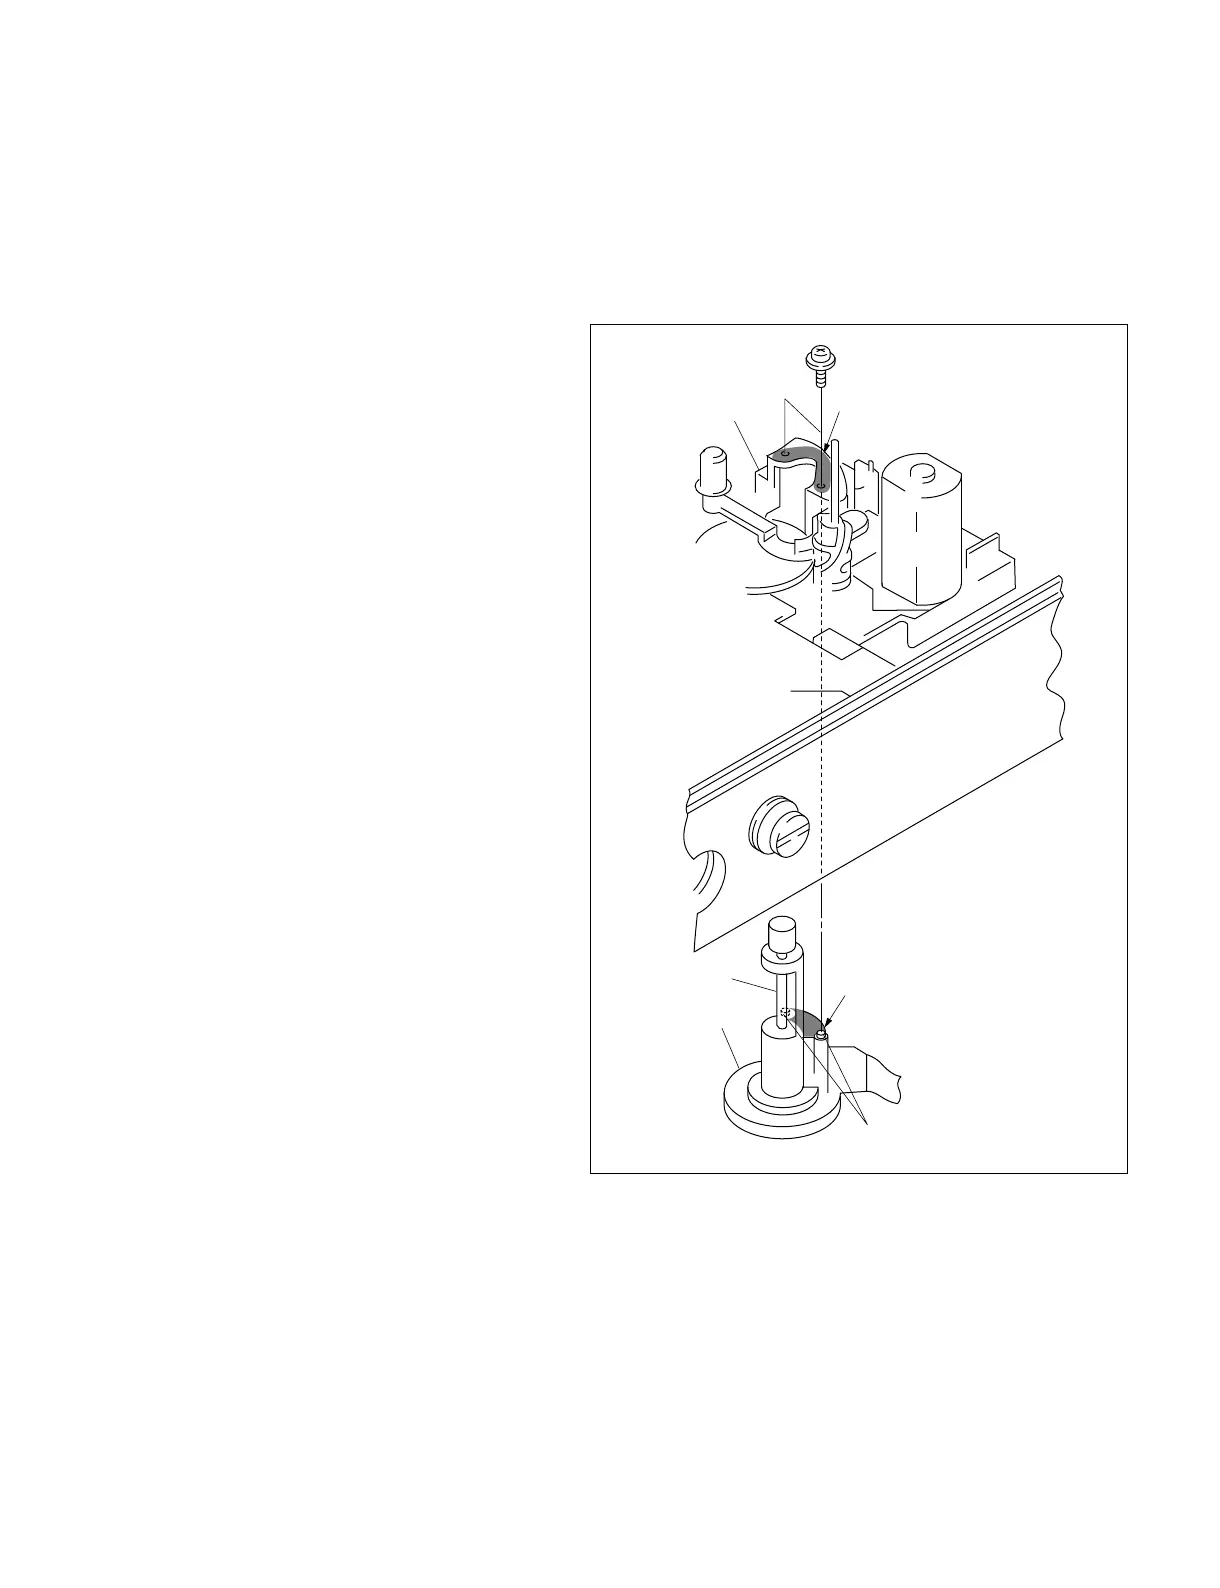
6-18. CAPSTAN MOTOR REPLACEMENT
Tools
Cleaning cloth : 3-184-527-01
Cleaning fluid : 9-919-573-01
Removal
1. Place the DSR-70/70P with its left side down.
2. Remove the bottom plate assembly.
(Refer to section 2-6-3.)
3. Remove the DR-364 board.
(Refer to section 2-8-9.)
4. With the pinch limiter shaft and the pinch limiter
arm of the MD chassis moved aside remove the
two screws from the bottom as shown and
remove the capstan motor.
Attachment
Note : Be careful not to damage the capstan
shaft.
5. Clean the mounting surface of the new capstan
motor and that of the MD chassis using the
cleaning cloth moistened with cleaning fluid.
6. Insert the new capstan motor from the rear.
Insert the two protrusions of the capstan motor
into the corresponding holes of the MD chassis.
Fix the capstan motor with the two screws from
the front.
7. Attach the removed parts by reversing the
removal procedure from step 3 to 1.
8. Clean the capstan shaft.
Adjustment After Replacement
9. Perform the capstan FG duty adjustment.
(Refer to section 4.)
10.Perform the tape path adjustment.
(Refer to section 7.)
 Loading...