Chapter 6 ClipLink Operation
92
Chapter 6 ClipLink Operation
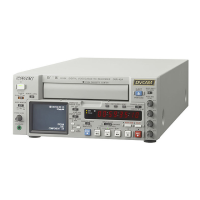
Displaying ClipLink Log Data
To display ClipLink log data, hold down the ENTRY/
SHIFT button and press the TRIM –/LIST button.
The following ClipLink log data list appears in the
monitor.
To return to the original monitor display
To exit from the ClipLink log data list and return to the
original monitor display, hold down the ENTRY/
SHIFT button and press the TRIM–/LIST button.
Detailed Data Display
To check more details related to the data item selected
on the ClipLink log data list, proceed as follows.
1
Using the shuttle/jog dial, move the selection mark
(asterisk) to the data item for which you wish to
display details.
2
Press the search button.
While you hold the search button down, the
detailed data display appears.
Chapter 6 ClipLink Operation
Chapter 6 ClipLink Operation
93
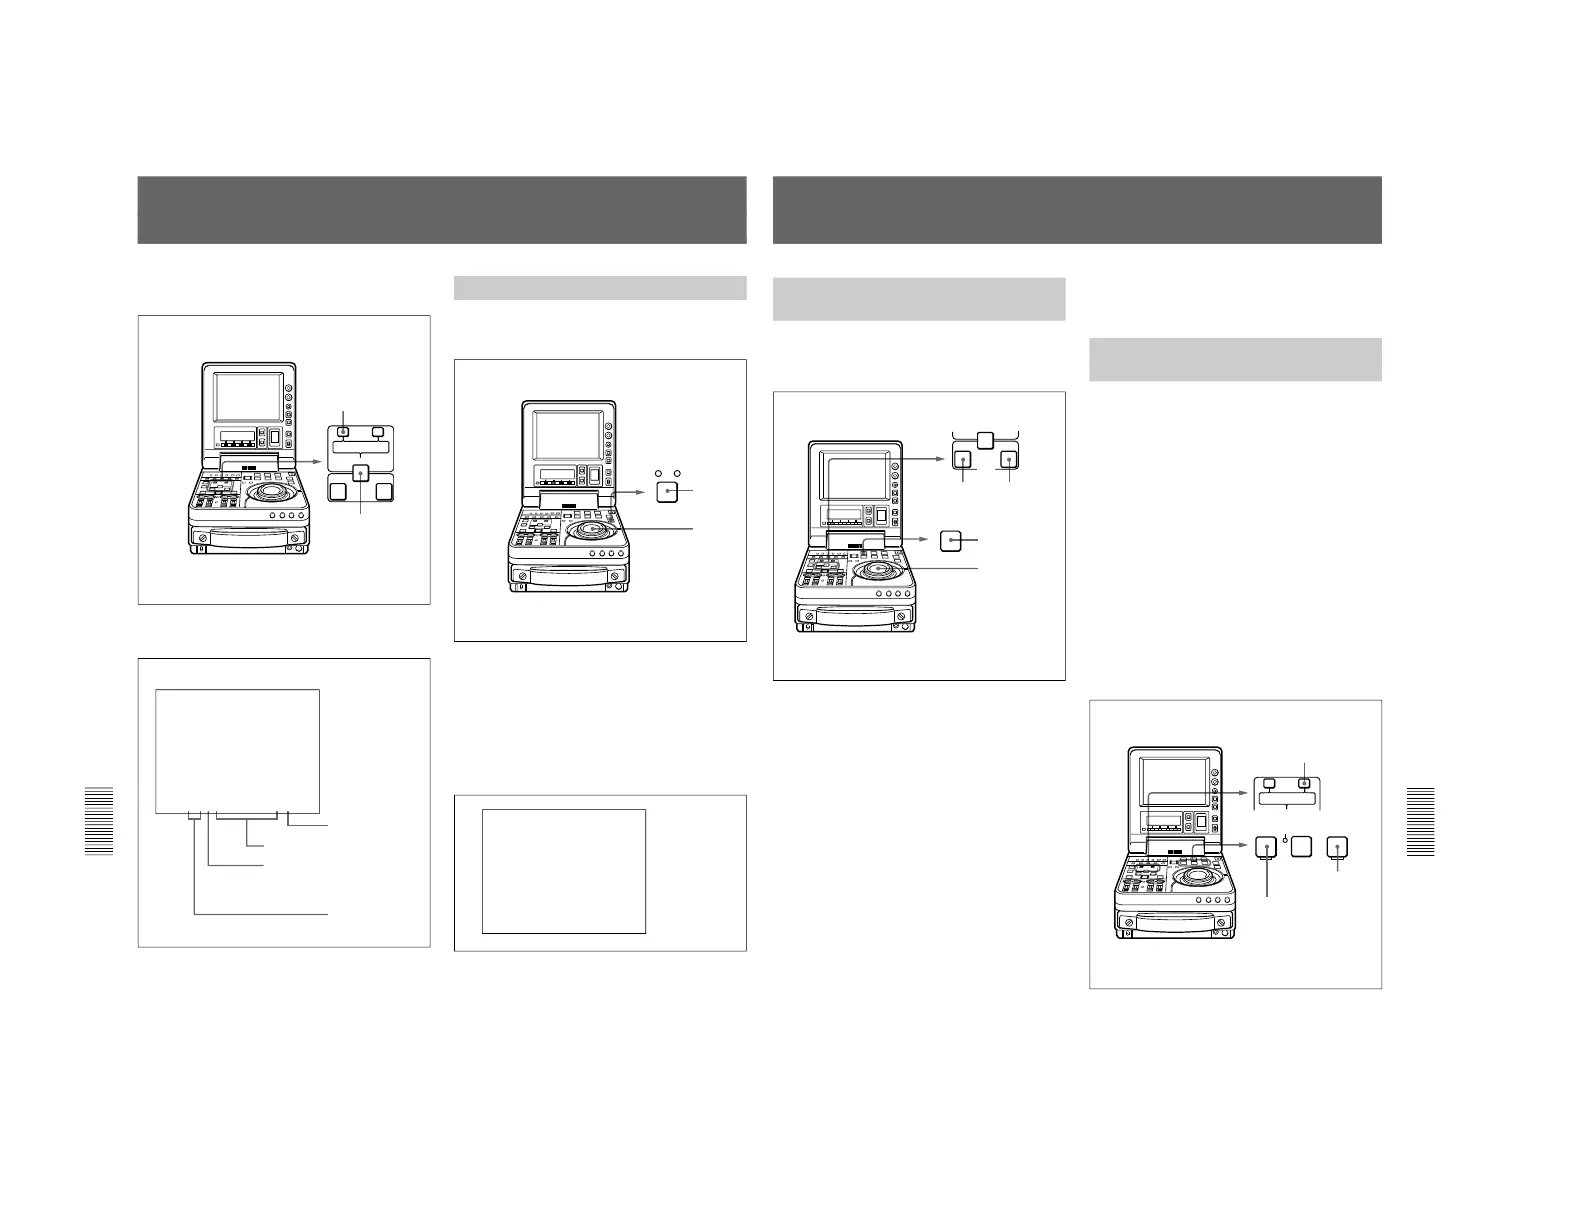
Cuing Up to Mark IN/Cue Points
Cuing Up to Any Desired
Position
To cue up to the point specified by the data item
selected on the ClipLink log data list, proceed as
follows.
1
Using the jog/shuttle dial, move the selection mark
(asterisk) to the desired data item on the ClipLink
log data list.
When the selected data item display contains
“M” mark
The Mark IN point address is stored as the IN point
and the Mark OUT point address is stored as the
OUT point. At the same time, the IN button and
the OUT button on the control panel light.
When the selected data item display contains
“C” mark
The cue point address is stored as the IN point and
the IN button on the control panel lights.
2
Operate as follows.
•To cue up to the mark IN point or cue point
Holding down the IN button, press the PREROLL
button.
•To cue up to the mark OUT point
Holding down the OUT button, press the
PREROLL button.
This exits from the ClipLink log data list and cues
up to the selected position.
Cuing Up to Adjacent Mark IN/
Cue Points
Once you select data on a ClipLink log data list, you
can cue up to the point preceding or following the
selected data with ease without reverting to the
ClipLink log data list.
To cue up to the Mark IN point or cue point
preceding the current point selected on the
list
Holding down the TRIM+/MARK button, press the
REW button.
During the cue-up operation is in progress, the REW
button flashes.
To cue up to the Mark IN point or cue point
following the current point selected on the list
Holding down the TRIM+/MARK button, press the F
FWD button.
During the cue-up operation is in progress, the F FWD
button flashes.
 Loading...