6-10 Operation
Operating the System Using the GUI Control Software
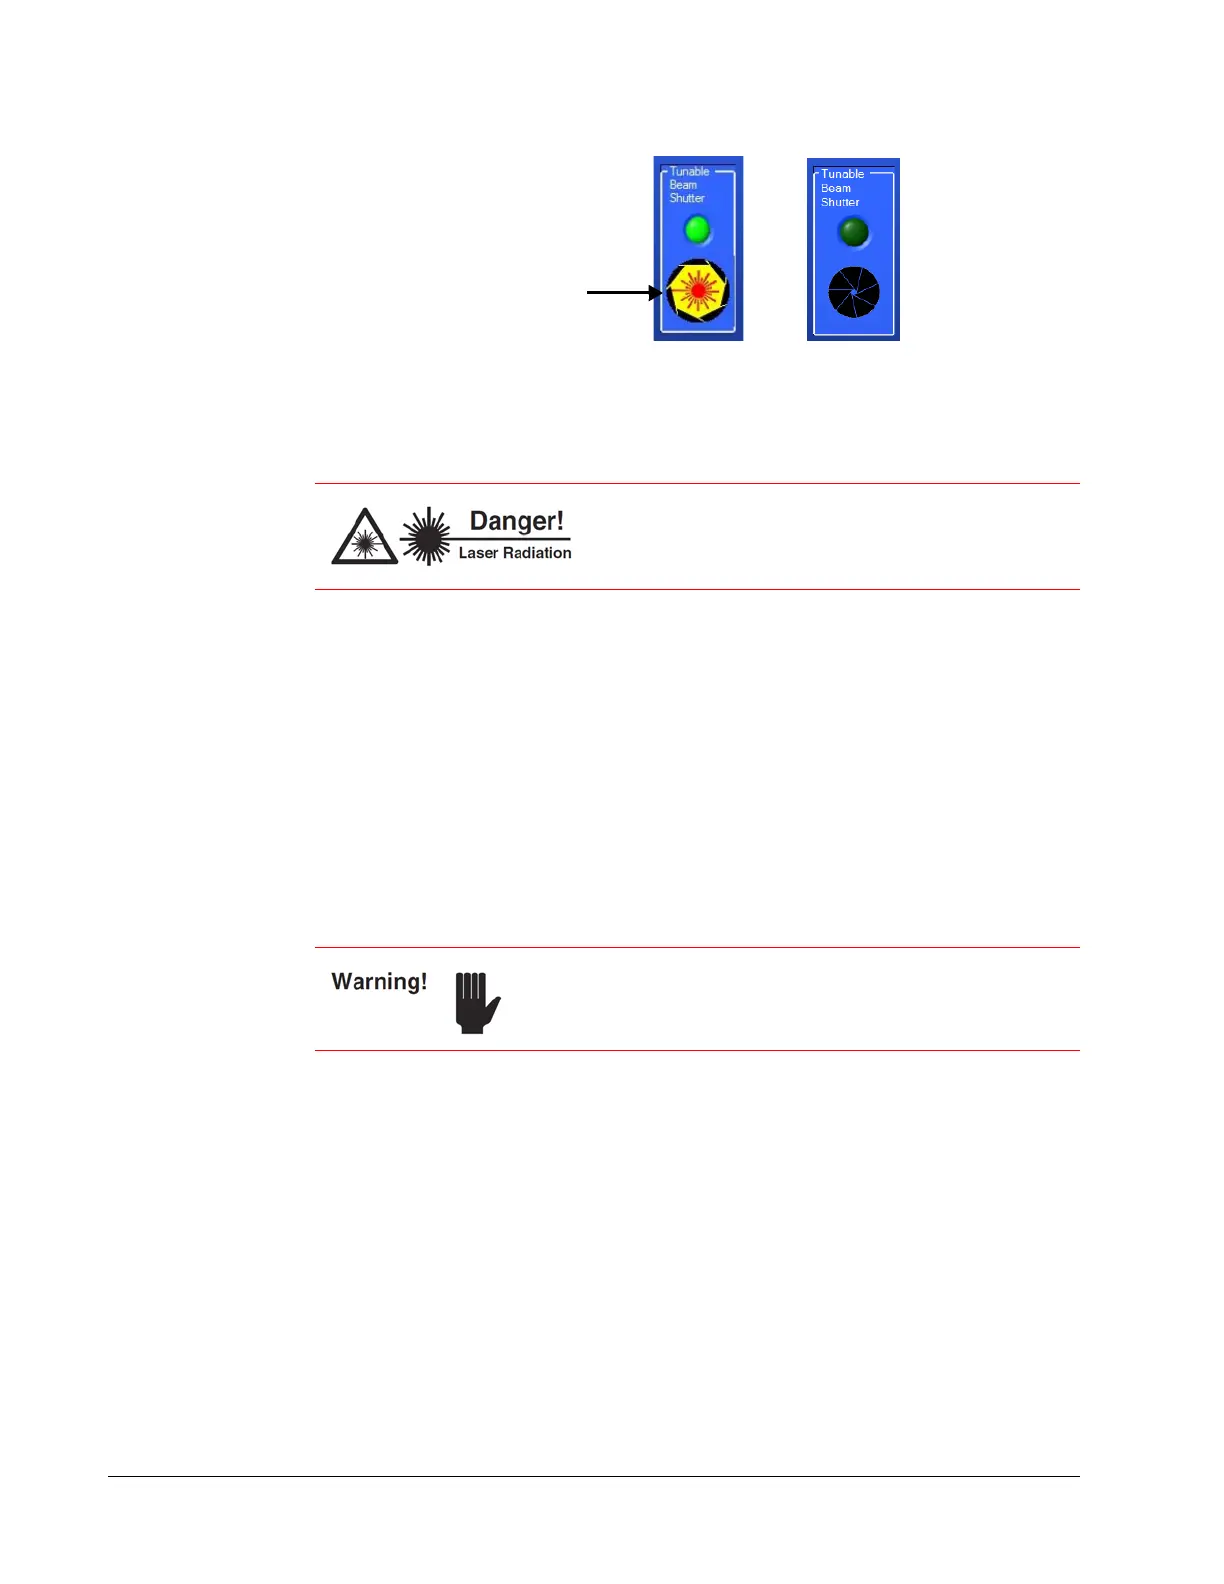
Figure 6-6 Emission on (left); emission off and shutter closed (right)
To resume operation, open the shutter again by clicking the appropriate aperture
icon and holding the button down for 3 seconds.
2. When done using the laser, click the on/off button to turn off the laser.
The laser turns off immediately, as does the emission indicator.
3. When you wish to turn off the computer for the day, click the close button (red X)
to exit the control program, then select Hibernate, Standby, or Shutdown to set the
off mode (refer to
Figure 6-2 and the shutdown option descriptions below the
figure).
4. Turn the laser head keyswitch to the off (horizontal) position and remove the key to
prevent unauthorized use.
It takes the system about 30 minutes to warm up. To minimize this start-up stabilizing
time, leave the power supply AC power switch in the on position and leave the chiller
on.
This is the preferred off mode for day-to-day operation or any time a quick startup is
preferred.
If the laser is not to be used for an extended period of time, shut down the GUI as
described in
“Operating the System Using the GUI Control Software,” then turn off the
power supply, then turn off the chiller.
This completes the turn off sequence.
Main Tab
The Main tab (Figure 6-7) appears on program startup (it appears right after the
Communication Setup menu is displayed). The screen is large and easily seen from a
distance, and serves as both a monitor and an input screen.
When the shutter is closed, treat the laser with the
same safety precautions you would observe if the
shutter was open! Wear proper eye protection at all
times!
The chiller must always be on when the IPS-300 power supply
is on, even if the diode laser is not switched on!
Click this aperture
icon to close the
shutter and block
laser output