7-11
764333-098
7.13 HOW TO ADJUST pH CONTROLLER
7.13.1 Reset Control
1. Press MENU button.
2. Press UP arrow until SYSTEM RESET menu is
displayed.
3. Press OK/RESET button. Display shows:
Reset Unit? Y
ES
4. Press OK/RESET button. Control is reset to 0.
7.13.2 Frequency Adjustment
1. Press MENU button.
2. Press UP arrow until SET FREQUENCY menu is
displayed.
3. Press OK/RESET button. Display shows:
Frequency = 6
0Hz
4. Press UP arrow to select 50 or 60 Hz as per washer’s
frequency.
5. Once frequency set, press OK/RESET button. Dis-
play shows:
Save Changes Y
es
6. Press OK/RESET button again to confirm fre-
quency.
7.13.3 Measure Units Adjustment
1. Press MEASURE MODE button. Display shows:
A = S
/cm (Micro)
2. Press RIGHT arrow to select MICRO.
3. Press UP arrow until AUTO appears on display:
A = S/cm (A
uto)
4. Press OK/RESET button, display shows:
a = Deg C (_)
5. Use LEFT arrow to place underscore under D.
Display must show:
a = D
eg C ( )
6. Press OK/RESET button, display shows:
B = S
/cm (Micro)
7. Press UP arrow until pH appears on display:
B = p
H
8. Press OK/RESET button, display shows:
b = DegC ( )
9. Press OK/RESET button to confirm modifications.
7.13.4 Analog Output Adjustment
• Channel 1 Adjustment:
1. Press OUTPUT button. Display shows:
Output: A
nalog
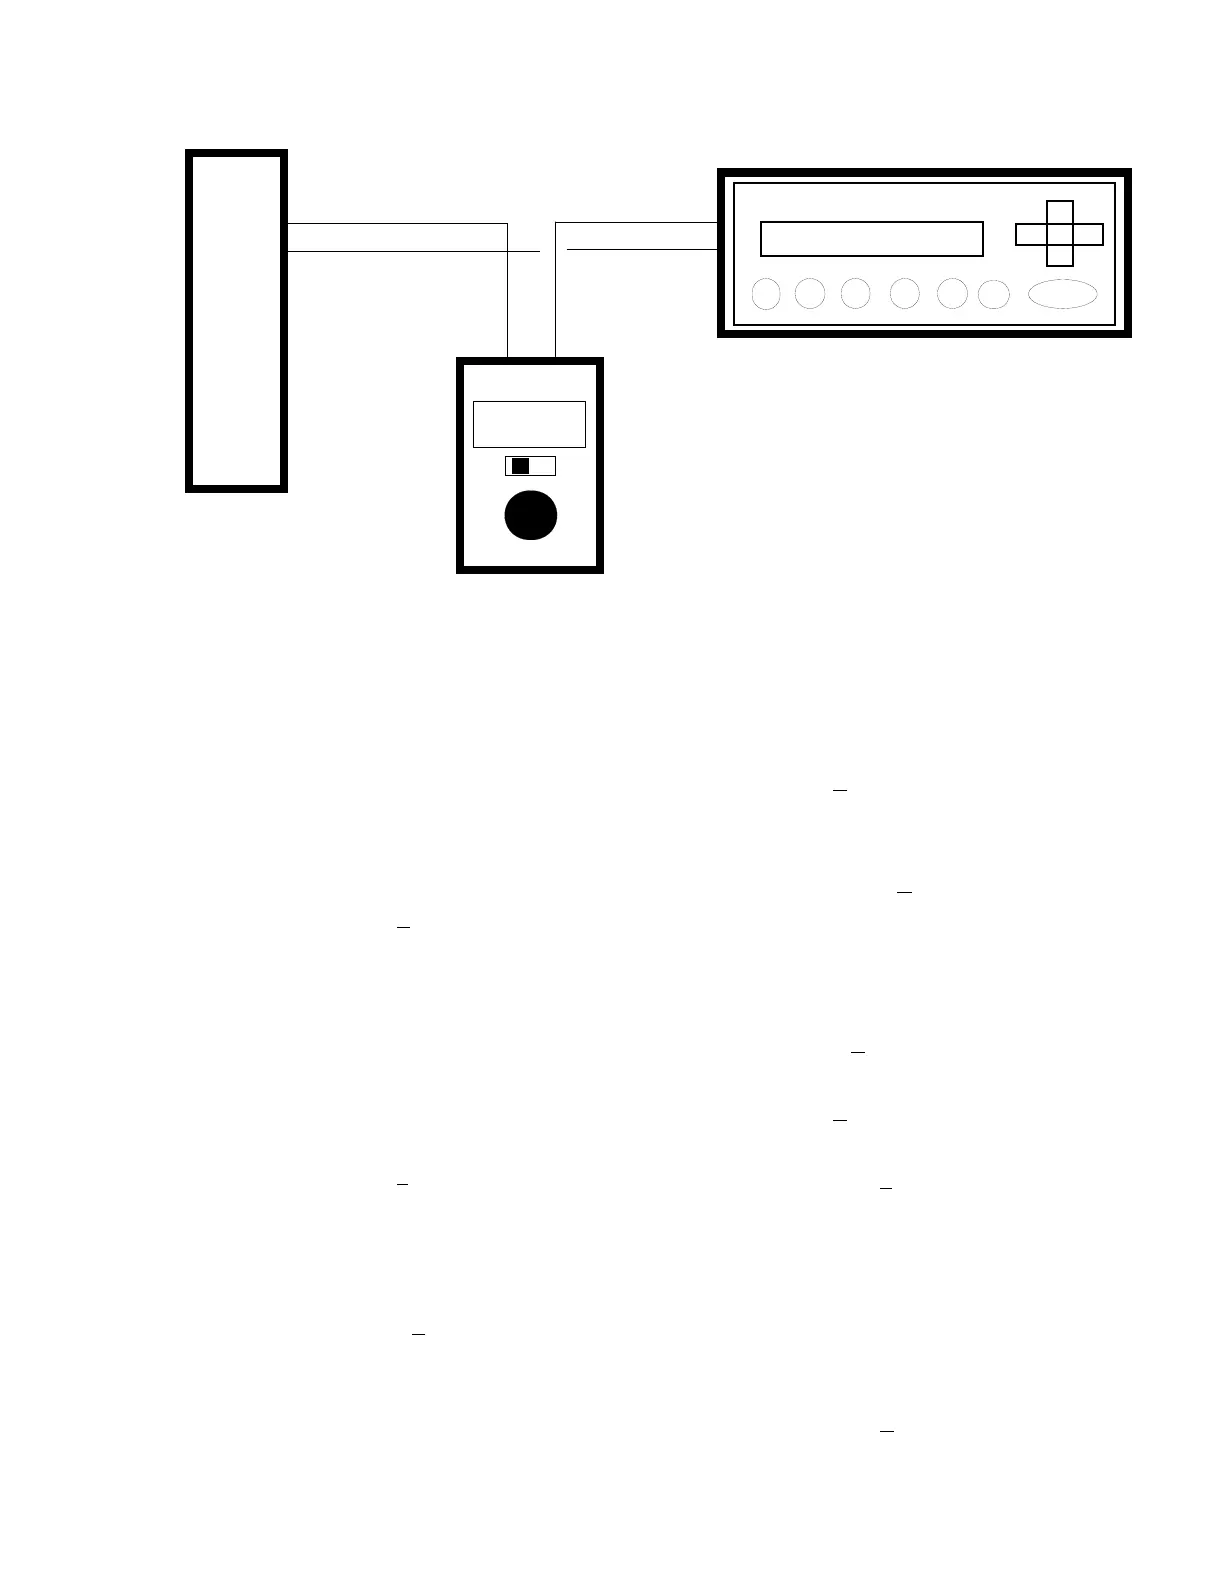
Figure 7-11. Install Loop Calibrator (Channel B)
4-20 ma
Analog Input Module
Slot 3, In0+
Thornton 2000
Loop Calibrator
AO1+
AO1-
[+]
[-]
[+]
[-]