INSTALLATION
Alternative installation methods
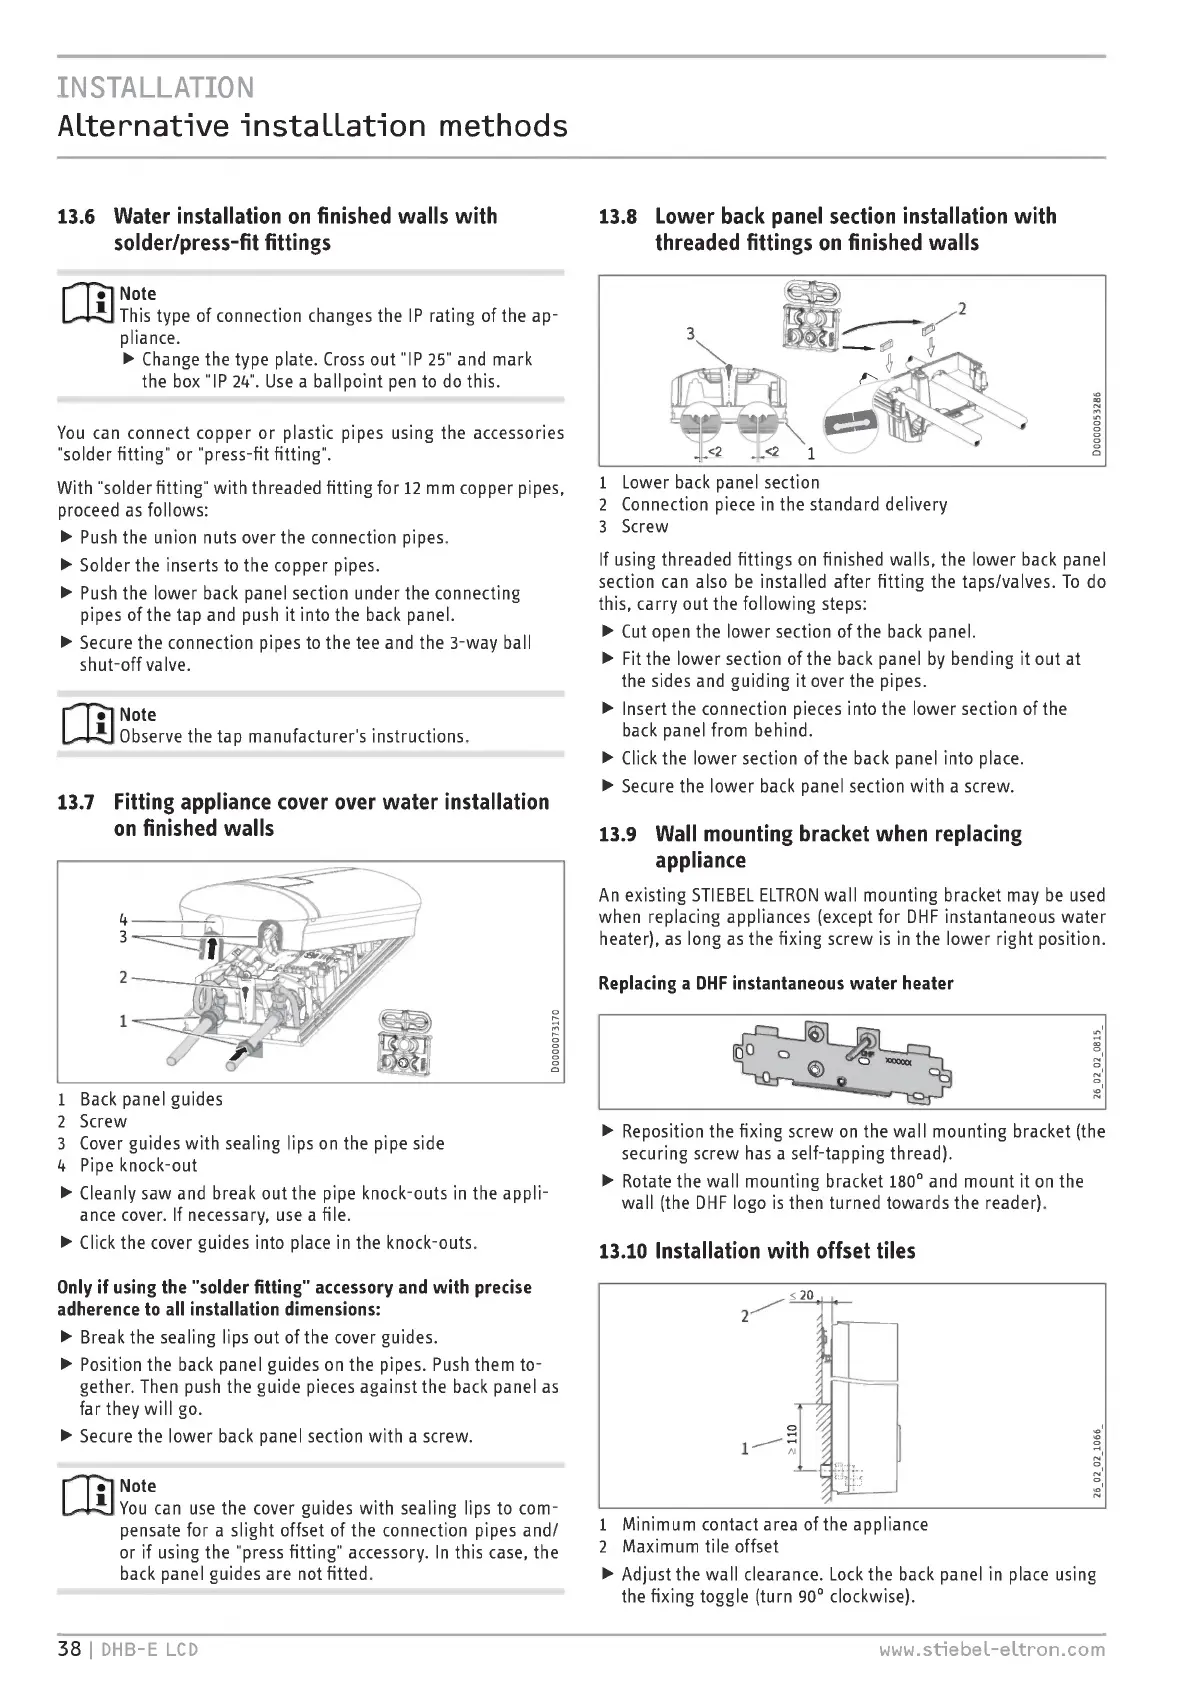
13.6 Water installation on finished walls with
solder/press-fit fittings
Note
This type of connection changes the IP rating of the ap¬
pliance.
► Change the type plate. Cross out "IP 25" and mark
the box "IP 24". Use a ballpoint pen to do this.
You can connect copper or plastic pipes using the accessories
"solder fitting" or "press-fit fitting".
With "solder fitting" with threaded fitting for 12 mm copper pipes,
proceed as follows:
► Push the union nuts over the connection pipes.
► Solder the inserts to the copper pipes.
► Push the lower back panel section under the connecting
pipes of the tap and push it into the back panel.
► Secure the connection pipes to the tee and the 3-way ball
shut-off valve.
Note
Observe the tap manufacturer's instructions.
13.7 Fitting appliance cover over water installation
on finished walls
1 Back panel guides
2 Screw
3 Cover guides with sealing lips on the pipe side
4 Pipe knock-out
► Cleanly saw and break out the pipe knock-outs in the appli
ance
cover. If necessary, use a file.
► Click the cover guides into place in the knock-outs.
Only if using the "solder fitting" accessory and with precise
adherence to all installation dimensions:
► Break the sealing lips out of the cover guides.
► Position the back panel guides on the pipes. Push them to¬
gether. Then push the guide pieces against the back panel as
far they will go.
► Secure the lower back panel section with a screw.
Note
You can use the cover guides with sealing lips to com
pensate
for a slight offset of the connection pipes and/
or if using the "press fitting" accessory. In this case, the
back panel guides are not fitted.
13.8 Lower back panel section installation with
threaded fittings on finished walls
1 Lower back panel section
2 Connection piece in the standard delivery
3 Screw
If using threaded fittings on finished walls, the lower back panel
section can also be installed after fitting the taps/valves. To do
this, carry out the following steps:
► Cut open the lower section of the back panel.
► Fit the lower section of the back panel by bending it out at
the sides and guiding it over the pipes.
► Insert the connection pieces into the lower section of the
back panel from behind.
► Click the lower section of the back panel into place.
► Secure the lower back panel section with a screw.
13.9 Wall mounting bracket when replacing
appliance
An existing
STIEBEL
ELTRON wall mounting bracket may be used
when replacing appliances (except for DHF instantaneous water
heater), as long as the fixing screw is in the lower right position.
Replacing a DHF instantaneous water heater
► Reposition the fixing screw on the wall mounting bracket (the
securing screw has a self-tapping thread).
► Rotate the wall mounting bracket 180° and mount it on the
wall (the DHF logo is then turned towards the reader).
13.10 Installation with offset tiles
1 Minimum contact area of the appliance
2 Maximum tile offset
► Adjust the wall clearance. Lock the back panel in place using
the fixing toggle (turn 90“ clockwise).
38
I DHB-E LCD
www.stiebeL-eLtron.com
 Loading...