INSTALLATION
Commissioning
11. Commissioning
Step-by-step guide
Commissioning
11.1 Preparation
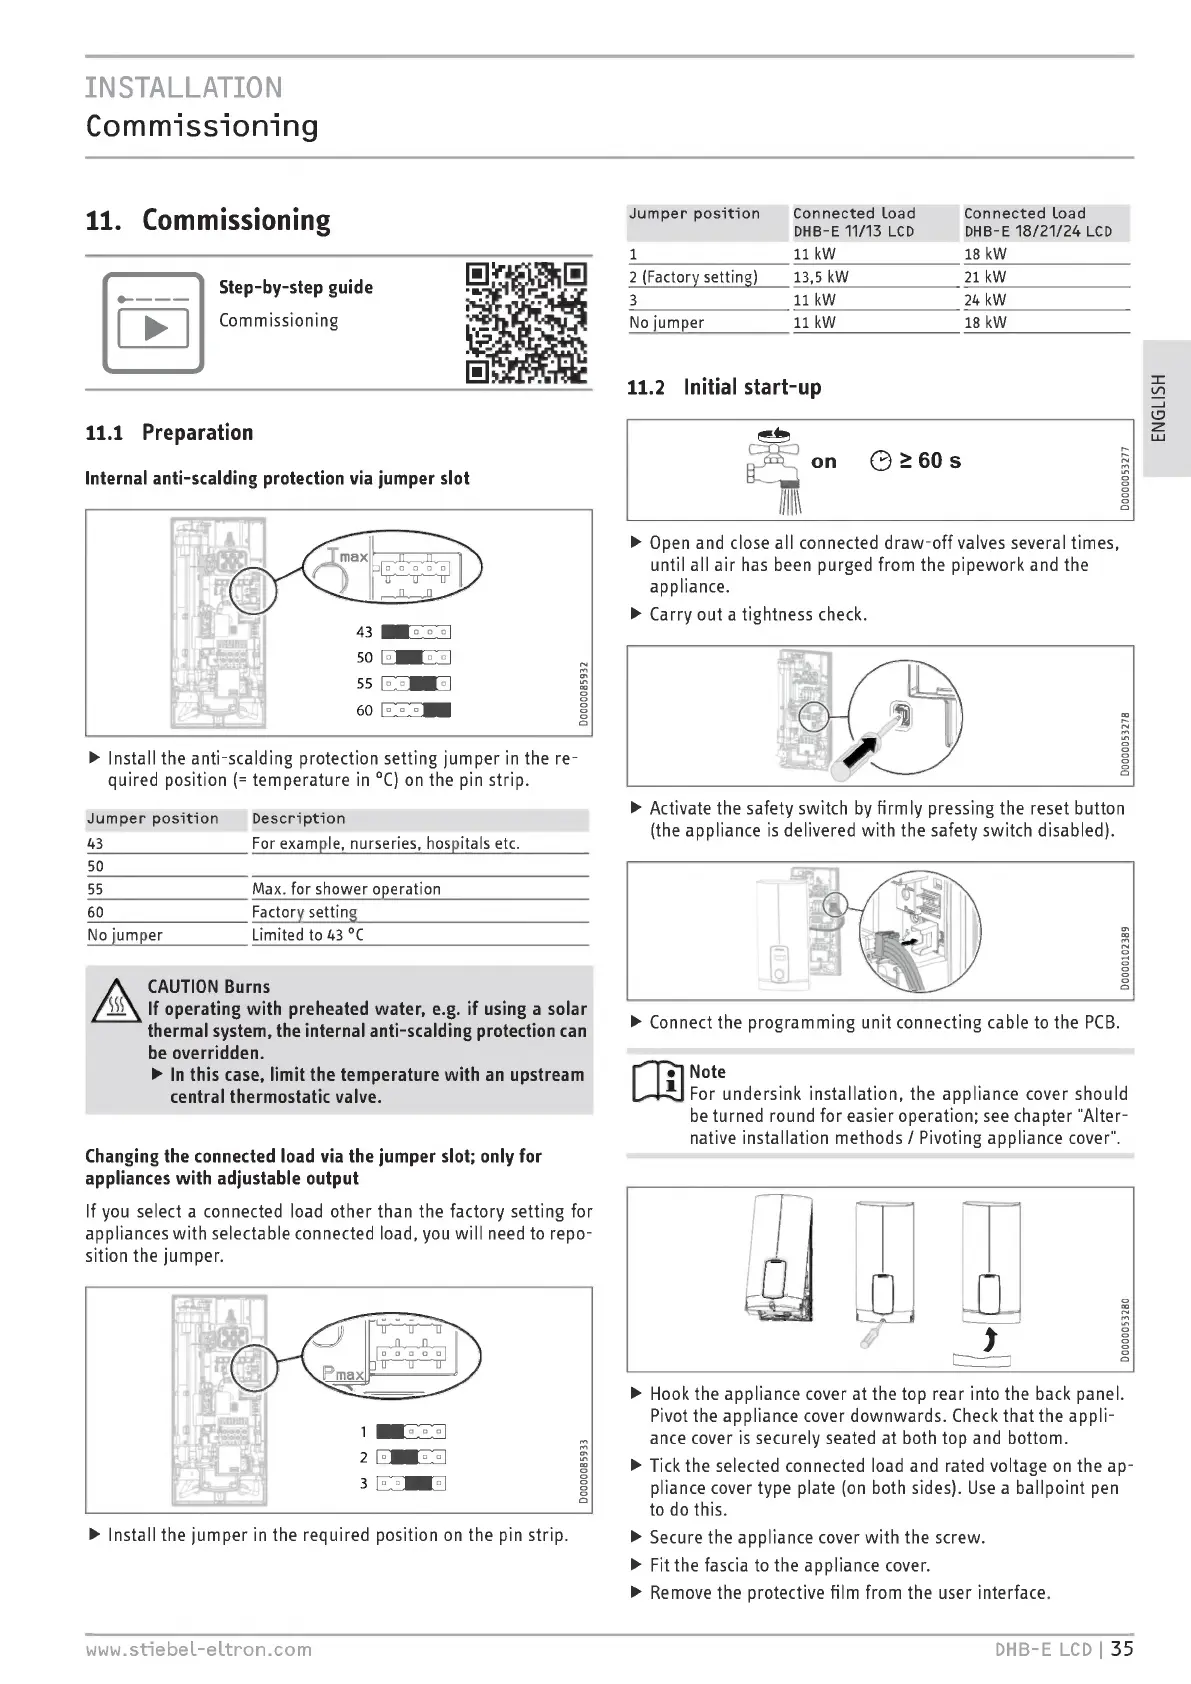
Internal anti-scalding protection via jumper slot
► Install the anti-scalding protection setting jumper in the re¬
quired position (= temperature in °C) on the pin strip.
Jumper position Description
43 For example, nurseries, hospitals etc.
50
55 Max. for shower operation
60 Factory setting
No jumper limited to 43 °C
A CAUTION Burns
/W\
If operating with preheated water, e.g. if using a solar
thermal system, the internal anti-scalding protection can
be overridden.
► In this case, limit the temperature with an upstream
central thermostatic valve.
Changing the connected load via the jumper slot; only for
appliances with adjustable output
If you select a connected load other than the factory setting for
appliances with selectable connected load, you will need to repo¬
sition the jumper.
► Install the jumper in the required position on the pin strip.
Jumper position
Connected load
DHB-E 11/13 LCD
Connected load
DHB-E 18/21/24 LCD
1
11
kW
18
kW
2 (Factory setting)
13,5
kW
21
kW
3
11
kW
24
kW
No jumper
11
kW
18
kW
11.2 Initial start-
■up
on 0 > 60 s
D0000053277
► Open and close all connected draw-off valves several times,
until all air has been purged from the pipework and the
appliance.
► Carry out a tightness check.
► Activate the safety switch by firmly pressing the reset button
(the appliance is delivered with the safety switch disabled).
► Connect the programming unit connecting cable to the PCB.
Note
For undersink installation, the appliance cover should
be turned round for easier operation; see chapter "Alter¬
native installation methods / Pivoting appliance cover".
► Hook the appliance cover at the top rear into the back panel.
Pivot the appliance cover downwards. Check that the appli¬
ance cover is securely seated at both top and bottom.
► Tick the selected connected load and rated voltage on the ap
pliance cover type plate (on both sides). Use a ballpoint pen
to do this.
► Secure the appliance cover with the screw.
► Fit the fascia to the appliance cover.
► Remove the protective film from the user interface.
www.stiebel-eltron.com
DHB-E LCD I 35
ENGLISH
 Loading...