INSTALLATION
Installation
Installing the appliance
Step-by-step guide
Installation
Note
If you are installing the appliance with flexible pipe con
nections, also secure the back panel with a screw.
2 Cable grommet
Use the installation aid for easier wiring access through the cable
grommet (see plastic parts set supplied).
► Remove the cable grommet from the back panel.
► Pull the cable grommet over the cable sheath of the power
cable. For large cable cross-sections, enlarge the hole in the
cable grommet if necessary.
► Remove the transport protection plugs from the appliance
pipe connections.
► Bend the power cable 45° upwards.
► Route the power cable and cable grommet through the back
panel from the rear.
► Install the appliance on the threaded studs of the wall
mounting bracket.
► Press the back panel firmly into place, aligning it correctly.
► Lock the fixing toggle by turning it 90° clockwise.
► Pull the cable grommets into the back panel, until both lock¬
ing tabs engage.
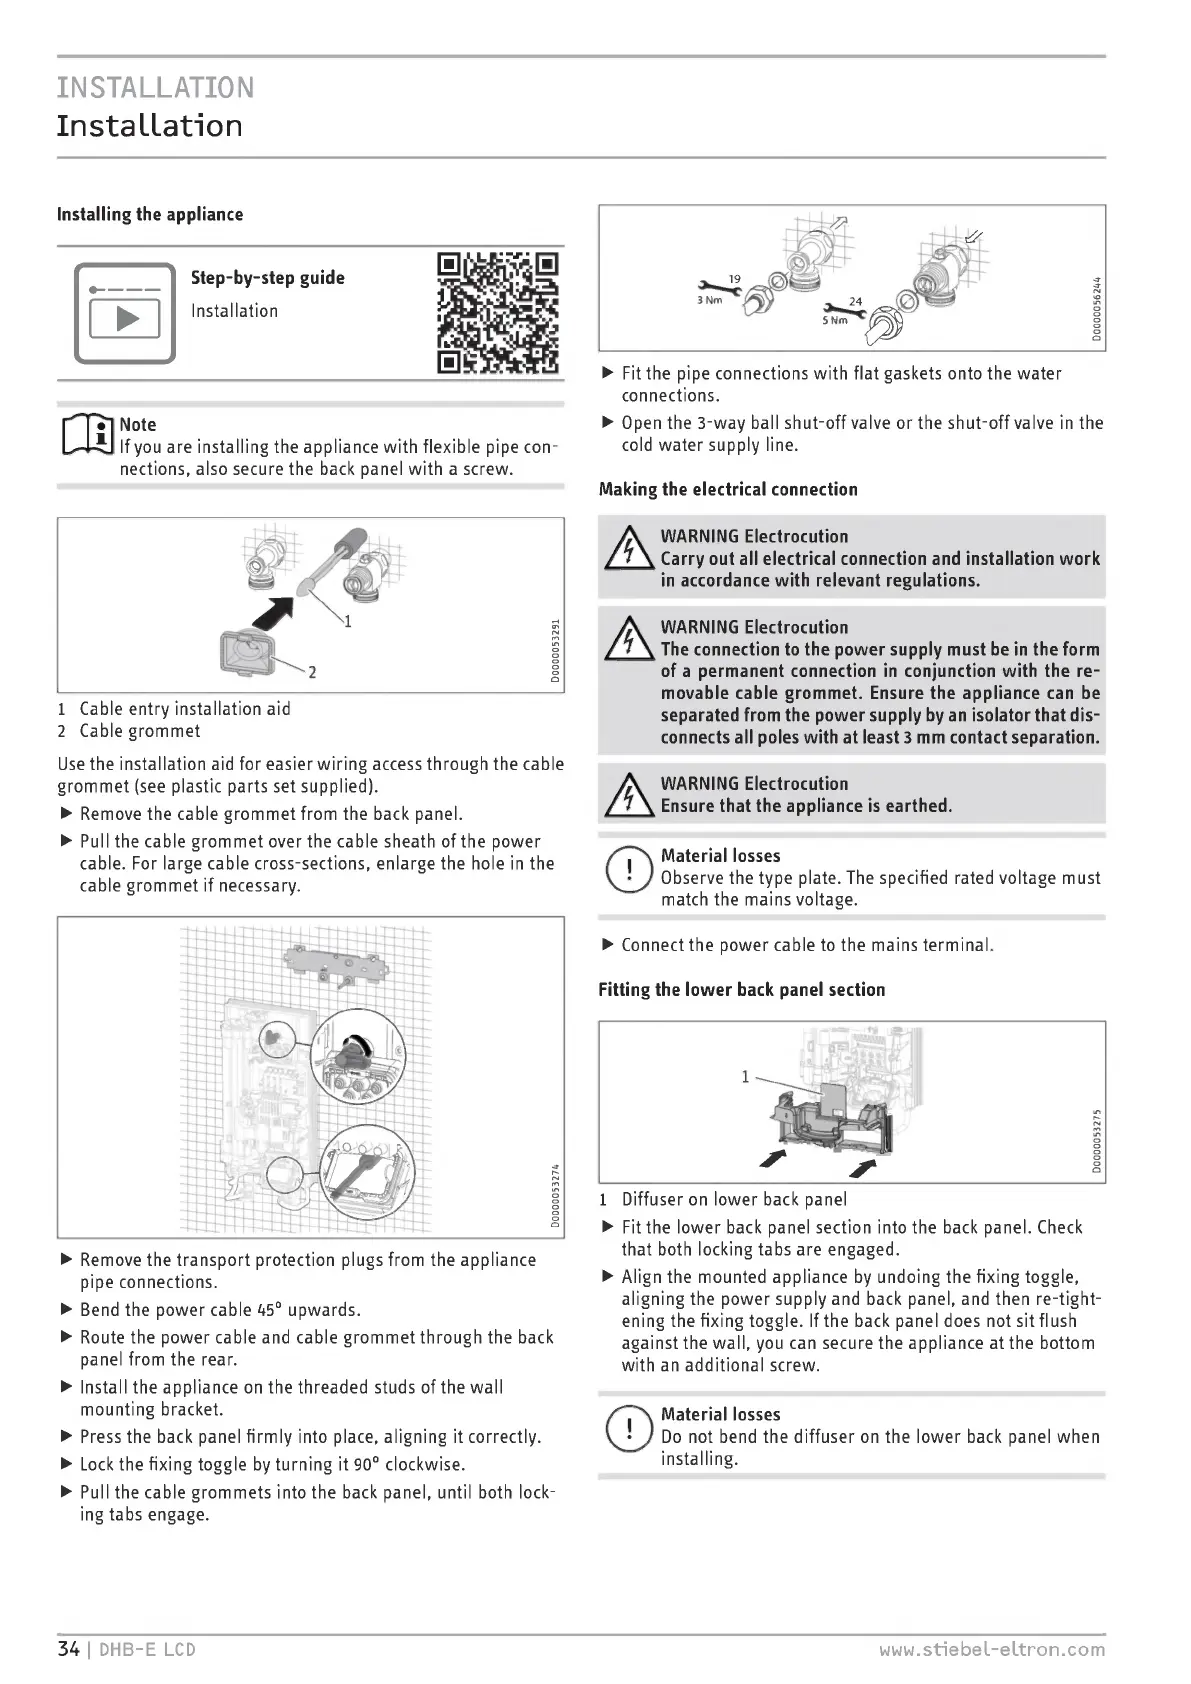
► Fit the pipe connections with flat gaskets onto the water
connections.
► Open the 3-way ball shut-off valve or the shut-off valve in the
cold water supply line.
Making the electrical connection
A
WARNING Electrocution
Carry out all electrical connection and installation work
in accordance with relevant regulations.
WARNING Electrocution
The connection to the power supply must be in the form
of a permanent connection in conjunction with the re¬
movable cable grommet. Ensure the appliance can be
separated from the power supply by an isolator that dis¬
connects all poles with at least 3 mm contact separation.
A
WARNING Electrocution
Ensure that the appliance is earthed.
©
Material losses
Observe the type plate. The specified rated voltage must
match the mains voltage.
► Connect the power cable to the mains terminal.
Fitting the lower back panel section
1 Diffuser on lower back panel
► Fit the lower back panel section into the back panel. Check
that both locking tabs are engaged.
► Align the mounted appliance by undoing the fixing toggle,
aligning the power supply and back panel, and then re-tight¬
ening the fixing toggle. If the back panel does not sit flush
against the wall, you can secure the appliance at the bottom
with an additional screw.
©
Material losses
Do not bend the diffuser on the lower back panel when
installing.
34 I DHB-E LCD
www.stiebel-eltron.com
 Loading...