Replacing a PCI Riser Assembly and Its Adapters
Installing and Replacing System Components
5-43
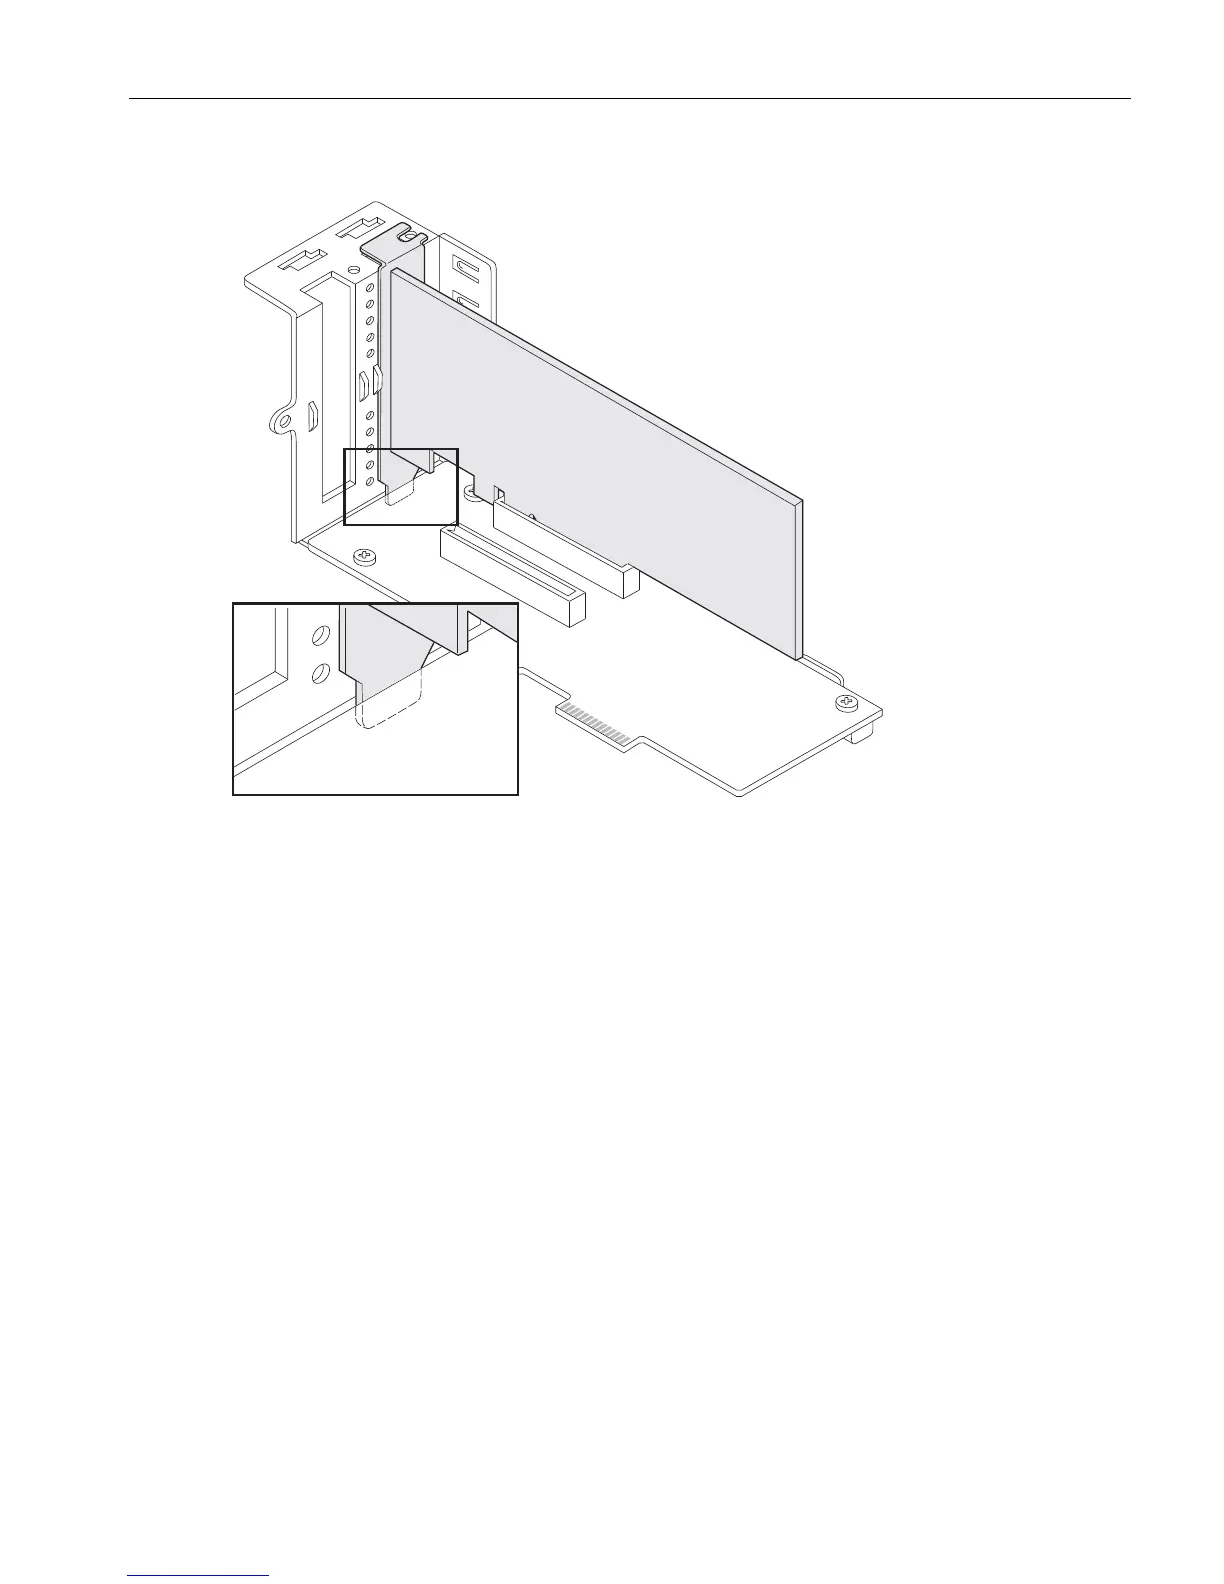
Figure 5-24. Inserting a Full-Height Adapter into the PCI Riser
If you are installing a 6.6 in. (167.75 mm) adapter, place it in the lower slot. If
installing a 7.7 in. (195.94 mm) adapter, place it in the upper slot.
2. Proceed with “Installing a PCI Riser Assembly” on page 5-43.
Installing a PCI Riser Assembly
1. Holding the riser assembly as shown in Figure 5-22, attach the bracket (number 1)
with the screw (number 2) to the top of the PCI riser assembly. Place the bracket’s
two lower tabs into the slots in the top of the full-height adapter cage, as shown in
the figure.
2. Connect the PCI riser assembly to its connectors (number 2 in Figure 5-21) on the
motherboard.
If you are installing an extra-long PCI riser assembly, secure the captive screw
(number 1 in Figure 5-21) at the end of the riser assembly to the motherboard.
3. Attach the three screws shown in Figure 5-20 (number 1).
4. On the low-profile PCI adapter cage, reattach the small bracket and screw that you
removed in an earlier procedure (see Figure 5-18). Place the bracket’s two lower
tabs into the slots in the top of the low-profile adapter cage.