1. Use the locking handle on the left side to unlock the
specimen mover and let it move into upright position.
2. Pull the quick-release ring and lift the housing.
3. Insert a specimen mover plate and rotate it until the
two pins are aligned with the holes in the specimen
mover.
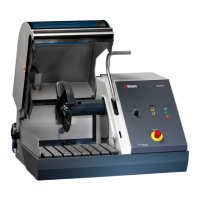
4. Push the specimen mover plate upwards and use the
Allen key to tighten the screw to secure it in position.
See A.
5. Make sure that the specimen mover plate is securely
mounted.
6. Lower the housing back into position.
A Screw
Adjust the height of the specimen mover plate
1. Use the locking handle on the left side to unlock the
specimen mover and let it move into upright position.
2. Select the ‘thickest’ preparation surface to be used and
place it on the preparation disc. Usually, this will be SiC
Foil on an MD-Gekko disc, or SiC Paper on an MD-
Fuga disc, or an MD-Alto.
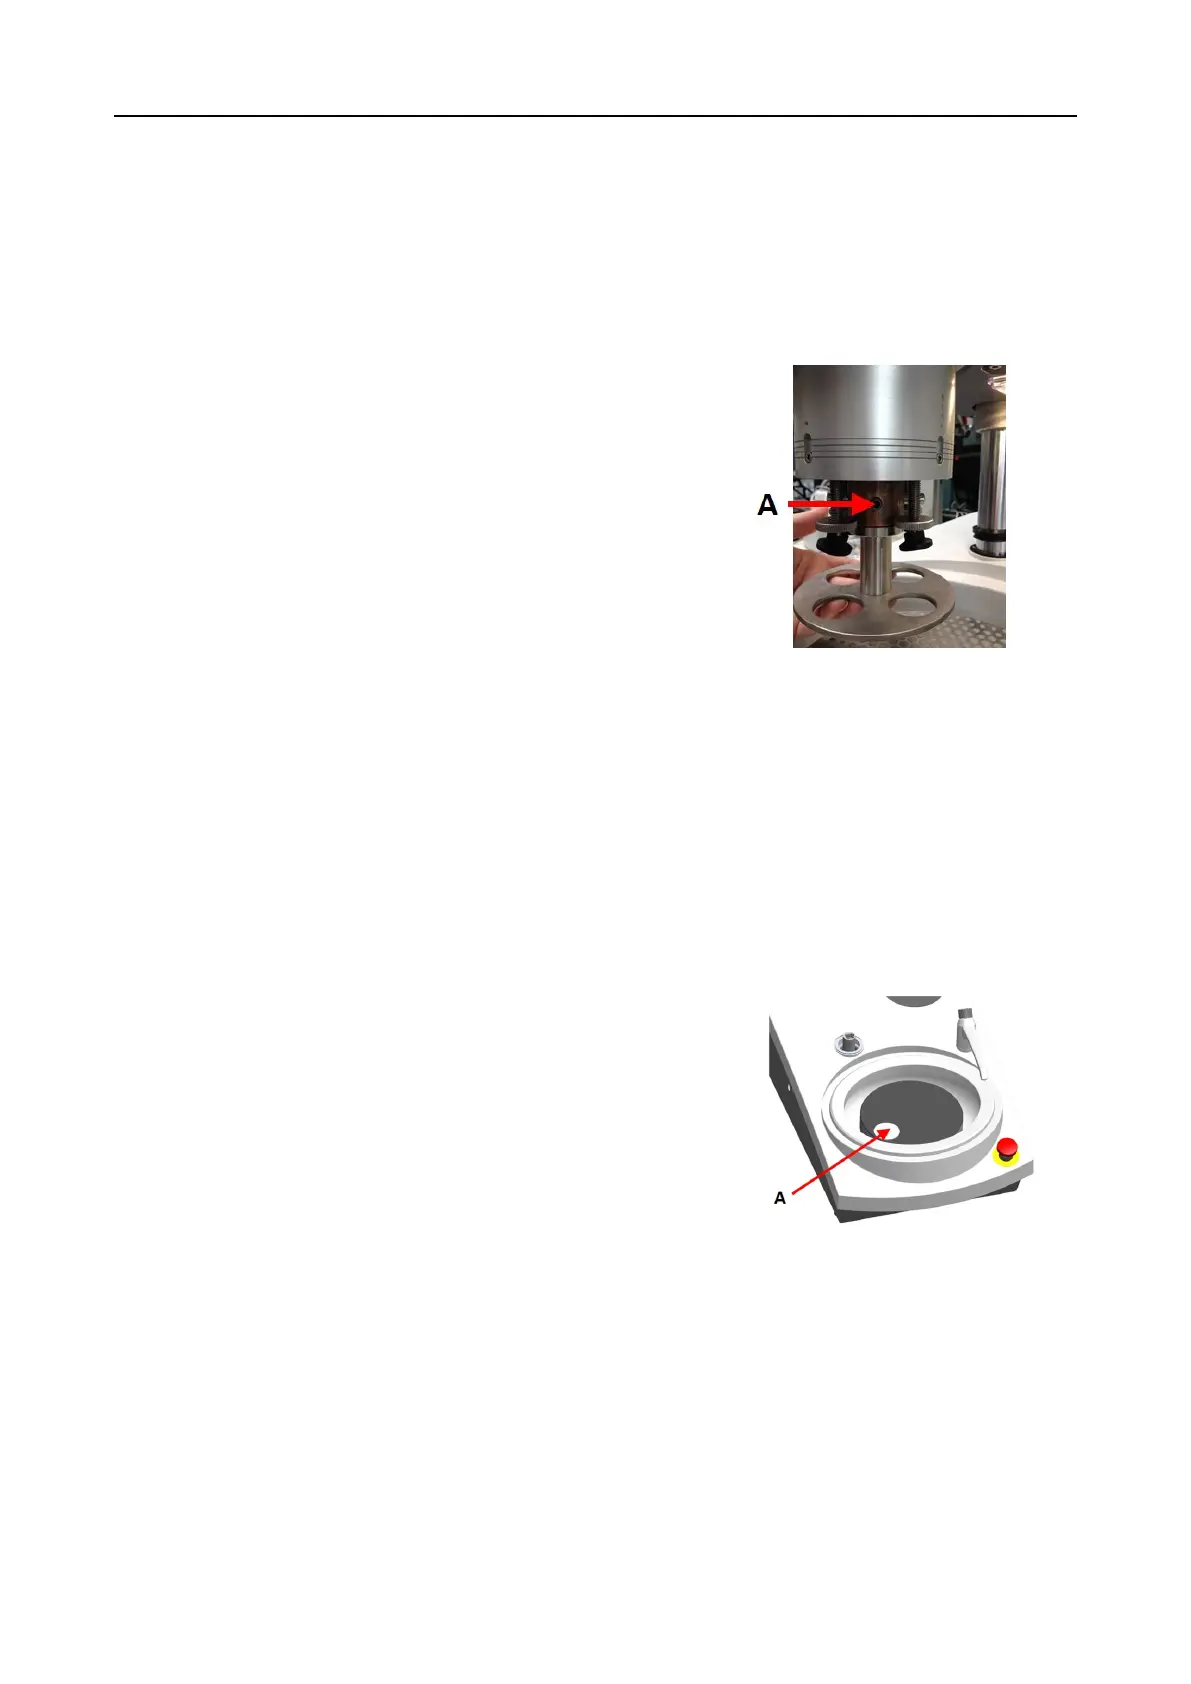
3. Place the supplied spacing disc on the preparation
surface.
4. Support the specimen mover head and loosen the 2
fastening screws that hold the column.
5. Lift and support the specimen mover.
6. Press the specimen mover head down as far as
possible.
7. Use the locking handle to lock the specimen mover
head in operating position.
A Spacing disc
8. Lower the column until the specimen mover plate rests
on the spacing disc.
9. Adjust the horizontal position of the specimen mover
plate.
7 LaboForce-50
LaboPol-30 33