English
1-12 2131-009-005 REV A www.stryker.com
Return To Table of Contents
Setup Procedures
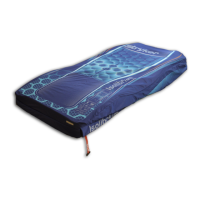
OPTIONAL XPRT THERAPY MATTRESS
If your bed is equipped with the XPRT Therapy Mattress option, perform the following setup procedures to install
the Mattress. For graphic representation of the setup procedures, refer to the XPRT Therapy Mattress Operations
Manual.
1. Place mattress over bed litter with printed logo at head end of the bed.
2. Fold back foot end section of mattress.
3. Place foot box on foot end of bed litter.
4. Connect the two (2) color coded connectors on the foot box to the corresponding color coded connectors on the
mattress. Connect black connection on foot box to cable adapter 2950-001-180 and then to the bed frame.
5. Turn the locking collars clockwise to secure the connections.
6. Connect the other end of the black connector to the bed (left side of litter at foot end behind the accessory
outlet).
7. Connect the air line from the mattress to the corresponding fitting on the foot box.
8. Fasten the two (2) retaining clips to the two (2) D-Rings on the foot box.
9. Lower the foot section of mattress over the foot box. Attach the mattress to the bed frame using the mattress tie-
downs.
10. Apply linens utilizing the “D” rings for the flat sheet.
11. To secure linens, to mattress, thread four corners through D-Rings attached to mattress.
12. To ensure proper therapy, do not pull linens taut. The linens should remain loose and wrinkly on the surface of
the mattress.
13. Plug the mattress power cord into a properly grounded, hospital grade receptacle.
Note
The InTouch™ bed will detect when the mattress has been connected as well as what type of mattress it is. This will
be shown on the InTouch™ screen.
WARNING
• Do not route the power cord between the mattress and the bed frame.
• Do not attach the power cord to any moving parts of the bed frame.
• The power cord could be pinched and may cause electrical shock if a bed extender is used.
OPTIONAL PositionPRO™ PATIENT REPOSITIONING MATTRESS OPTION
If your bed is equipped with the Position PRO™ Patient Repositioning Mattress option, perform the following setup
procedures to install the mattress. For graphic representation of the setup procedures, refer to the Position PRO™
Mattress Operations Manual.
1. Place the mattress onto the bed.
2. Flip the foot section towards the head end.
3. Place the control box (upside down) into the opening in the foot section.
4. Connect outer transparent tubes to manifold, matching the color coding.
5. Connect tilt sensor cables.
a. Align the white dots.
b. Twist clockwise to fasten.
6. Connect pendant cable.
7. Connect power cord (4’) and turn the switch to on.
Note: The switch is hidden under the power cord.
8. Fasten straps over the power cord.
9. Install the power cord in the two (2) retaining clips.
10. Fasten the three (3) retaining straps.
11. Carefully rotate the foot end control box and the mattress into the flat position.

 Loading...
