CHAPTER FOUR - OPTIONS: SYSTEM
29
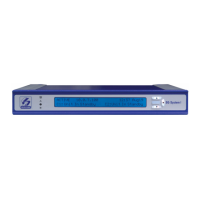
SG-System I Operating Manual
4
System Option Index
Steps required to access an option and change its setting or value
The steps required to access an option and change its setting or value are very nearly uniform from option to option. The procedure detailed
below will match satisfy the majority of options. Those it does not will accept close, intuitive variations of it. Please refer to the steps below
when programming system options.
To change an option’s setting or value, take the following steps:
1. Turn on the SG-System I.
2. Use the Up and Down buttons to select the user. User ‘0’ has full administrative powers; all other users may only review system set-
tings, in addition to changing the time and date.
3. Press the Enter button. This initiates the password sequence, placing a flashing cursor underneath the first digit of the four-digit pass-
word.
4. Use the Up and Down buttons to select the appropriate value. Press the Enter button. The cursor will advance to the next digit.
5. Repeat Step 4 for all four digits. If the password you have entered is correct, you now have access to SG-System I. If not, re-enter
your password.
6. View or Change Options appears on the LCD. Press the Enter button.
7. Use the Up and Down buttons to locate which section of options is valid for your configuration of SG-System I: CPM Options /
Channel-1 Options / Channel-2 Options / Channel-IP Options / Exit Menu.
8. Press the Enter button. The options applicable to your system are to available for you to access.
9. Navigate to Option XXX. Press the Enter button. The current value is displayed on the LCD.
10. Press the Enter button. The value may now be changed.
11. Use the Up or Down buttons to scroll to the desired value.
12. Having made a selection, press the Enter button.
13. The LCD will prompt you to accept (Y?) or to decline (N?) your changes.
14. Use the Up and Down buttons to select your response. Press the Enter button.
15. Your changes have been saved.
Option 001: LAN IP Address on page 30
Option 002: LAN Subnet Mask Address on page 30
Option 003: LAN Gateway on page 30
Option 004: Auto Update Time and Date on page 30
Option 005: Contrast on page 30
Option 006: Password on page 31
Option 007: Automation Baud Rate on page 31
Option 008: Automation Data Bits on page 31
Option 009: Automation Parity on page 32
Option 00A: Serial Printer Format on page 32
Option 00B: Serial Baud Rate on page 32
Option 00C: Serial Data Bits on page 32
Option 00D: Serial Printer Parity on page 33
Option 00E: AHS Operations Time on page 33
Option 00F: B32 Headers on page 33
Option 012: Heartbeat Timer on page 33
Option 013: Buzzer Tone on page 34
Option 014: Receiver Number on page 34
Option 015: Printer Test on page 34
Option 020: Mask UPS AC on page 35
Option 021: Mask UPS BAT on page 35
Option 024: Mask SG TCP/IP on page 35
Option 025: Mask SG Serial on page 35
Option 028: Mask TCP Printer on page 35
Option 029: Mask Parallel Printer on page 36
Option 02A: Mask Serial Printer on page 36
Option 02F: Automation Mode on page 36
Option 030: Printer Mode on page 37
Option 031: ACK Wait on page 38
Option 032: Date Format on page 39
Options 037 and 038: License Keys #1, #2 on page 39
Option 039: Mask USB Printer on page 39
Option 03A: Programmable I/O on page 39
Option 03B: Last Message On on page 40
Option 03C: LCD Backlight Colour on page 40
Option 03D: Key Backlight Colour on page 40
Option 040: Number of Channels on page 41
Option 041: System Number Length on page 41
Option 042: Busy Out on page 42
Option 043: System Protocol ID on page 42
Option 044: System CLASS Field on page 43