CHAPTER FOUR - OPTIONS: SYSTEM
30
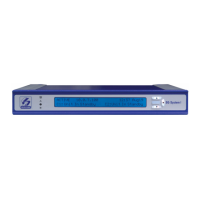
SG-System I Operating Manual
4
System Options
Option 001: LAN IP Address
Default (10.0.7.200)
Enter the IP address of the SG-System I. The IP address must be entered as a dotted decimal number (e.g. 255.255.001.000). Each three-
digit segment of the IP address must be within a valid range of 000 to 255.
NOTE: The SG-System I must be restarted for these changes to take effect.
Option 002: LAN Subnet Mask Address
Default (255.255.0.0)
Enter the LAN Subnet Mask address of the SG-System I. The address must be entered as a dotted decimal number (e.g. 255.255.001.000).
Each three-digit segment of the address must be within a valid range of 000 to 255.
NOTE: The SG-System I must be restarted for these changes to take effect.
Option 003: LAN Gateway
Default (0.0.0.0)
Enter the LAN Gateway address of the SG-System I. Take care to ensure that the address is unique to your system. The address must be
entered as a dotted decimal number (e.g. 255.255.001.000). Each three-digit segment of the address must be within a valid range of 000 to
255. The gateway is used in the event that the data being sent is not on the same network as the SG-System I. The data will need to be sent
through a router device. This is the address of that router device.
NOTE: The SG-System I must be restarted for these changes to take effect.
Option 004: Auto Update Time and Date
Default (0)
This option enables the automation to update the SG-System I’s time via the TCP/IP port. If the SG-System I fails to get the time and date
within a twenty-four-hour period (started after the last update is received), it will generate a status message to the printer and automation,
following the internal trouble protocol. The Trouble status on the SG-System I display will not be affected.
Printer message: “Time&Date Update Fail”
Automation message: [#0000|NRU0000]
Option 005: Contrast
Default (80)
Use this option to adjust the level of contrast of the unit’s LCD. Pressing the Up button will increase the contrast, while pressing the Down
button will decrease the contrast. Alternatively, pressing the Up and Enter buttons simultaneously will increase the level of contrast; pressing
the Down and Enter buttons simultaneously will decrease the level of contrast. Contrast can be adjusted in both Active and Manual modes.