getting started
38
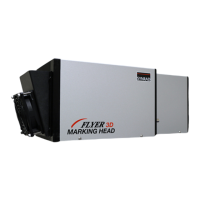
SYNRAD FH Series Flyer Operator’s Manual Version 3.4
Mounting
The Mounting section includes subsections:
Mounting guidelines
Mounting Rail
L-bracket
FH Flyer marking head
Laser
Mounting guidelines
Before mounting your FH Series Flyer marking head to the appropriate Mounting Rail, please ensure the
following guidelines are met:
When replacing an FH Index/Tracker head with FH Flyer, mount your Flyer head to a Flyer (clear an-
odized aluminum) L-bracket. If Flyer is mounted to a standard FH (black anodized) L-bracket, then the
center of Flyer’s beam exit is moved 2.54 mm (0.10") away from the center of the FH Index/Tracker
mark eld in the –X direction (to your right when facing Flyer’s membrane panel).
Mount the marking head so that the distance from the lens to the mark surface (the Working Dis-
tance) matches the distance specied in Flyer’s Final Test Report. A Z-axis adjustment for either the
marking surface or the mounting platform is highly recommended.
Surround the beam path around the marking area with a beam enclosure shield to conne any re-
ected laser radiation.
To prevent damage to your Flyer head when using a custom-built mounting bracket, verify that the
1/4–20 UNC mounting screws do not extend further than 0.30" (7.6 mm) into the Flyer head.
Flyer’s built-in heat sink includes four threaded holes for attaching a cooling fan. Allow room for fan
clearance if there is a possibility that a cooling fan is required in your marking installation. See the
Auxiliary cooling fan section for additional details.
If you are designing a non-standard mounting conguration (without a SYNRAD Mounting Rail or
L-bracket), carefully review the material in Appendix C before proceeding.
SYNRAD’s integrated component design eliminates the need for Flyer-to-laser alignment. To mount your
FH Series Flyer head simply follow the steps listed in each section below.
Mounting Rail
Refer to Figure 1-3 and verify that the bevel machined on one edge of the Mounting Rail is properly ori-
ented as shown in the drawing. Once the beveled edge is positioned as shown, securely fasten the Mounting
Rail to a rigid structure. You must ax the Mounting Rail so that the bottom of the marking head housing is
parallel to the part marking surface.