_Tighten the nut [72]. (TOOL: 17mm open end wrench).
_Reassemble the crank assembly and the ring nut [61] on the left side.
Apply Loctite 243 and tighten the ring nut [61] with a torque wrench set to 60 Nm [44.3 lbf-ft]
_Assemble the crank in the correct direction as shown below. Then reassemble the rod with the
relative screw.
_Reassemble the connection rod [70] , the crank assembly and the ring nut [67] on the right side.
Apply Loctite 243 and tighten the ring nut [67] with a torque wrench set to 60 Nm [44.3 lbf-ft] .
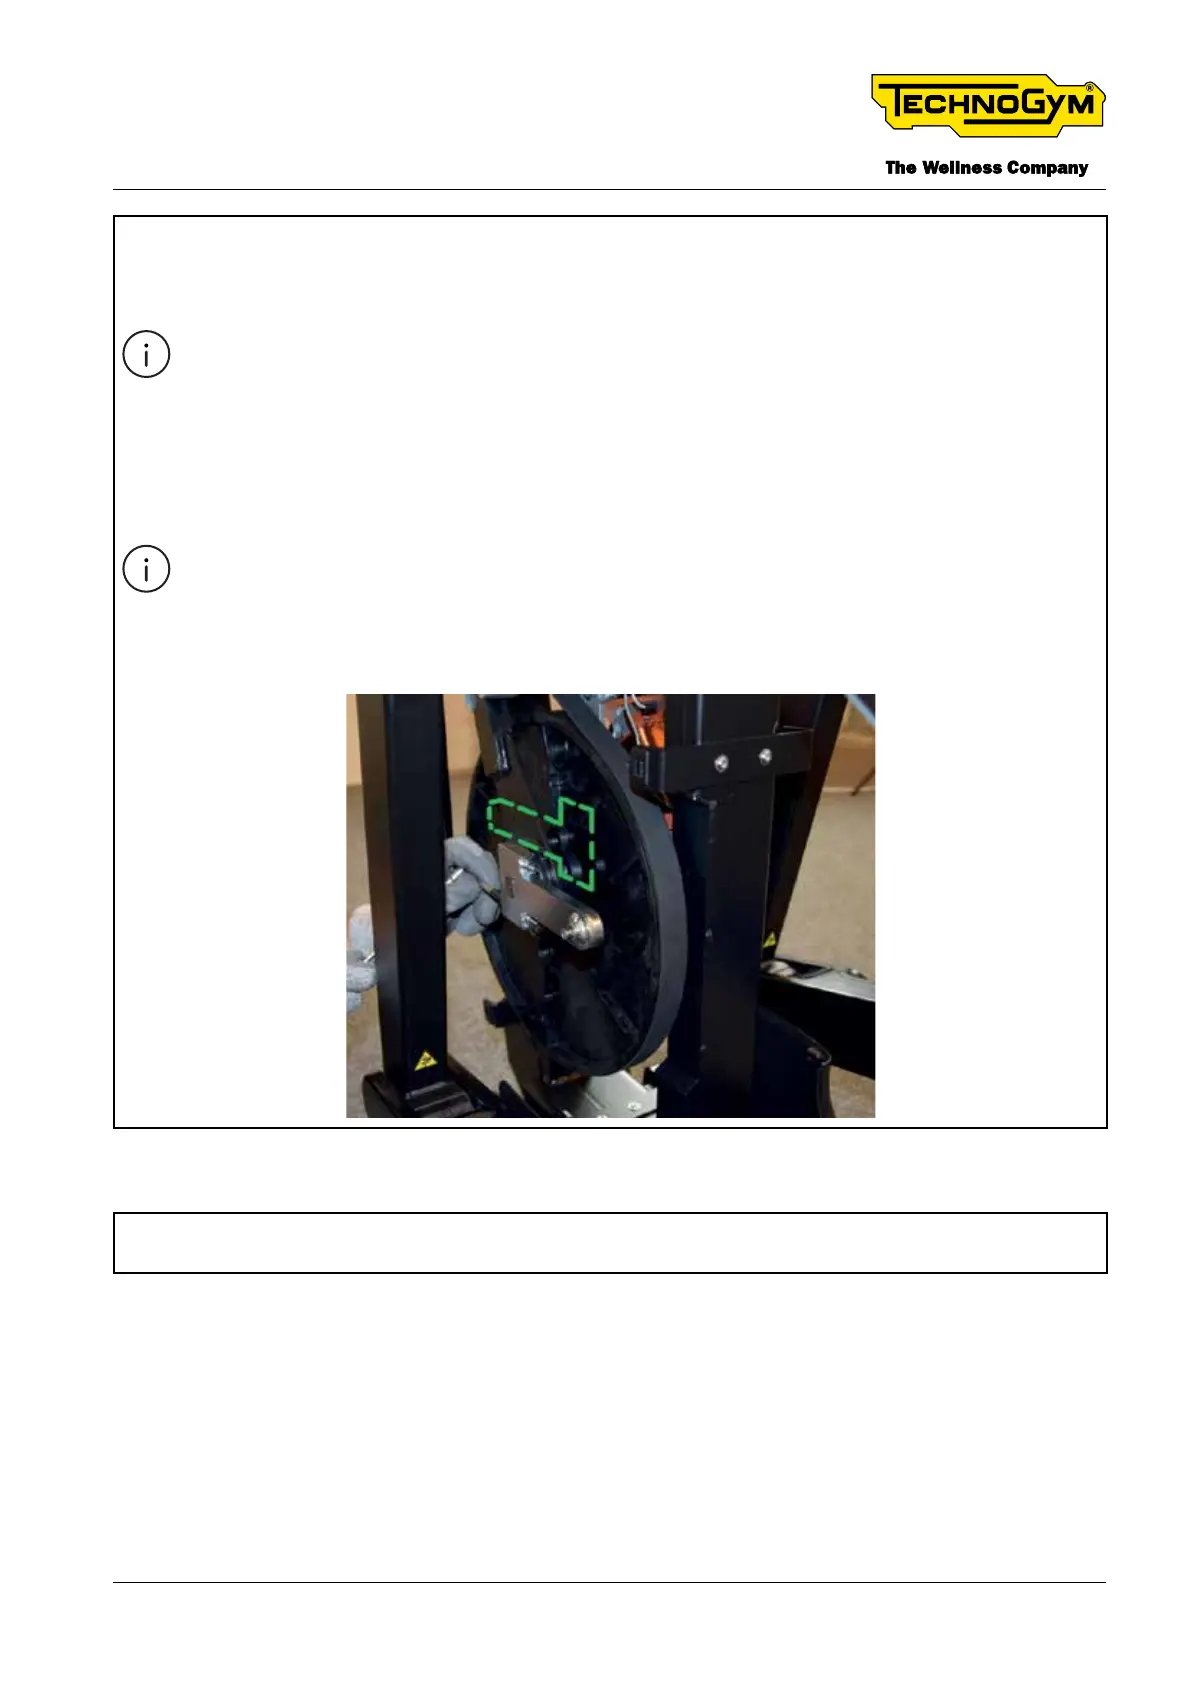
_Assemble the crank in the opposite direction as shown below (in green). Then reassemble the
rod with the relative screw.
7.14 DISASSEMBLING THE BELT OF THE PULLEY
Remove all the necessary front casings, without removing the lever of the pedal. For details, see
§”7.9 DISASSEMBLING THE FRONT CASINGS”
TECHNOGYM ELLIPTICAL Technical Service Guide
Rev. 1.1
- 107 -
Uncontrolled copy if printed