PURESTRENGTH & BENCHES: Guida all'Assistenza Tecnica - rev. 4.1
Page 5.33
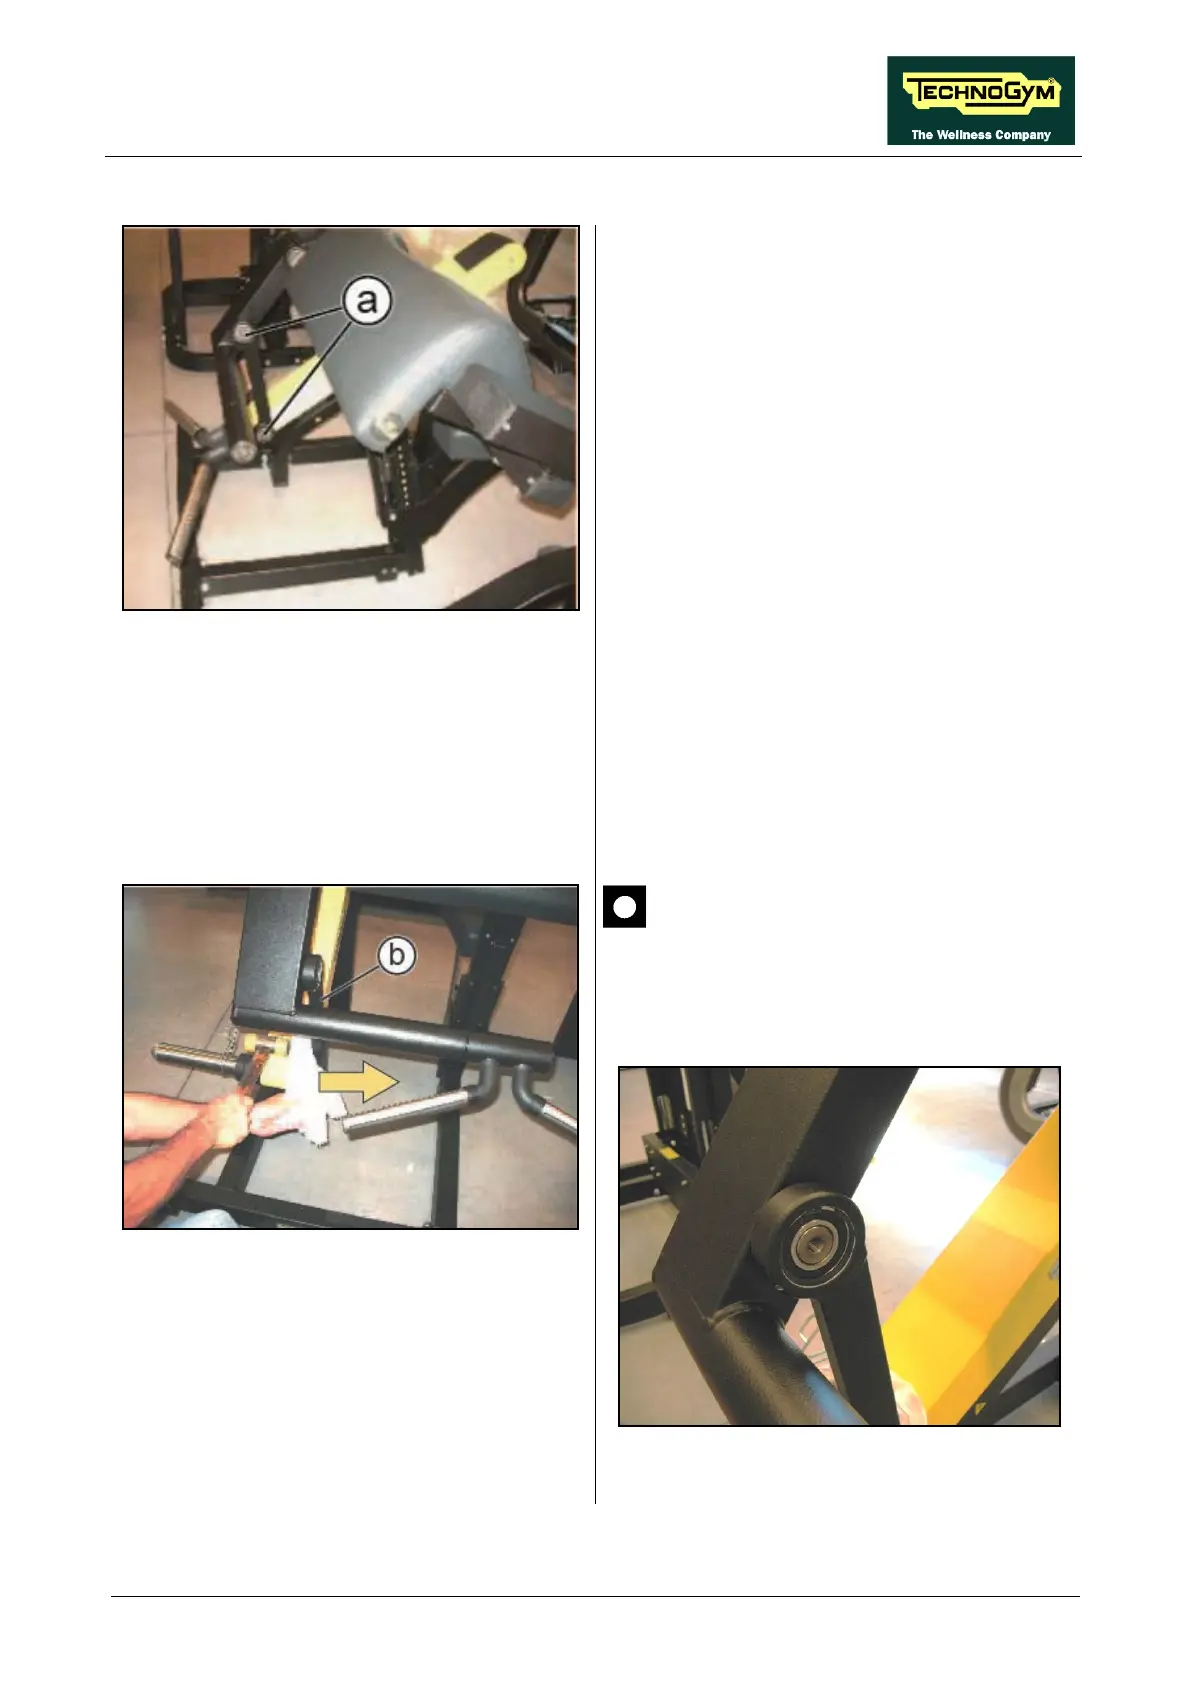
5.10.2. DISASSEMBLING THE CONNECTING ROD
Figure 5.10-3
1. Unscrew the 2 screws (a) using a 6mm
hexagonal key.
Figure 5.10-4
2. Remove the connecting rod in the direction
of the yellow arrow, with a rubber hammer.
To reassemble everything removed, follow the
disassembling instructions in reverse order,
taking into account the information below:
CAUTION: During reassembly pay
attention to reassemble the connecting
rod in the correct direction, as indicated
below.
Figure 5.10-5