ES
SELECCIÓN DE PATRÓN
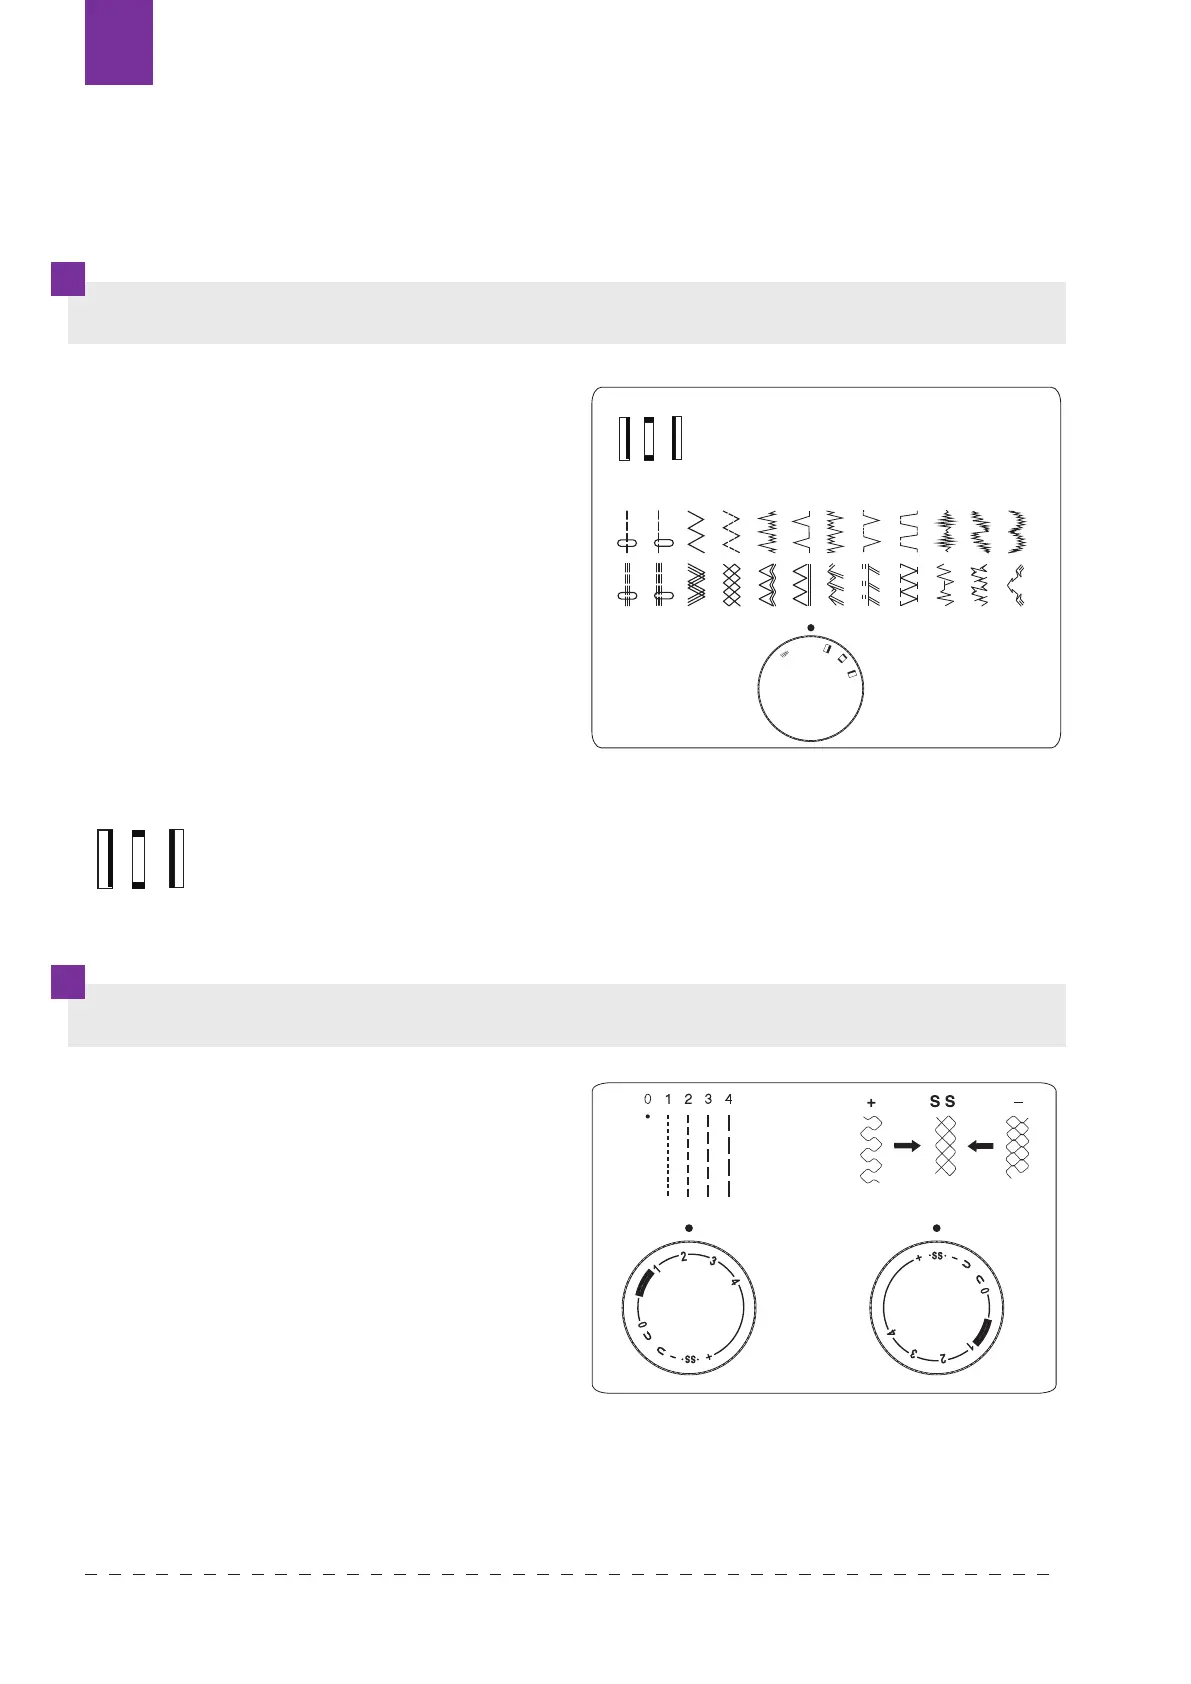
REGULACIÓN DE LONGITUD DE PUNTADA
Al coser con las puntadas zigzag, la tensión del hilo debe ser un poco más débil que para
las puntadas rectas. Se obtiene una mejor puntada cuando el hilo superior aparece en la
parte inferior del material.
Para cambiar la longitud de puntada (en
puntada elástica) es necesario ajustar el
selector de longitud de puntada que se
encuentra en el panel central, en intervalos
de 0 a 4 mm. Cuanto más grande sea el
número, más larga será la puntada.
Para puntadas elásticas, el selector de
longitud de puntada se puede ajustar
en intervalos: + SS -. Si la puntada no es
correcta, gire el selector de longitud de
puntada en dirección (-) sin quiere hacerla
más concentrada o (+) si se preere más
separada.
Antes de realizar cambios o de elegir la
puntada debe introducir la aguja en el tejido.
Para elegir la puntada deseada, coloque el
selector de patrón en la posición adecuada
(A-L), según la tabla de puntadas que se
encuentra en la máquina.
Para elegir una puntada simple en la linea
superior - ajuste el selector de longitus de
puntada entre 0-4. Las puntadas elásticas
(línea inferior) se realizan ajustando el
selector de longitud de puntada en la
posición + SS -
marca la conguración adecuada de la función de sobrehilado de ojales para
botones.
Tensión del hilo para las puntadas zigzag
11
KNOWING YOUR SEWING MACHINE
Pattern selector dial
Stitch length dial
The higher the number, the longer the stitch length. You can select the suitable stitch length
for most fabric.
Raise the needle above the fabric and select the desired pattern at the setting mark by
turning the pattern selector dial.
Selecting stretch stitch patterns
When sewing stretch, set the stitch length dial at “SS”.
When forward and reverse feeds become unbalanced depending upon the type of fabric,
correct the hand as follows.
When patterns are compressed, correct it by tur
ning the dial toward “+”.
When patterns are drawn out, correct it by turning the dial toward”-”.
I
J
K
L
H
1
2
4
3
K
L
4
3
A
B
C
D
E
G
H
I
J
F
1
2
A
B
C
D
E
F
G
11
KNOWING YOUR SEWING MACHINE
Pattern selector dial
Stitch length dial
The higher the number, the longer the stitch length. You can select the suitable stitch length
for most fabric.
Raise the needle above the fabric and select the desired pattern at the setting mark by
turning the pattern selector dial.
Selecting stretch stitch patterns
When sewing stretch, set the stitch length dial at “SS”.
When forward and reverse feeds become unbalanced depending upon the type of fabric,
correct the hand as follows.
When patterns are compressed, correct it by tur
ning the dial toward “+”.
When patterns are drawn out, correct it by turning the dial toward”-”.
I
J
K
L
H
1
2
4
3
Texi Fox 25102