DE
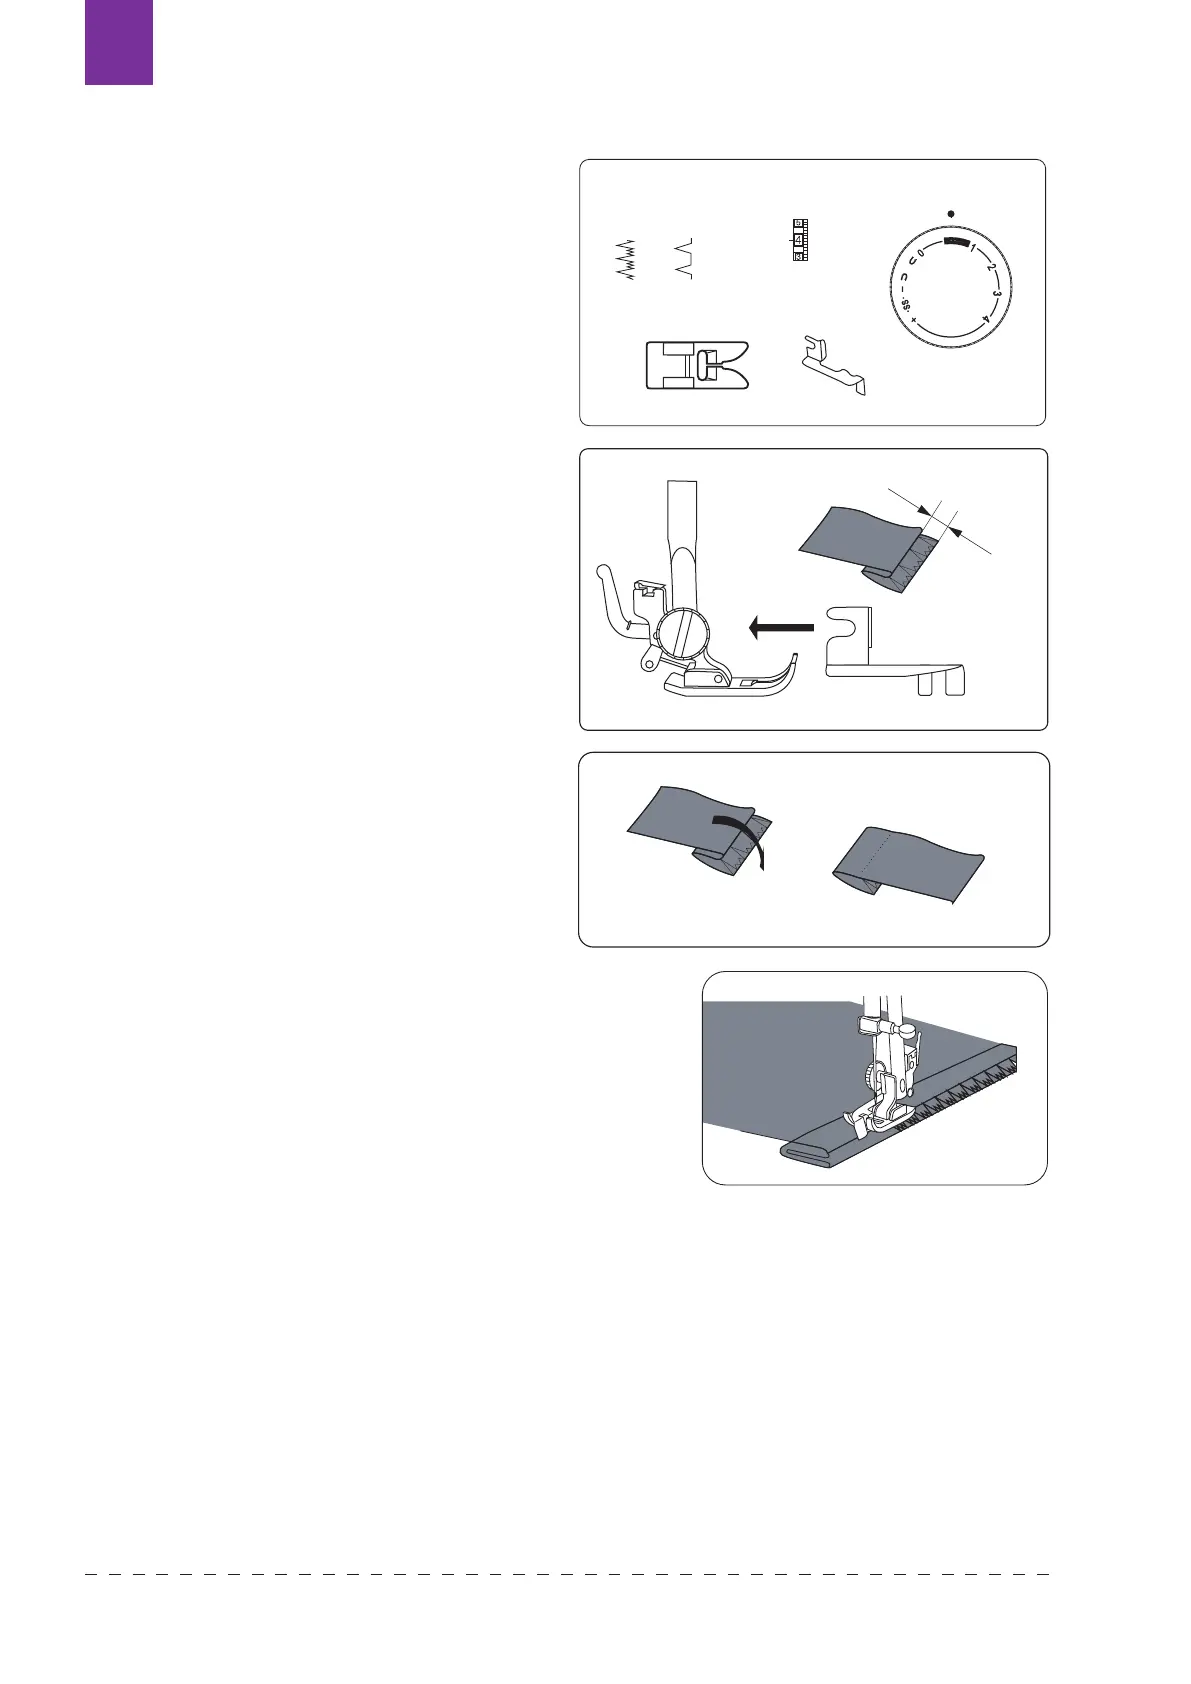
BLINDSTICHNÄHEN
ELASTISCHER BLINDSTICH und
BLINDSTICH dienen zum Säumen von
Röcken oder Hosenbeinen – sie sind auf
dem Oberteil des Stoes nicht sichtbar. Bei
dieser Naht ist es besonders wichtig, die
Farbe von Fäden an die Farbe vom Sto
anzupassen. Beim Blindstichnähen können
Sie entweder Standardfuß und Führung
oder den Blindstichfuß benutzen.
1. Falten Sie den Sto, so wie es auf der
Abbildung gezeigt wurde. Der Abstand
soll zwischen 0,4 und 0,7 variieren.
2. Lassen Sie den Nähfuß herunter und
schrauben Sie die Schraube bei dem
Nähfuß, um die Führung richtig zu
platzieren. Schrauben Sie dann die
Schraube wieder fest an.
3. Heben Sie den Nähfuß und legen Sie
den Sto darunter (3).
4. Lassen Sie den Nähfuß herunter, nähen
Sie langsam um bessere Kontrolle zu
haben, so dass die geraden Stiche direkt
an der Stokante und die Zickzack-
Stiche über die obere Falte des Stoes
genäht werden (4).
5. Vergewissern Sie sich beim Nähen,
dass der Sto korrekt von der Führung
geführt wird.
6. Nach dem Nähprozess nehmen Sie den
Sto heraus und bügeln Sie ihn. Auf der
Oberseite des Stoes sollen die Stiche
fast unsichtbar sein.
0.4~0.7cm
UTILITY STITCHES
Blind stitch
Fold up the fabric as illustrated.
Lower the presser foot, then loosen the foot holder
screw to place the hem guide between the screw
and the shank of foot holder. Tighten the screw
making sure the wall of hem guide is placed in the
middle of the toes of the presser foot.
Raise the presser foot and place the fabric under the
foot so that the soft fold rests against the wall of hem
guide.
Lower the foot, then stitch slowly for better for better
control so that the zigzag stitches fall on the hen
allowance and pierce the soft fold. While sewing,
make sure the soft fold runs along the wall of hem
guide.
Spread the fabric flat with the right side facing up.
+
1~4
0.5~1
E
F
Machine Setting
19
0.4~0.7cm
UTILITY STITCHES
Blind stitch
Fold up the fabric as illustrated.
Lower the presser foot, then loosen the foot holder
screw to place the hem guide between the screw
and the shank of foot holder. Tighten the screw
making sure the wall of hem guide is placed in the
middle of the toes of the presser foot.
Raise the presser foot and place the fabric under the
foot so that the soft fold rests against the wall of hem
guide.
Lower the foot, then stitch slowly for better for better
control so that the zigzag stitches fall on the hen
allowance and pierce the soft fold. While sewing,
make sure the soft fold runs along the wall of hem
guide.
Spread the fabric flat with the right side facing up.
+
1~4
0.5~1
E
F
Machine Setting
Texi Fox 2550