EN
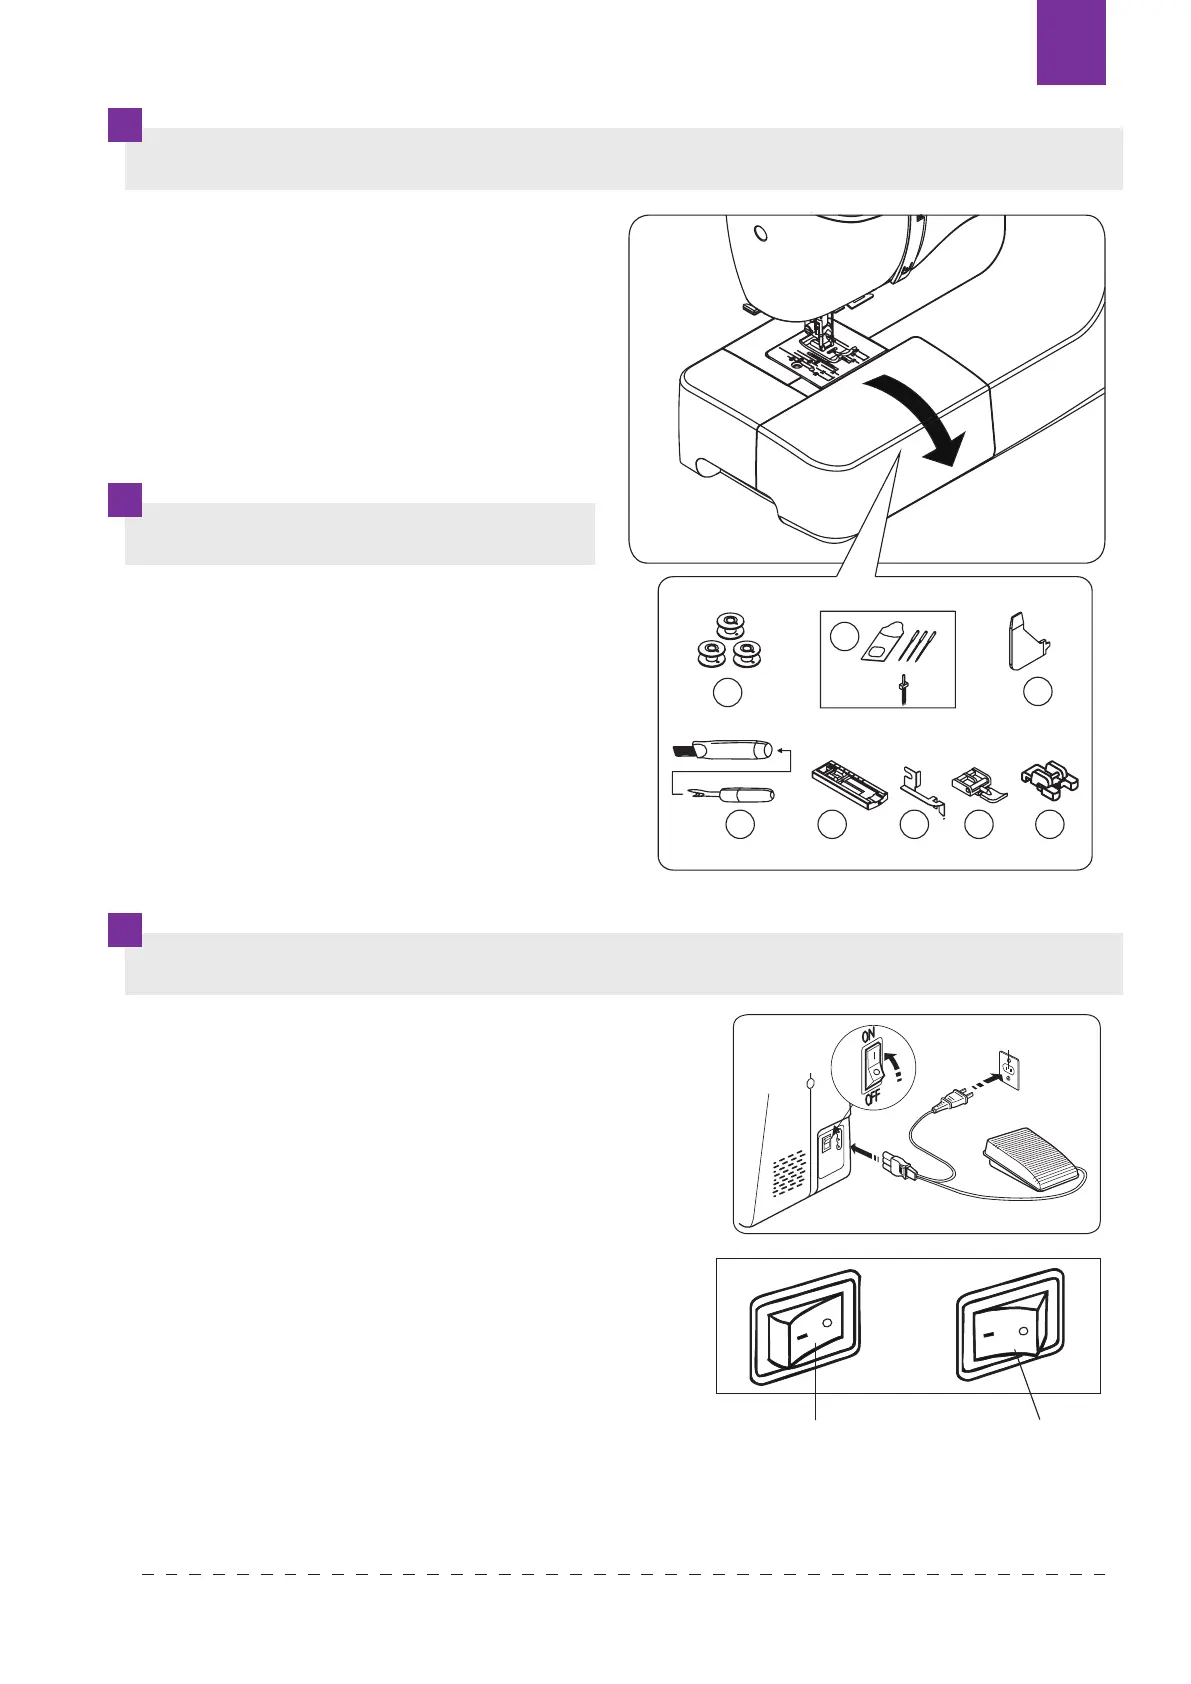
To open the accessory case, lift up on the
top left side of the table and pull toward
you.
Accessories are provided in the accessory case.
1. Bobbins
2. Set of 3 needles + double needle
3. Screwdrive
4. Ripper/ Brush
5. Buttonhole foot
6. Guide
7. Zipper foot
8. Button foot
Place the machine on a stable table.
Be sure to wipe o any surplus oil from needle
plate area before using your machine the rst
time. Make sure that the sewing machine is
turned o (the power switch is set to ”O”.
Before connecting the power cord, make sure
that the voltage and frequency indicated on the
machine is the same as in your power source.
1. Connect the power cord to the machine
by inserting the 2-hole plug into the plug
socket.
2. Connect the power cord plug to the electric
outlet.
3. Turn „ON” the power switch.
4. A LED lamp will light up when switch is turned on.
5. To disconnect, turn the power switch to the „OFF” position, then remove plug from outlet.
OPENING ACCESSORY CASE
ACCESSORIES
CONNECTING THE MACHINE
3
2
1
3
5
4
7
6
8
9
KNOWING YOUR SEWING MACHINE
Power line cord/foot control
Make sure that the sewing machine is turned off (the
power switch is set to “O”), and then connect the plug
of the power line and into the appliance inlet and your
wall outlet.
The foot that comes on your sewing machine
is called zigzag foot and will be used for the
majority of your sewing.
Setting up your machine
Bu sure to wipe off any surplus oil from needle
plate area before using your machine the first
time.
Power/light switch
Your machine will not operate until the power/light switch is turned on. The same switch controls
both the power and the light.
When servicing the machine, or changing needles, etc., machine must be disconnected from
the power supply.
NOTE:
When foot control is disconnected,
the machine will not operate.
Always disconnect the machine from power
supply by removing the plug from the wall-outlet.
Sewing speed can be varied the foot control.
The harder you press on the control, the faster
machine runs.
Accessories
1. Bobbins (3pcs)
2. Needle 3 pcs and twin needle 1 pc
3. Multi-function screwdriver
4. Seam guide(optional)
5. Ripper/Brush
6. Buttonhole foot
7. Guide presser foot
8. Zipper foot
9. Button fitting foot
Power/light
switch “OFF”
Power/light
switch “ON”
3
2
1
3
5
4
7
6
8
9
KNOWING YOUR SEWING MACHINE
Power line cord/foot control
Make sure that the sewing machine is turned off (the
power switch is set to “O”), and then connect the plug
of the power line and into the appliance inlet and your
wall outlet.
The foot that comes on your sewing machine
is called zigzag foot and will be used for the
majority of your sewing.
Setting up your machine
Bu sure to wipe off any surplus oil from needle
plate area before using your machine the first
time.
Power/light switch
Your machine will not operate until the power/light switch is turned on. The same switch controls
both the power and the light.
When servicing the machine, or changing needles, etc., machine must be disconnected from
the power supply.
NOTE:
When foot control is disconnected,
the machine will not operate.
Always disconnect the machine from power
supply by removing the plug from the wall-outlet.
Sewing speed can be varied the foot control.
The harder you press on the control, the faster
machine runs.
Accessories
1. Bobbins (3pcs)
2. Needle 3 pcs and twin needle 1 pc
3. Multi-function screwdriver
4. Seam guide(optional)
5. Ripper/Brush
6. Buttonhole foot
7. Guide presser foot
8. Zipper foot
9. Button fitting foot
Power/light
switch “OFF”
Power/light
switch “ON”
2
1
3
4
6
5
7 8
Texi Fox 25 65