PL
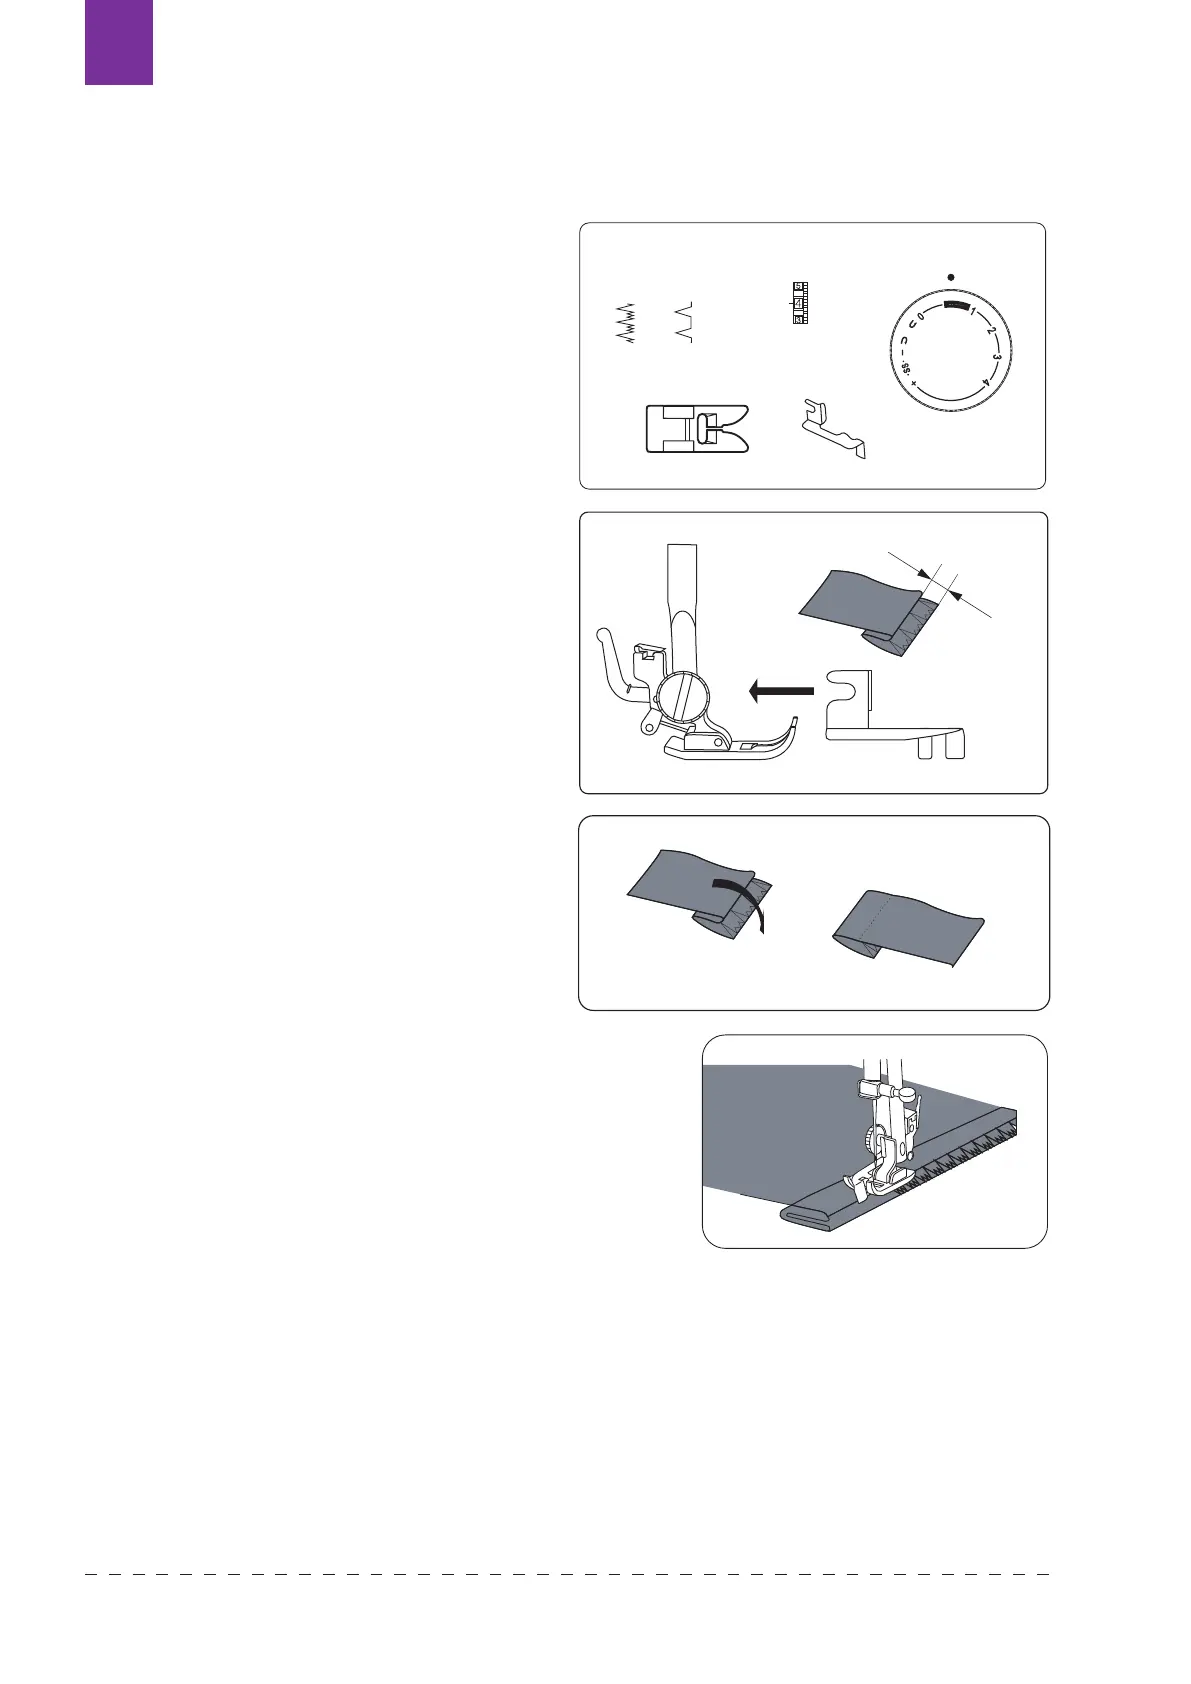
SZYCIE ŚCIEGIEM KRYTYM
STOPKA UNIWERSALNA + PROWADNIK
ŚCIEG KRYTY ELASTYCZNY (E) Stosować
doelastycznych materiałów i stretchu
ŚCIEG KRYTY (F) Stosować do materiałów
uniwersalnych, które nie będą się rozciągać
Służą do podszywania listew spódnic,
nogawek spodni itp. – są niewidoczne
na wierzchu tkaniny. Szyjąc tym ściegiem
należy odpowiednio dobrać kolor nici
dokoloru tkaniny.
Zastosuj stopkę uniwersalną i prowadnik
do ściegu krytego lub specjalną stopkę
dościegu krytego.
1. Złóż tkaninę jak pokazano na ilustracji.
Odległość powinna wahać się
pomiędzy 0,4-0,7 cm.
2. Opuść stopkę, odkręć śrubę przy
stopce, by umieścić prowadnik szycia
między śrubą idrążkiem stopki. Dokręć
śrubę, umiejscawiając prowadnik po
środku stopki.
3. Podnieś stopkę i umieść tkaninę pod
stopką, tak jak pokazano na rysunku.
4. Opuść stopkę, szyj powoli dla lepszej
kontroli, tak aby proste ściegi były
przeszywane przy krawędzi, zaś szwy
zygzaka opierały się o górną zakładkę
złożonego materiału.
5. Kiedy szyjesz, upewnij się, czy materiał
jest prawidłowo transportowany.
6. Po zakończeniu szycia wyjmij materiał
izaprasuj. Po wierzchniej stronie tkaniny
wkłucia igły powinny być prawie
niewidoczne.
0.4~0.7cm
UTILITY STITCHES
Blind stitch
Fold up the fabric as illustrated.
Lower the presser foot, then loosen the foot holder
screw to place the hem guide between the screw
and the shank of foot holder. Tighten the screw
making sure the wall of hem guide is placed in the
middle of the toes of the presser foot.
Raise the presser foot and place the fabric under the
foot so that the soft fold rests against the wall of hem
guide.
Lower the foot, then stitch slowly for better for better
control so that the zigzag stitches fall on the hen
allowance and pierce the soft fold. While sewing,
make sure the soft fold runs along the wall of hem
guide.
Spread the fabric flat with the right side facing up.
+
1~4
0.5~1
E
F
Machine Setting
19
0.4~0.7cm
UTILITY STITCHES
Blind stitch
Fold up the fabric as illustrated.
Lower the presser foot, then loosen the foot holder
screw to place the hem guide between the screw
and the shank of foot holder. Tighten the screw
making sure the wall of hem guide is placed in the
middle of the toes of the presser foot.
Raise the presser foot and place the fabric under the
foot so that the soft fold rests against the wall of hem
guide.
Lower the foot, then stitch slowly for better for better
control so that the zigzag stitches fall on the hen
allowance and pierce the soft fold. While sewing,
make sure the soft fold runs along the wall of hem
guide.
Spread the fabric flat with the right side facing up.
+
1~4
0.5~1
E
F
Machine Setting
Texi Fox 25162