ES
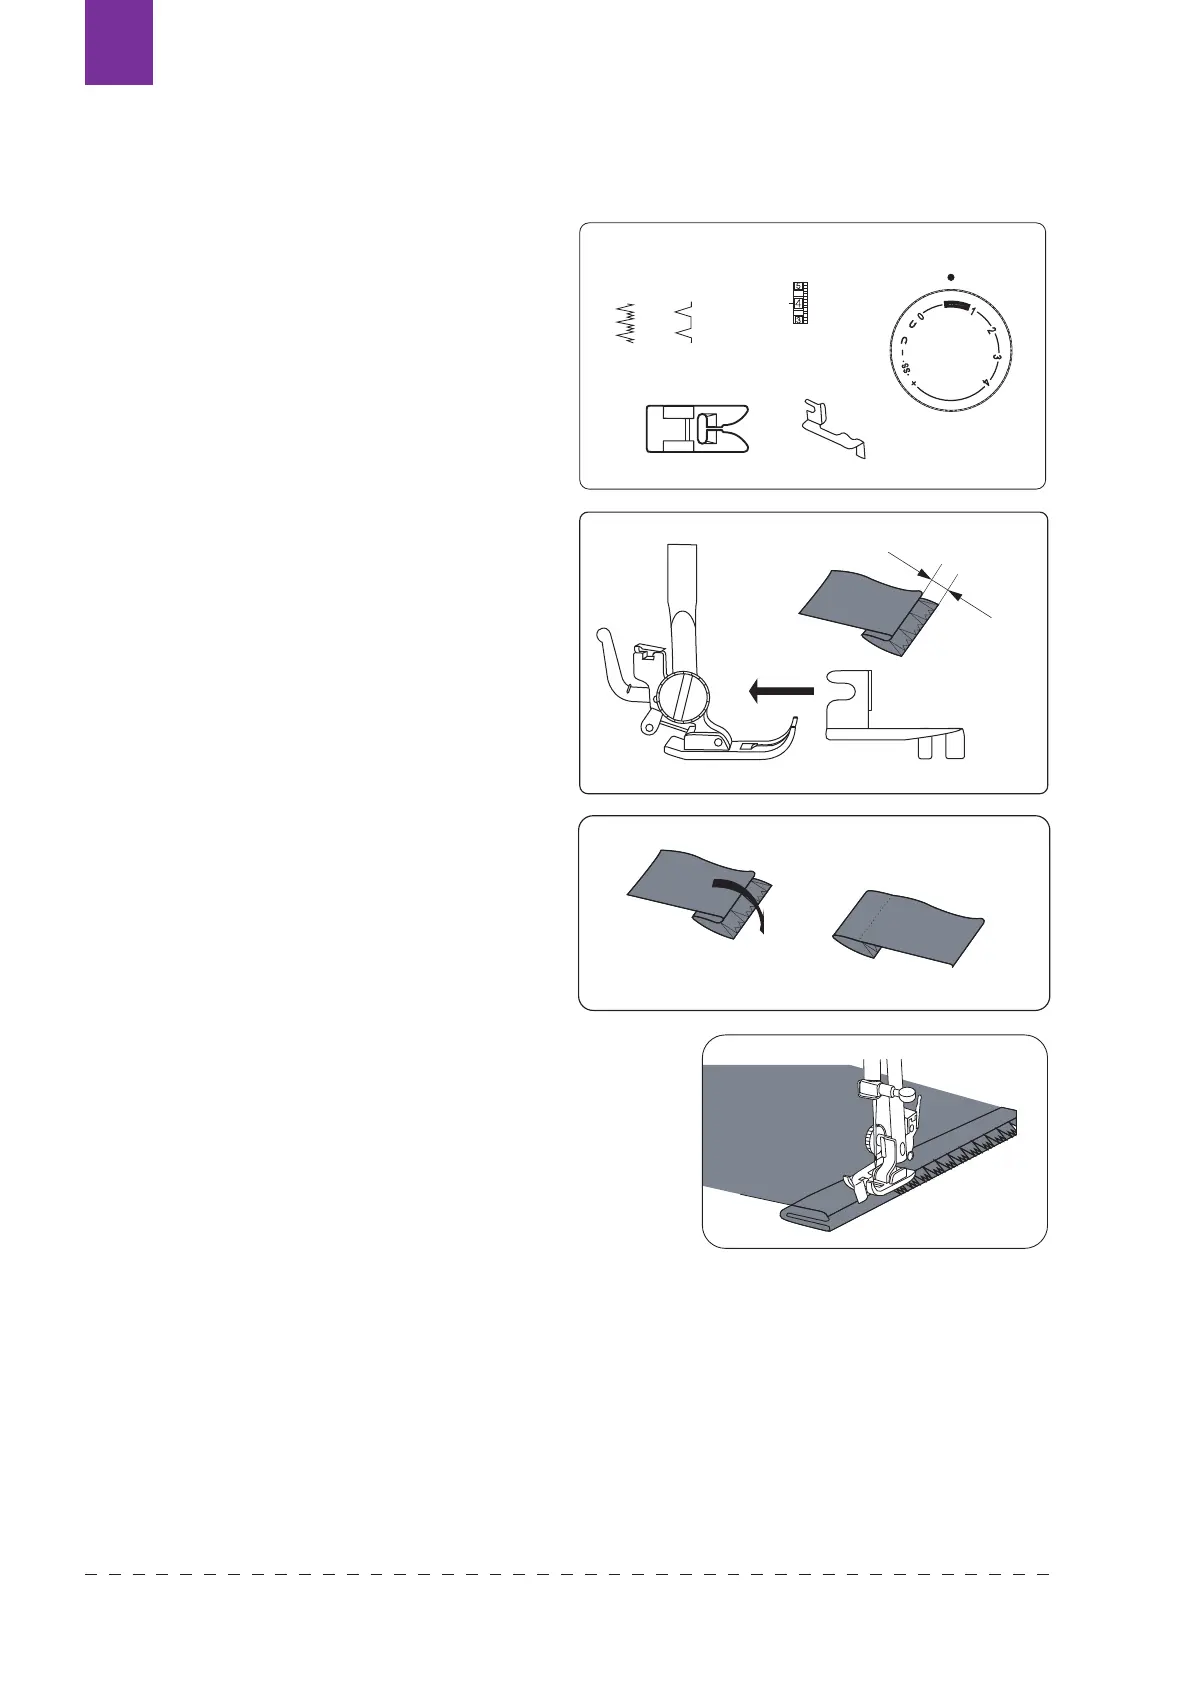
PUNTADA INVISIBLE
Utlice sobre materiales universales que no se estren
Utlice sobre materiales elástcos y stretch
PUNTADA ELÁSTICA INVISIBLE
y PUNTADA INVISIBLE
para materiales muy rígidos utilizados en
dobladillos y perneras de pantalones - no
son visibles en la supercie del tejido. Al
coser con esta puntada se debe elegir un
hilo de un color idéntico al del tejido. Utilice
un prensatelas universal y una guía para
puntada invisible o un pie especial para
puntada invisible.
1. Coloque la tela tal y como se muestra
en la ilustración. La distancia “2” debe
variar entre 0,4-0,7 cm. Baje el pie
prensatelas, aoje el tornillo bajo él
para colocar la guía de costura entre
el tornillo y el vástago del pie. Apriete
el tornillo, colocando la guía bajo el
prensatelas.
2. Eleve el pie prensatelas y coloque el
tejido bajo él.
3. Baje el pie prensatelas, cosa lentamente
para un mejor control, de tal forma que
la puntada recta cosa el lado del borde
y la puntada zigzag se apoye en el
pliegue superior del tejido.
4. Cuando cosa, asegúrese de que el
material se transporta correctamente.
5. Una vez concluida la costura, retire el
tejido y plánchelo. Por la parte superior
de la tela la inserción de la aguja debe
ser prácticamente invisible.
6. Cuando haya terminado de coser, dé
la vuelta al material.
0.4~0.7cm
UTILITY STITCHES
Blind stitch
Fold up the fabric as illustrated.
Lower the presser foot, then loosen the foot holder
screw to place the hem guide between the screw
and the shank of foot holder. Tighten the screw
making sure the wall of hem guide is placed in the
middle of the toes of the presser foot.
Raise the presser foot and place the fabric under the
foot so that the soft fold rests against the wall of hem
guide.
Lower the foot, then stitch slowly for better for better
control so that the zigzag stitches fall on the hen
allowance and pierce the soft fold. While sewing,
make sure the soft fold runs along the wall of hem
guide.
Spread the fabric flat with the right side facing up.
+
1~4
0.5~1
E
F
Machine Setting
19
0.4~0.7cm
UTILITY STITCHES
Blind stitch
Fold up the fabric as illustrated.
Lower the presser foot, then loosen the foot holder
screw to place the hem guide between the screw
and the shank of foot holder. Tighten the screw
making sure the wall of hem guide is placed in the
middle of the toes of the presser foot.
Raise the presser foot and place the fabric under the
foot so that the soft fold rests against the wall of hem
guide.
Lower the foot, then stitch slowly for better for better
control so that the zigzag stitches fall on the hen
allowance and pierce the soft fold. While sewing,
make sure the soft fold runs along the wall of hem
guide.
Spread the fabric flat with the right side facing up.
+
1~4
0.5~1
E
F
Machine Setting
Texi Fox 25106

 Loading...


