PL
ROZPOCZĘCIE I ZAKOŃCZENIE SZWU
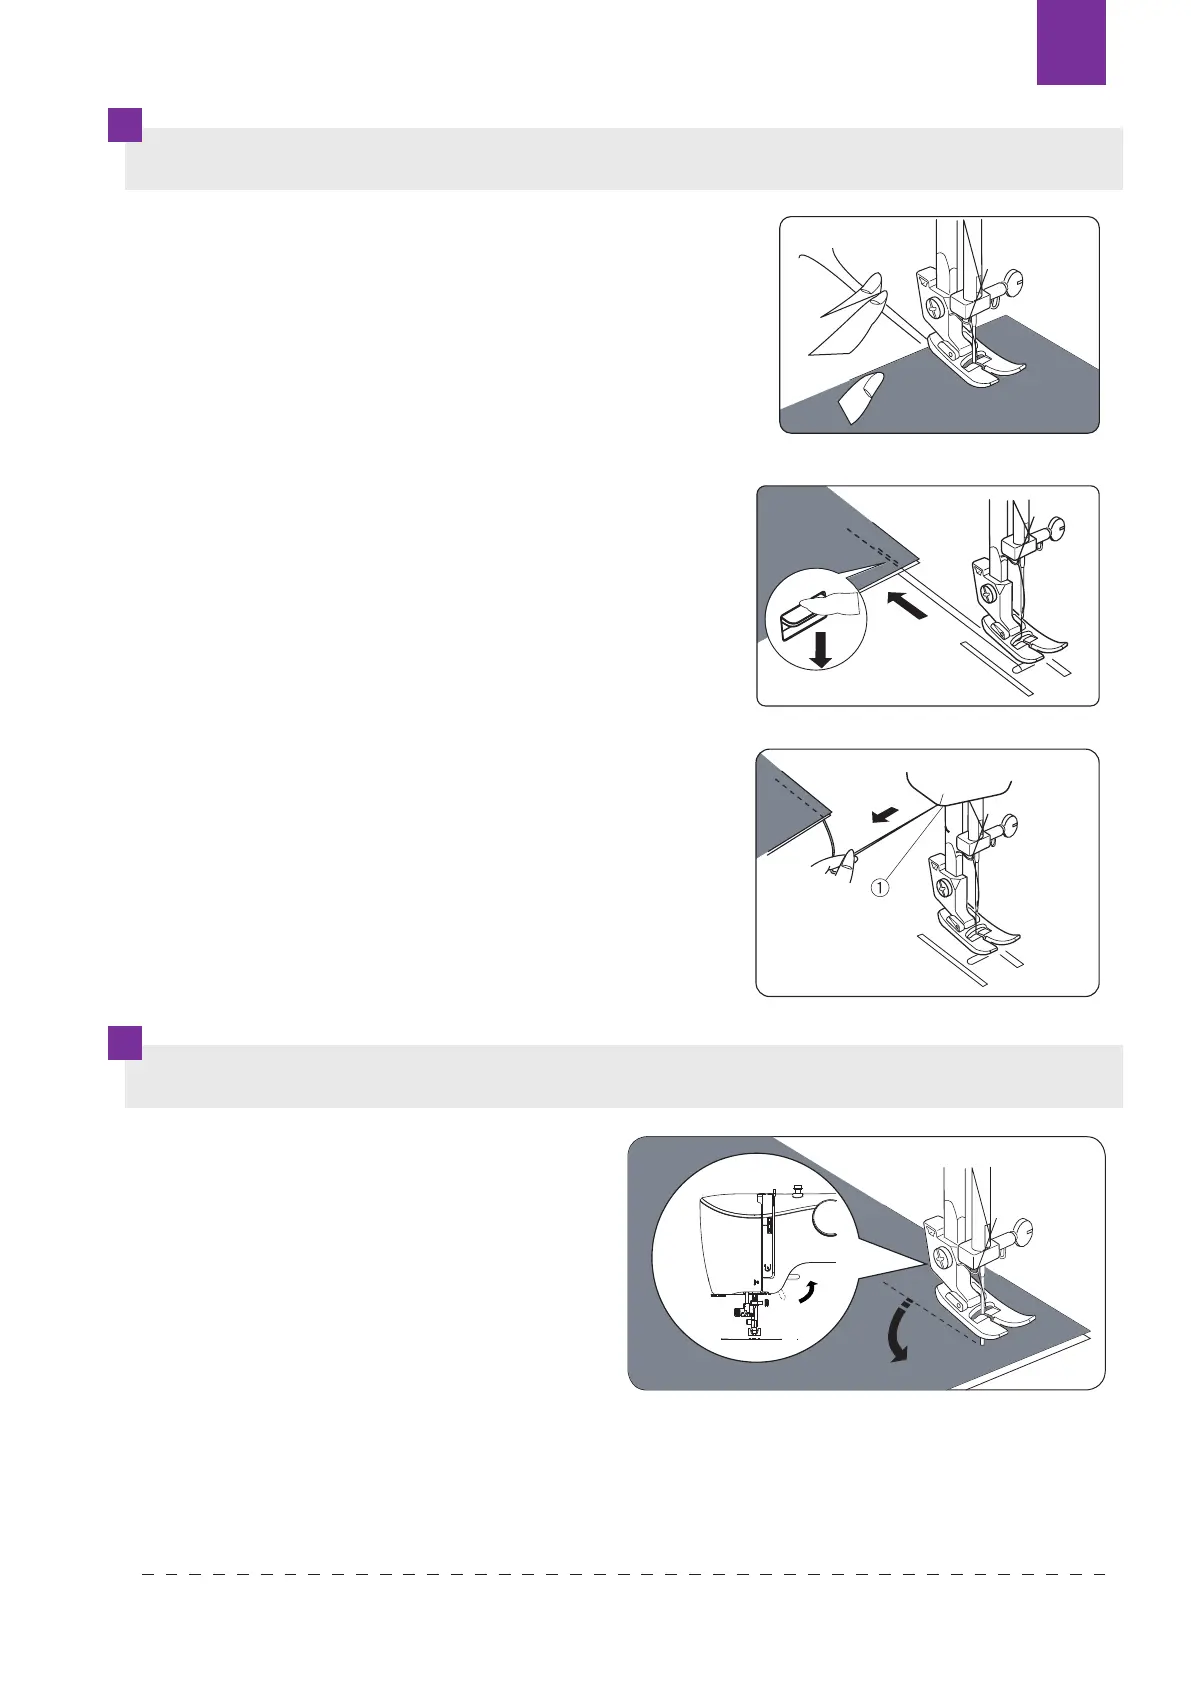
ZMIANA KIERUNKU SZYCIA
UWAGA: Podczas szycia należy szczególnie uważać
na przestrzeń dookoła igły.
Maszyna będzie automatycznie transportować
materiał, nie ciągnij ani nie
popychaj materiału.
1. Przekręć kołem pasowym tak, aby igła znalazła się
w swojej najwyższej pozycji.
2. Podnieś stopkę dociskową i umieść pod nią
materiał.
3. Opuść stopkę dociskową.
4. Pociągnij nić od igły i nić od szpulki do tyłu.
Przeszyj kilka ściegów.
5. Dostosuj prędkość szycia.
6. Zatrzymaj maszynę, gdy skończysz szew.
7. Podnieś dźwignię podnoszenia stopki.
8. Przekręcając kołem napędowym podnieś igłę.
Wyciągnij szyty materiał spod stopki. Używając
obcinacza z boku maszyny odetnij nitki.
1. Zatrzymaj maszynę przed zmianą
kierunku szycia.
2. Ustaw igłę w dolnej pozycji
(przekręcając ręcznie koło pasowe).
3. Podnieś stopkę.
4. Aby zmienić kierunek szycia obróć
materiał „na igle”.
5. Opuść stopkę dociskową i kontynuuj
pracę.
13
UTILITY STITCHES
Straight stitch
Raise the presser foot and position the fabric next to a
stitching guide line on the needle plate.
Lower the needle into the fabric.
Lower the presser foot and smooth the thread towards the
back. Depress the foot control.
Gently guide the fabric along the guide line letting the
fabric feed by itself.
For fastening the ends of seams, press the reverse stitch
button and sew several reverse stitches.
Raise the presser foot and remove the fabric, drawing the
threads to back.
The threads are cut the proper length for starting the next
seam.
A
B
2~6
1.5~4
Machine Setting
12
KNOWING YOUR SEWING MACHINE
Useful sewing tips
Various ways to achieve better sewing results are described below.
Refer to these tips when sewing.
1. Trial sewing
Use different stitch width and length for trial sewing. When you have finished, select the
best looking stitch width and length for correct sewing.
For the trial sewing, use a piece of fabric and thread that are the same as those used for
your project, and check the thread tension and stitch length and width. Since the results
differ depending on the type of stitching and the number of fabric layers sewn, perform the
trial sewing under the same conditions th
at will be used with your project.
3. Sewing curves
1).Stop sewing, and then slightly change the sewing direction to sew around the curve.
2).When sewing along a curve while using a zigzag stitch, select a shorter length in order to
obtain a finer stitch.
4. Sewing thick fabrics
If the fabric does not fit under the presser foot
Raise the presser foot even higher to bring the presser foot to its highest position. Then feed
the fabric under the presser foot. (See page 4 to Raise the presser foot.)
5. Sewing elastic fabric or the fabric that is easy to cause skipping stitches
Use round head needle and b
igger stitch length. If necessary, add one layer of lining cloth
under the fabric for better sewing.
6. Sewing thin fabric or silk
When sewing thin fabric or silk, the stitch may depart from correct direction or cannot feed the
fabric correctly. If so, add one layer of lining cloth under the fabric for better sewing.
7. Sewing stretch fabrics
First, baste the piece of fabric together, and then sew without stretching the fabric.
8. Free arm sewing
When sewing tube fabric or the part cannot reach, use the free arm sewing function (For
detail, refer to page 4).
2. Changing the sewing direction
Stop the machine and turn the hand wheel
toward you to bring the needle down into the
fabric. Raise the presser foot.
Pivot the fabric around the needle to change
sewing direction as desired. Lower the
presser foot and continue sewing.
Texi Fox 25 159