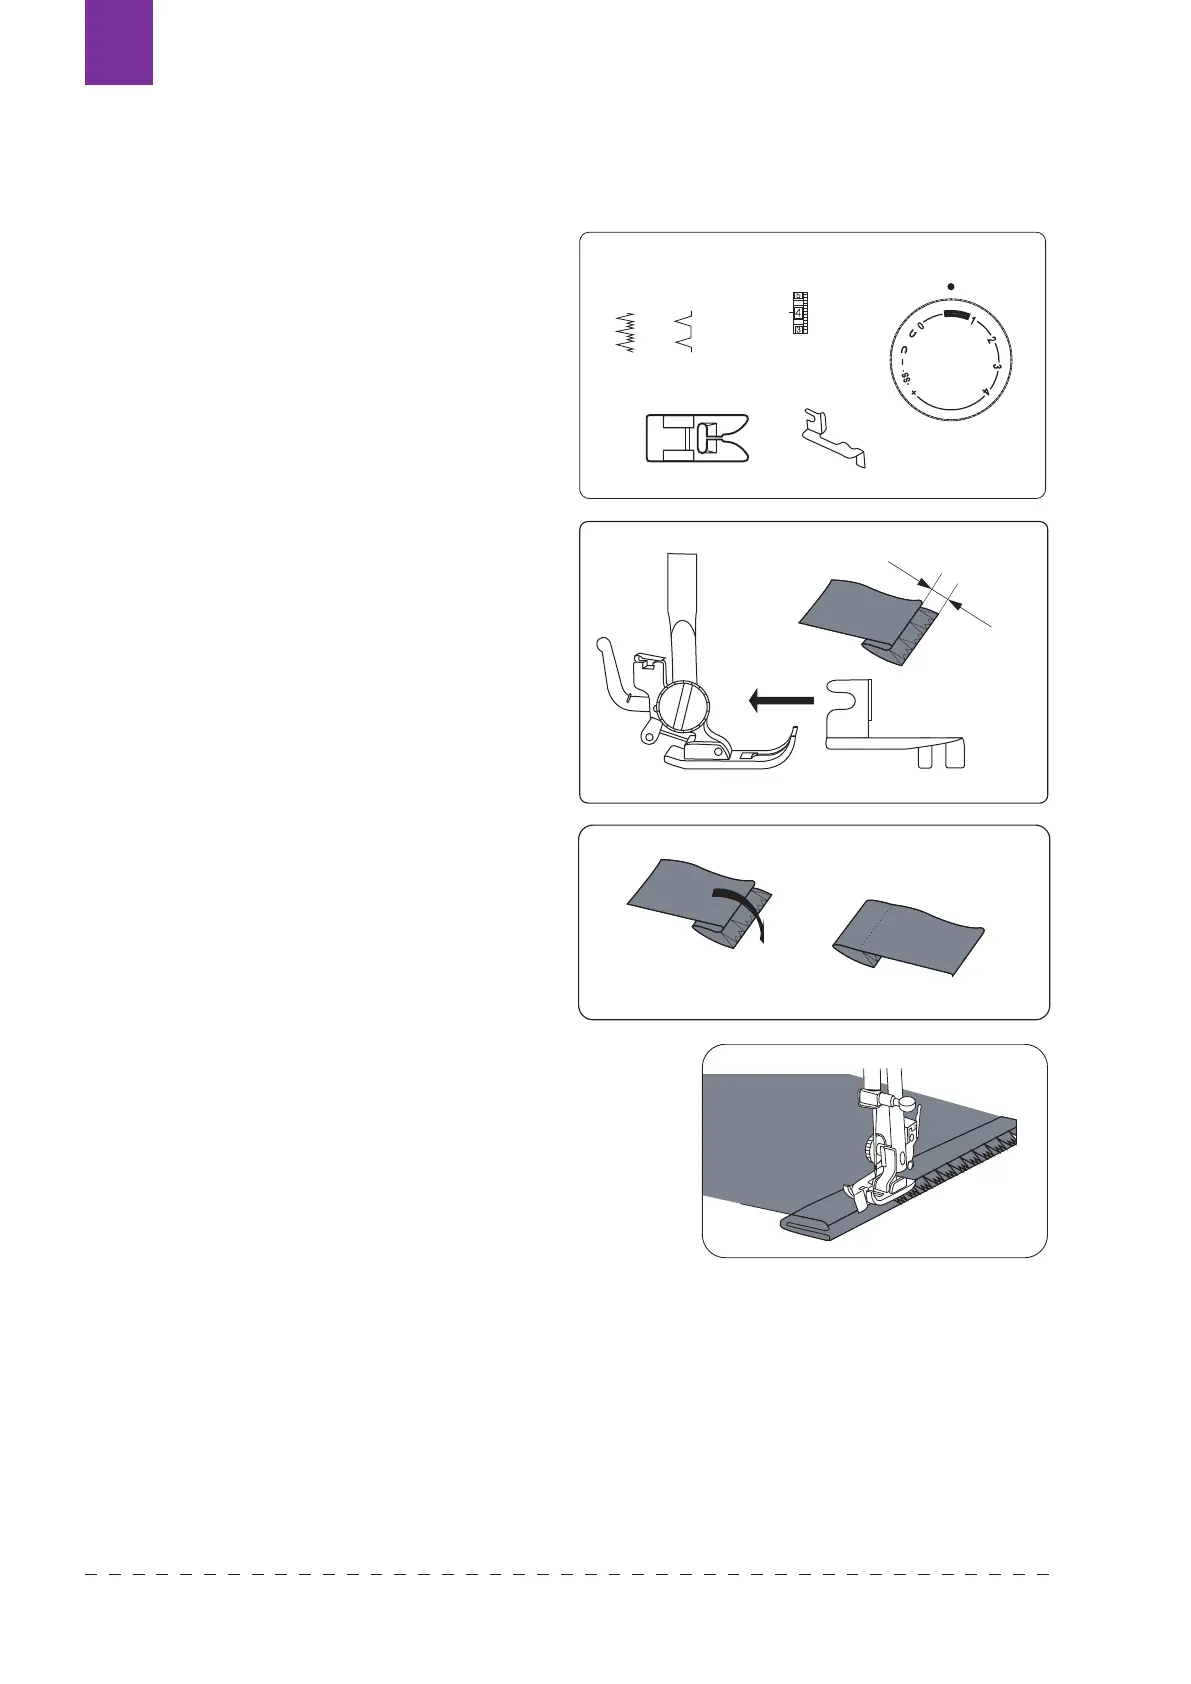
SLEPÝ LEM
PŘÍTLAČNÁ PATKA UNIVERZÁLNÍ I VODIČ NA PŘÍTLAČNOU PATKU
F BĚŽNÝ SLEPÝ steh pro pevnější látky
E ELASTICKÝ SLEPÝ steh pro jemné,
pružné látky.
Zajišťovací elastický steh (E) and Zajišťovací
steh (F) - používá se pro slepé lemování na
šatech, nohavicích - tento steh je šitý bez
stehů viditelných na lícové straně látky. Je
třeba sladit barvu nitě s barvou materiálu.
1. Přeložte látku dle obrázku. Vzdálenost
by měla být asi 0,4-0,7 cm.
2. Spusťte přítlačnou patku, poté uvolněte
šroubek na patce pro umístění vodiče
lemů mezi šroubek a držák patek.
Utáhněte šroubek, ujistěte se, že
je vodič vložen na správném místě
uprostřed patky.
3. Zdvihněte přítlačnou patku a umístěte
látku pod patku .
4. Spusťte přítlačnou patku a šijte velmi
pomalu pro lepší kontrolu, rovné stehy
šijte v blízkosti hrany látky a zigzag
stehy by měly procházet látkou a na
druhé straně zachytávat přeložený lem .
5. Při šití kontrolujte, zda je látka
rovnoměrně podávána.
0.4~0.7cm
UTILITY STITCHES
Blind stitch
Fold up the fabric as illustrated.
Lower the presser foot, then loosen the foot holder
screw to place the hem guide between the screw
and the shank of foot holder. Tighten the screw
making sure the wall of hem guide is placed in the
middle of the toes of the presser foot.
Raise the presser foot and place the fabric under the
foot so that the soft fold rests against the wall of hem
guide.
Lower the foot, then stitch slowly for better for better
control so that the zigzag stitches fall on the hen
allowance and pierce the soft fold. While sewing,
make sure the soft fold runs along the wall of hem
guide.
Spread the fabric flat with the right side facing up.
+
1~4
0.5~1
E
F
Machine Setting
19
0.4~0.7cm
UTILITY STITCHES
Blind stitch
Fold up the fabric as illustrated.
Lower the presser foot, then loosen the foot holder
screw to place the hem guide between the screw
and the shank of foot holder. Tighten the screw
making sure the wall of hem guide is placed in the
middle of the toes of the presser foot.
Raise the presser foot and place the fabric under the
foot so that the soft fold rests against the wall of hem
guide.
Lower the foot, then stitch slowly for better for better
control so that the zigzag stitches fall on the hen
allowance and pierce the soft fold. While sewing,
make sure the soft fold runs along the wall of hem
guide.
Spread the fabric flat with the right side facing up.
+
1~4
0.5~1
E
F
Machine Setting
Texi Fox 2522
CS