PL
UWAGA: Nie zostawiaj włączonej maszyny bez opieki. Po zakończeniu pracy zawsze
wyciągnij przewód zasilający z gniazda. Postępuj tak samo przed przystąpieniem do
czyszczenia i konserwacji.
UWAGA: Odłączając maszynę nie ciągnij za przewód, tylko chwyć wtyczkę. Jeśli
rozrusznik nożny jest odłączony, nie można rozpocząć procesu szycia na maszynie.
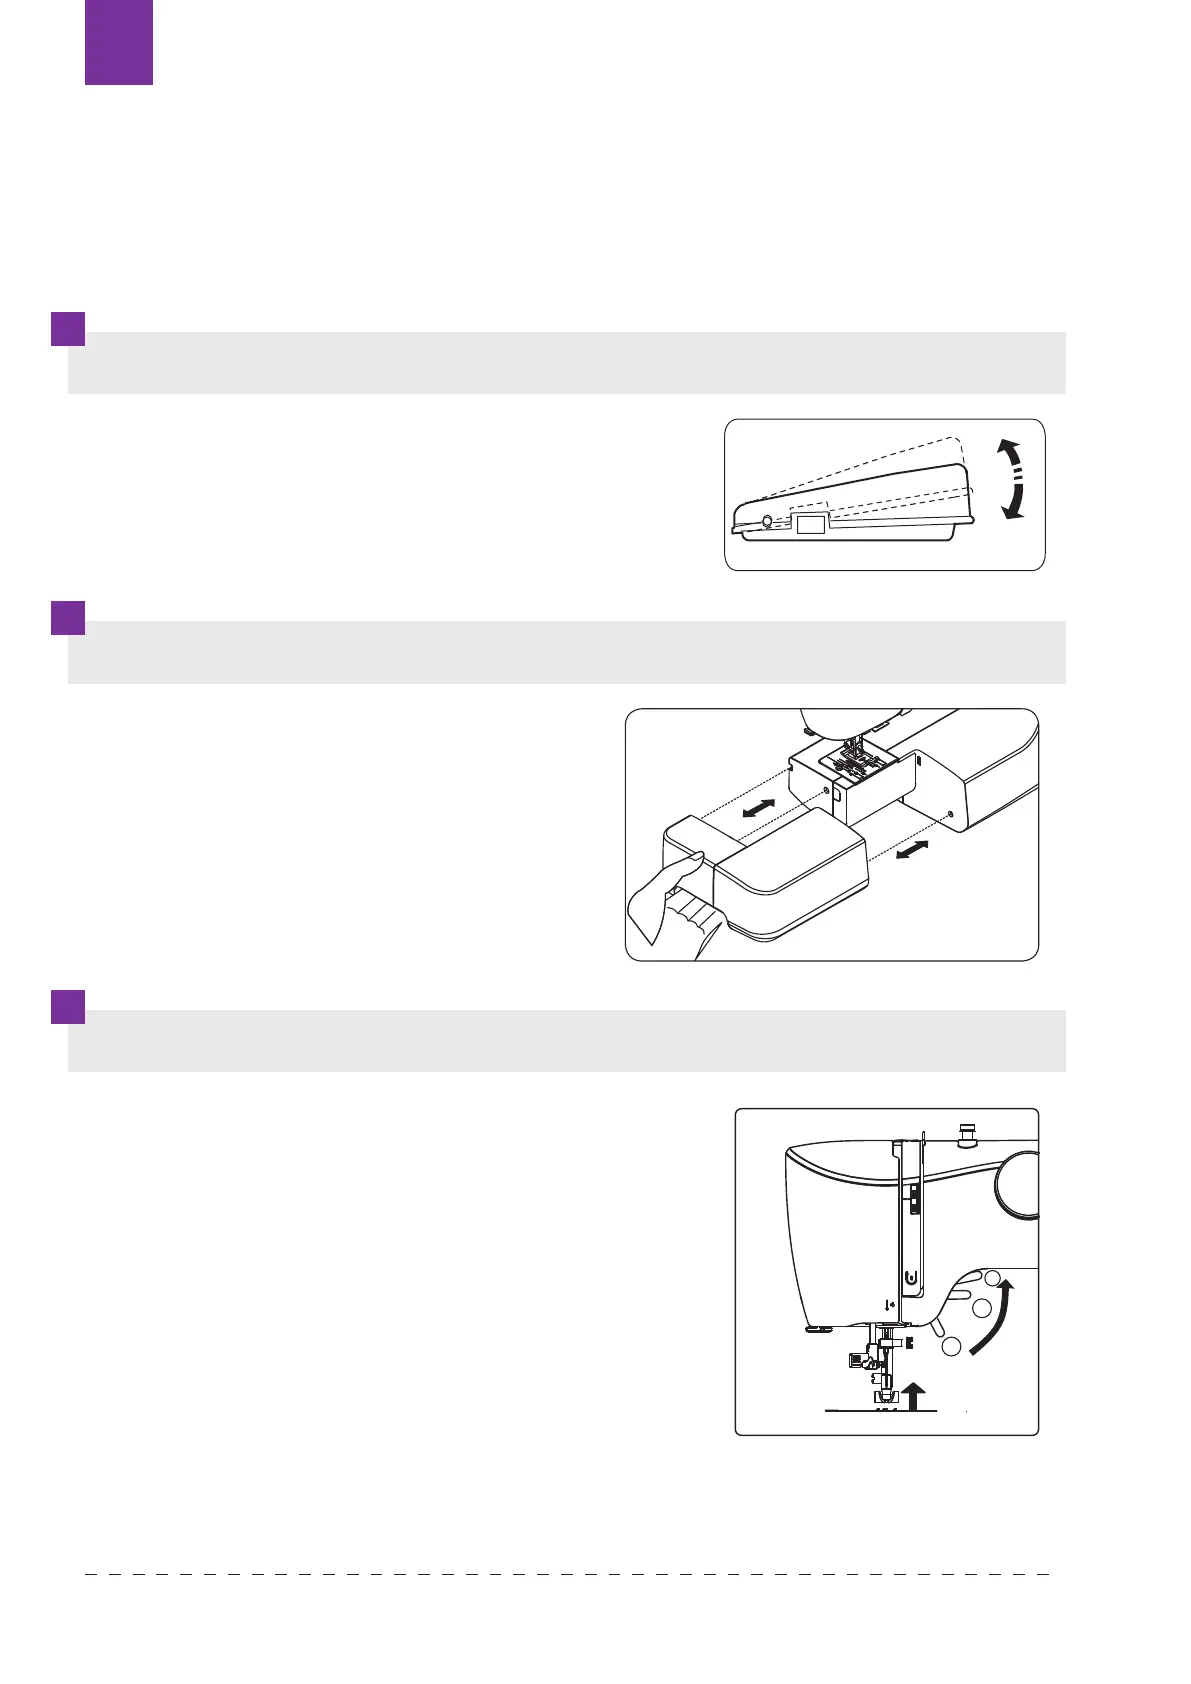
ROZRUSZNIK NOŻNY (PEDAŁ)
SZYCIE NA OKRĄGŁO (WOLNE RAMIĘ)
PODNOSZENIE STOPKI
Aby rozpocząć szycie, należy nacisnąć na rozrusznik.
Prędkość szycia jest regulowana przy pomocy
rozrusznika. Im mocniej naciskamy na rozrusznik, tym
szybciej maszyna szyje.
Aby otrzymać wolne ramię wysuń
stolik w lewo jak pokazano na rysunku
obok. Powysunięciu stolika otrzymamy
wolne ramię, które ułatwia szycie trudno
dostępnych elementów odzieży (nogawek,
rękawów itp.).
Dostępne są trzy pozycje stopki,
1. Stopka powinna być opuszczona zawsze podczas
szycia.
2. Stopkę należy podnieść do pozycji środkowej, aby
wsunąć pod spód szyty materiał.
3. Stopkę można unieść do trzeciej, najwyższej
pozycji, przytrzymując dźwignię w celu
umieszczenia pod nią kilku warstw materiałów,
bądź przy wymianie stopki .
3
2
1
3
5
4
7
6
8
9
KNOWING YOUR SEWING MACHINE
Power line cord/foot control
Make sure that the sewing machine is turned off (the
power switch is set to “O”), and then connect the plug
of the power line and into the appliance inlet and your
wall outlet.
The foot that comes on your sewing machine
is called zigzag foot and will be used for the
majority of your sewing.
Setting up your machine
Bu sure to wipe off any surplus oil from needle
plate area before using your machine the first
time.
Power/light switch
Your machine will not operate until the power/light switch is turned on. The same switch controls
both the power and the light.
When servicing the machine, or changing needles, etc., machine must be disconnected from
the power supply.
NOTE:
When foot control is disconnected,
the machine will not operate.
Always disconnect the machine from power
supply by removing the plug from the wall-outlet.
Sewing speed can be varied the foot control.
The harder you press on the control, the faster
machine runs.
Accessories
1. Bobbins (3pcs)
2. Needle 3 pcs and twin needle 1 pc
3. Multi-function screwdriver
4. Seam guide(optional)
5. Ripper/Brush
6. Buttonhole foot
7. Guide presser foot
8. Zipper foot
9. Button fitting foot
Power/light
switch “OFF”
Power/light
switch “ON”
4
2
1
3
KNOWING YOUR SEWING MACHINE
Converting to free-arm sewing
Your machine can be used either as a flat-bed or as a
free-arm model.
With the extension table in position, it provides a
large working surface as a standard flat-bed model.
To remove the extension table, hold it firmly with both
hands and pull it off to the left as shown. To replace,
slide the extension table back into place until it
clicks.
With the extension table removed the machine
converts into a slim free-arm model for sewing
children’s clothes, cuffs, trouser legs, and other
hard-to-reach pl
aces.
Presser foot lifter
There are three positions for your presser foot.
1. Lower the presser foot to sew.
2. Raise the lifter to the middle position to insert or remove
fabric.
3. Lift it to its highest position to change the presser foot or to
remove thick fabric.
Reverse sewing lever
As long as you are pressing down this
button while sewing, the machine will feed
the fabric backwards.
Dropping the feed dogs
1. For dropping the feed dogs, press down
lever and move it to the direction of arrow
as illustrated.
2. To raise the feed dogs, press down the
lever and move it to the direction or arrow
as illustrated.
* Feed dogs must always be up for normal
sewing.
Texi Fox 25150