FR
METTRE LA BOBINE SUR LE BOBINEUR
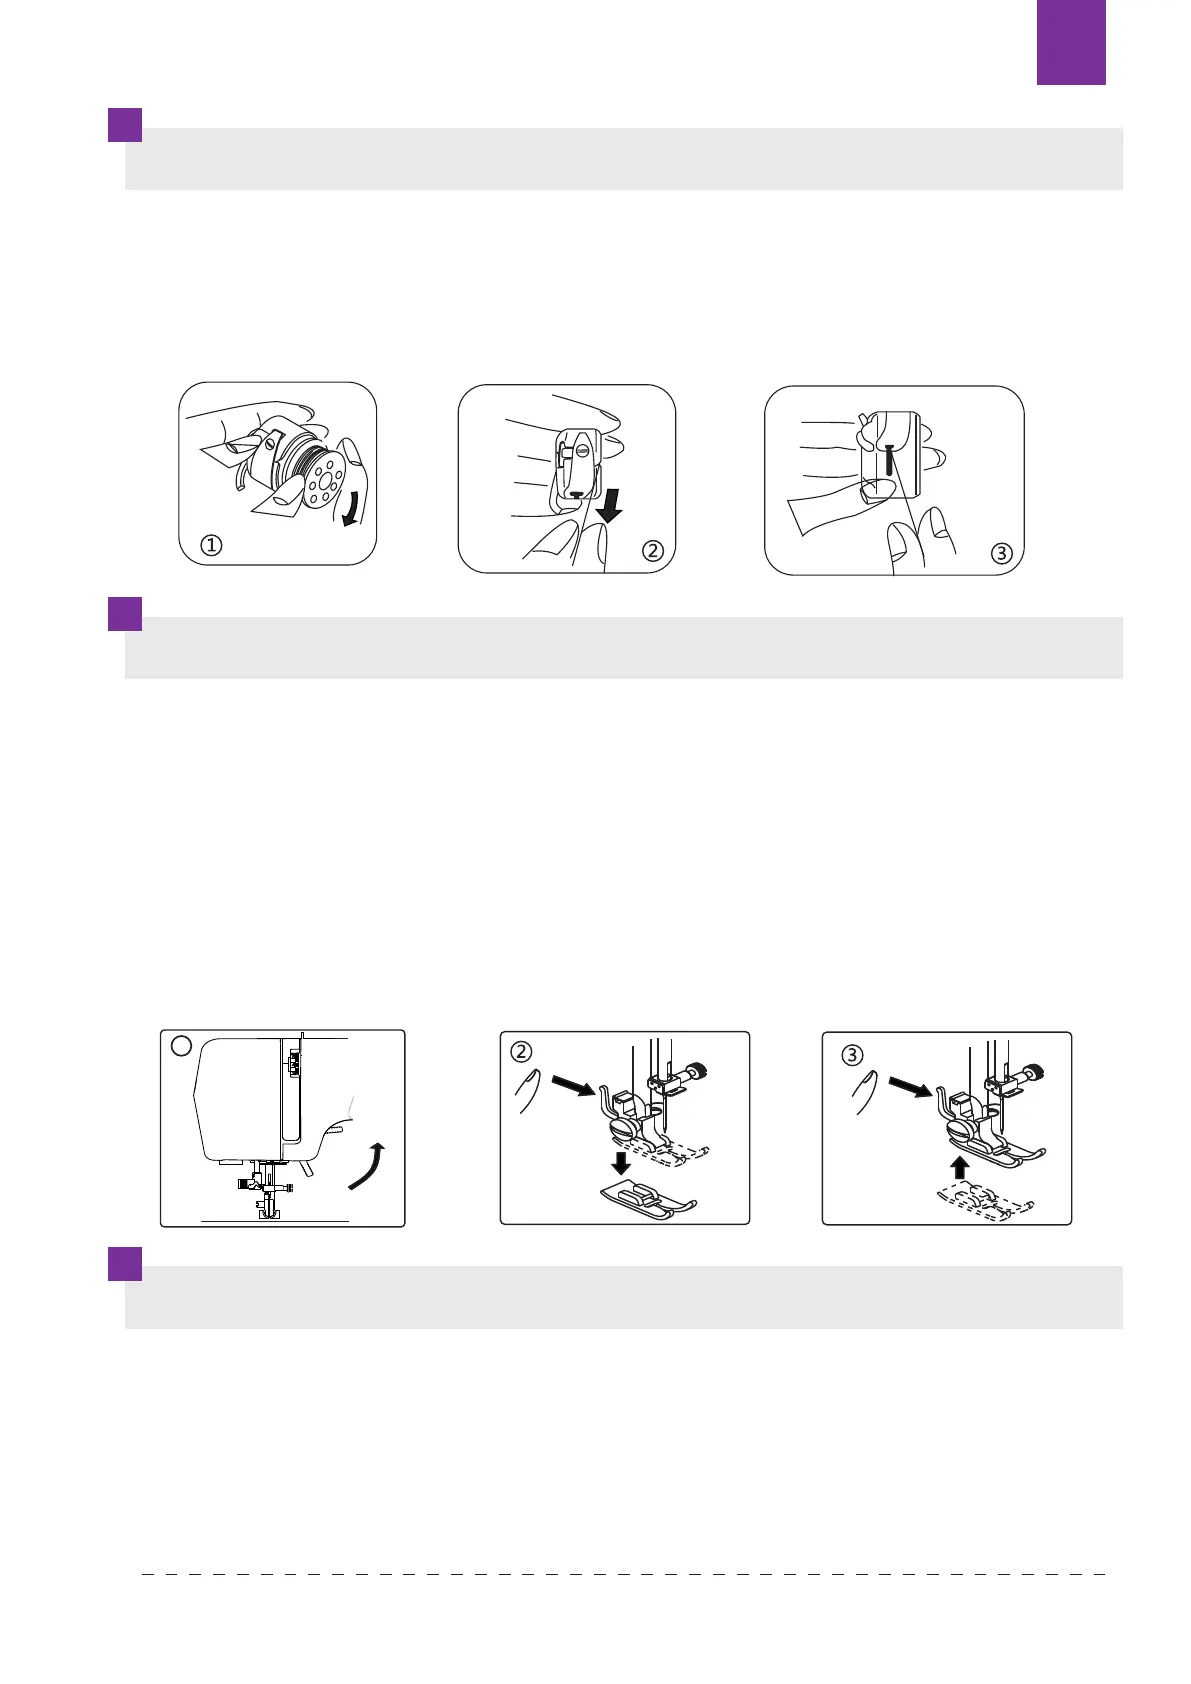
CHANGEMENT DU PIED (SYSTEME MATIC)
ENFILAGE DU FIL SUPERIEUR
1. Placez la bobine enlée sur la canette. Assurez-vous que le l se déroule dans le
sens des aiguilles d’une montre comme indiqué sur l’image.
2. Faire passer le l par la ssure de la canette
3. Ensuite faire passer le l par le ressort de réglage de la tension du l jusqu’au
trou de sortie. Faire sortir au moins 10 cm du l en dehors de la canette.
1. Tourner la roue volante ver soi de manière à ce que l’aiguille se trouve dans la plus
haute position.
2. Soulever le pied presseur s’il est abaissé (1).
3. Appuyer vers soi le levier relâchant la poignée du pied presseur (2).
4. Le pied presseur va se libérer du fermoir.
5. Placer le pied presseur voulu sur la plaque à points sous la poignée du pied
presseur de manière à ce que la coupure dans la poignée se trouve juste au-dessus
du pivot du pied presseur (3).
6. Baisser le levier du pied presseur et l’appuyer su le pied presseur an que le
mécanisme de fermeture du pied presseur se mette en marche.
Le mauvais ordre de l’enlage ou le mauvais guidage du l peut causer la
rupture du l, le passage des points, le plissage du tissu.
1. Placer l’aiguille dans la plus haute position en tournant la roue volante vers soi et
relever le pied presseur.
2. Placer la bobine avec le l sur le support de manière à ce que le l se déroule par
derrière - comme indiqué sur l’image.
6
KNOWING YOUR SEWING MACHINE
Removing or replace the bobbin case
1. Refer to page 4 to remove the Extension table, raise the needle by turning the hand wheel
toward you, then open the shuttle cover.
2. Take out bobbin case holding the latch.
3. When installing the bobbin case, the pin on the case should fit into the gap of the shuttle race.
Threading the bobbin case
1. Install the bobbin into bobbin case. Make sure the thread unwinds in the direction of arrow.
2. Pull the thread into the groove in the bobbin case slot.
3. Now pull the thread under the tension spring and into the delivery eye.
NOTE: L
eave about 10cm (4 inches) of the thread hanging out of the bobbin case. When
you pull the thread, the bobbin should spin clockwise.
Changing the presser foot
1. Turn the hand wheel toward you to raise the needle to its highest position.
Raise the presser foot.
2. Press the lever on the back of the presser foot holder. The presser foot will drop off.
3. Place the presser foot so the pin on the foot lies just under the groove of the holder.
Lower the presser foot holder to lock the foot in place.
Be sure to disconnect the power supply before operating the machine.
Attaching the seam guide(optional)
Attach the seam guide in the slot as illustrated. adjust according to
need for hems pleats etc.
Gap
1
Texi Fox 25 125

 Loading...


