ES
COLOCACIÓN DE LA CANILLA EN EL CARRETE
CAMBIO DEL PIE (SISTEMA MATIC)
ENHEBRADO DE HILO SUPERIOR
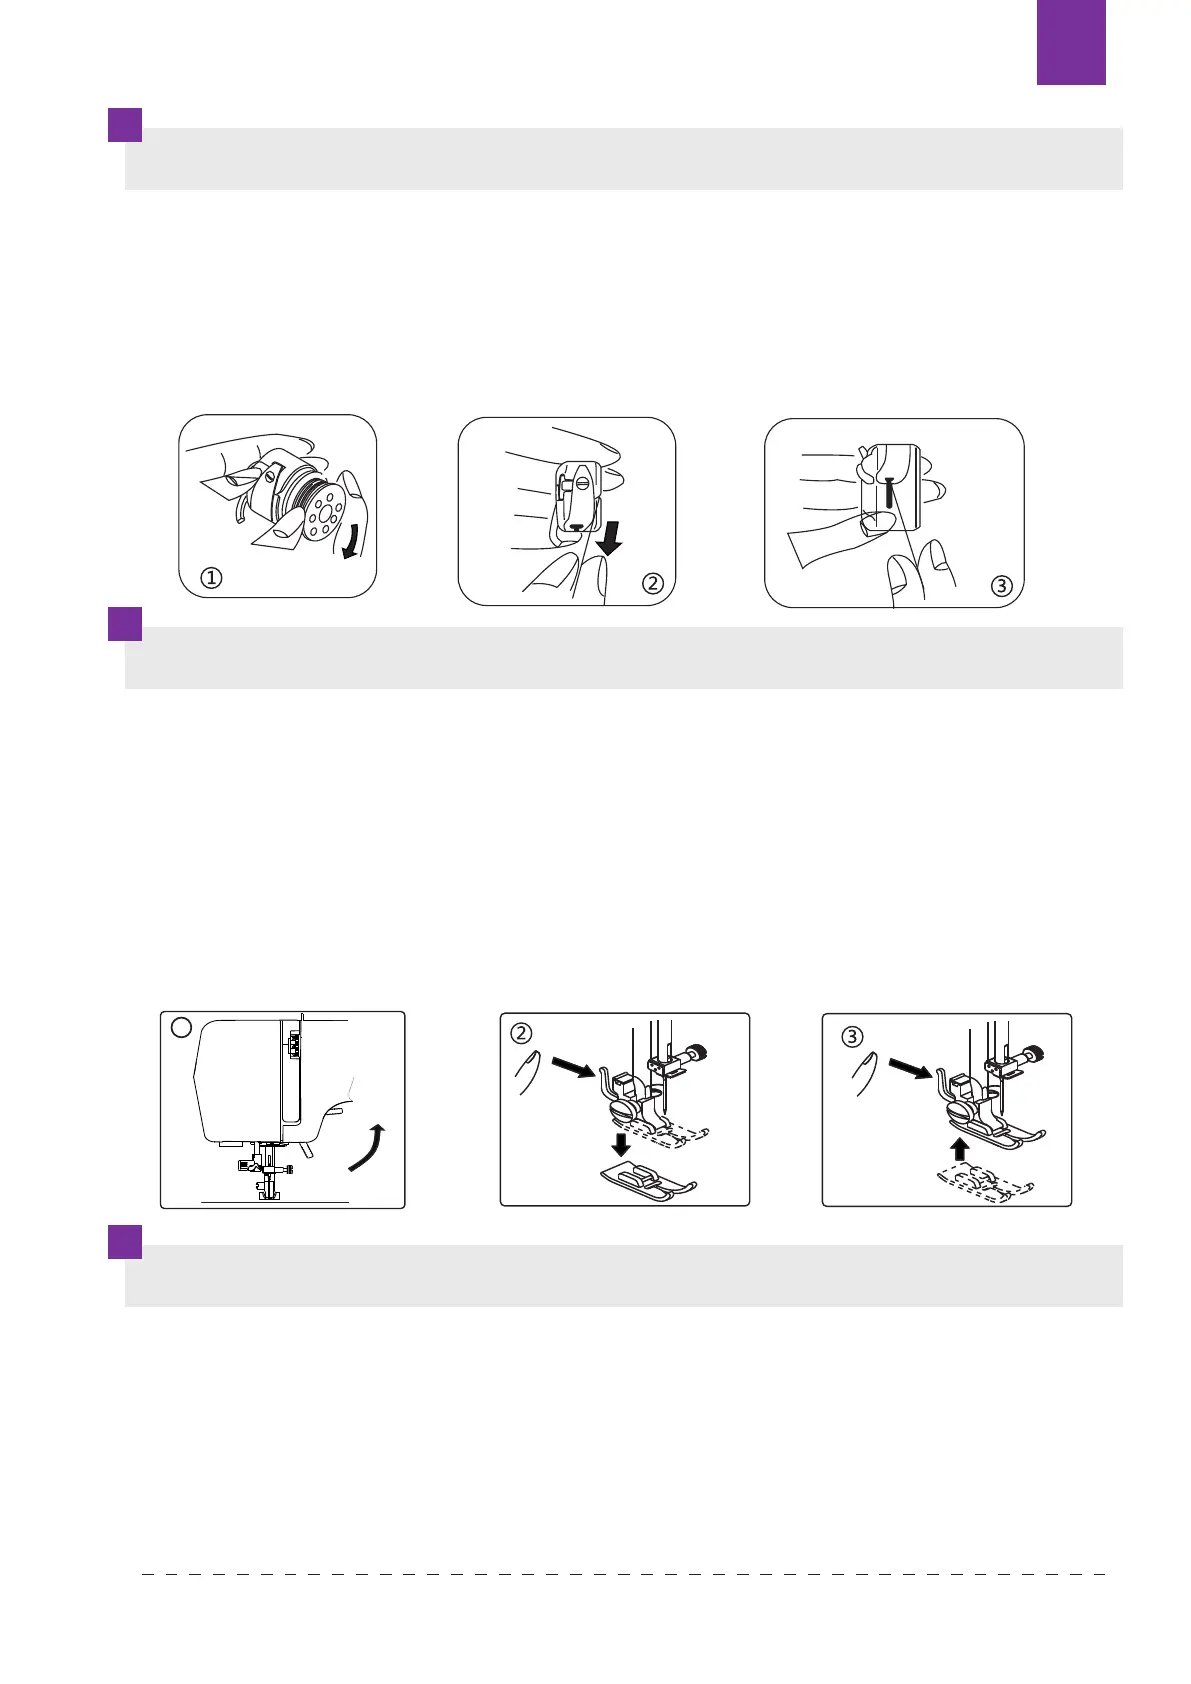
1. Coloque la canilla previamente enhebrada en el carrete. Asegúrese de que el hilo
se embobina en dirección de las manillas del reloj, siguiendo la echa - como se
muestra en el dibujo.
2. Pase el hilo a través de la ranura del carrete.
3. A continuación, pase el hilo por los muelles de regulación de tensión del hilo
hasta el oricio de salida. Saque el hilo un mínimo de 10 cm fuera del carrete.
1. Gire el volante hacía usted, hasta que la aguja se encuentre en la posición más alta.
2. Levante el prensatelas hacia arriba, si está bajado (1).
3. Presione hacia usted la palanca de liberación del soporte del pie prensatelas (2).
4. El pie se libera con un pestillo.
5. Coloque el pie deseado en la placa de aguja bajo el soporte del prensatelas, de tal
forma que la muesca del soporte se encuentre exactamente encima del eje del pie
(3).
6. Baje la palanca del prensatelas y empújela hacia el pie, hasta que salte el
mecanismo .
Un orden incorrecto en el enhebrado o en la conducción de los hilos, puede
provocar que el hilo se enganche, saltos en la puntada o arrugas en el tejido.
1. Ajuste la aguja en la posición más alta, girando el volante hacia usted y eleve el
prensatelas.
2. Coloque la canilla con el hilo en el soporte, de tal forma que el hilo se
desembobine desde atrás - tal y como se muestra en el dibujo.
6
KNOWING YOUR SEWING MACHINE
Removing or replace the bobbin case
1. Refer to page 4 to remove the Extension table, raise the needle by turning the hand wheel
toward you, then open the shuttle cover.
2. Take out bobbin case holding the latch.
3. When installing the bobbin case, the pin on the case should fit into the gap of the shuttle race.
Threading the bobbin case
1. Install the bobbin into bobbin case. Make sure the thread unwinds in the direction of arrow.
2. Pull the thread into the groove in the bobbin case slot.
3. Now pull the thread under the tension spring and into the delivery eye.
NOTE: L
eave about 10cm (4 inches) of the thread hanging out of the bobbin case. When
you pull the thread, the bobbin should spin clockwise.
Changing the presser foot
1. Turn the hand wheel toward you to raise the needle to its highest position.
Raise the presser foot.
2. Press the lever on the back of the presser foot holder. The presser foot will drop off.
3. Place the presser foot so the pin on the foot lies just under the groove of the holder.
Lower the presser foot holder to lock the foot in place.
Be sure to disconnect the power supply before operating the machine.
Attaching the seam guide(optional)
Attach the seam guide in the slot as illustrated. adjust according to
need for hems pleats etc.
Gap
1
Texi Fox 25 97