EN
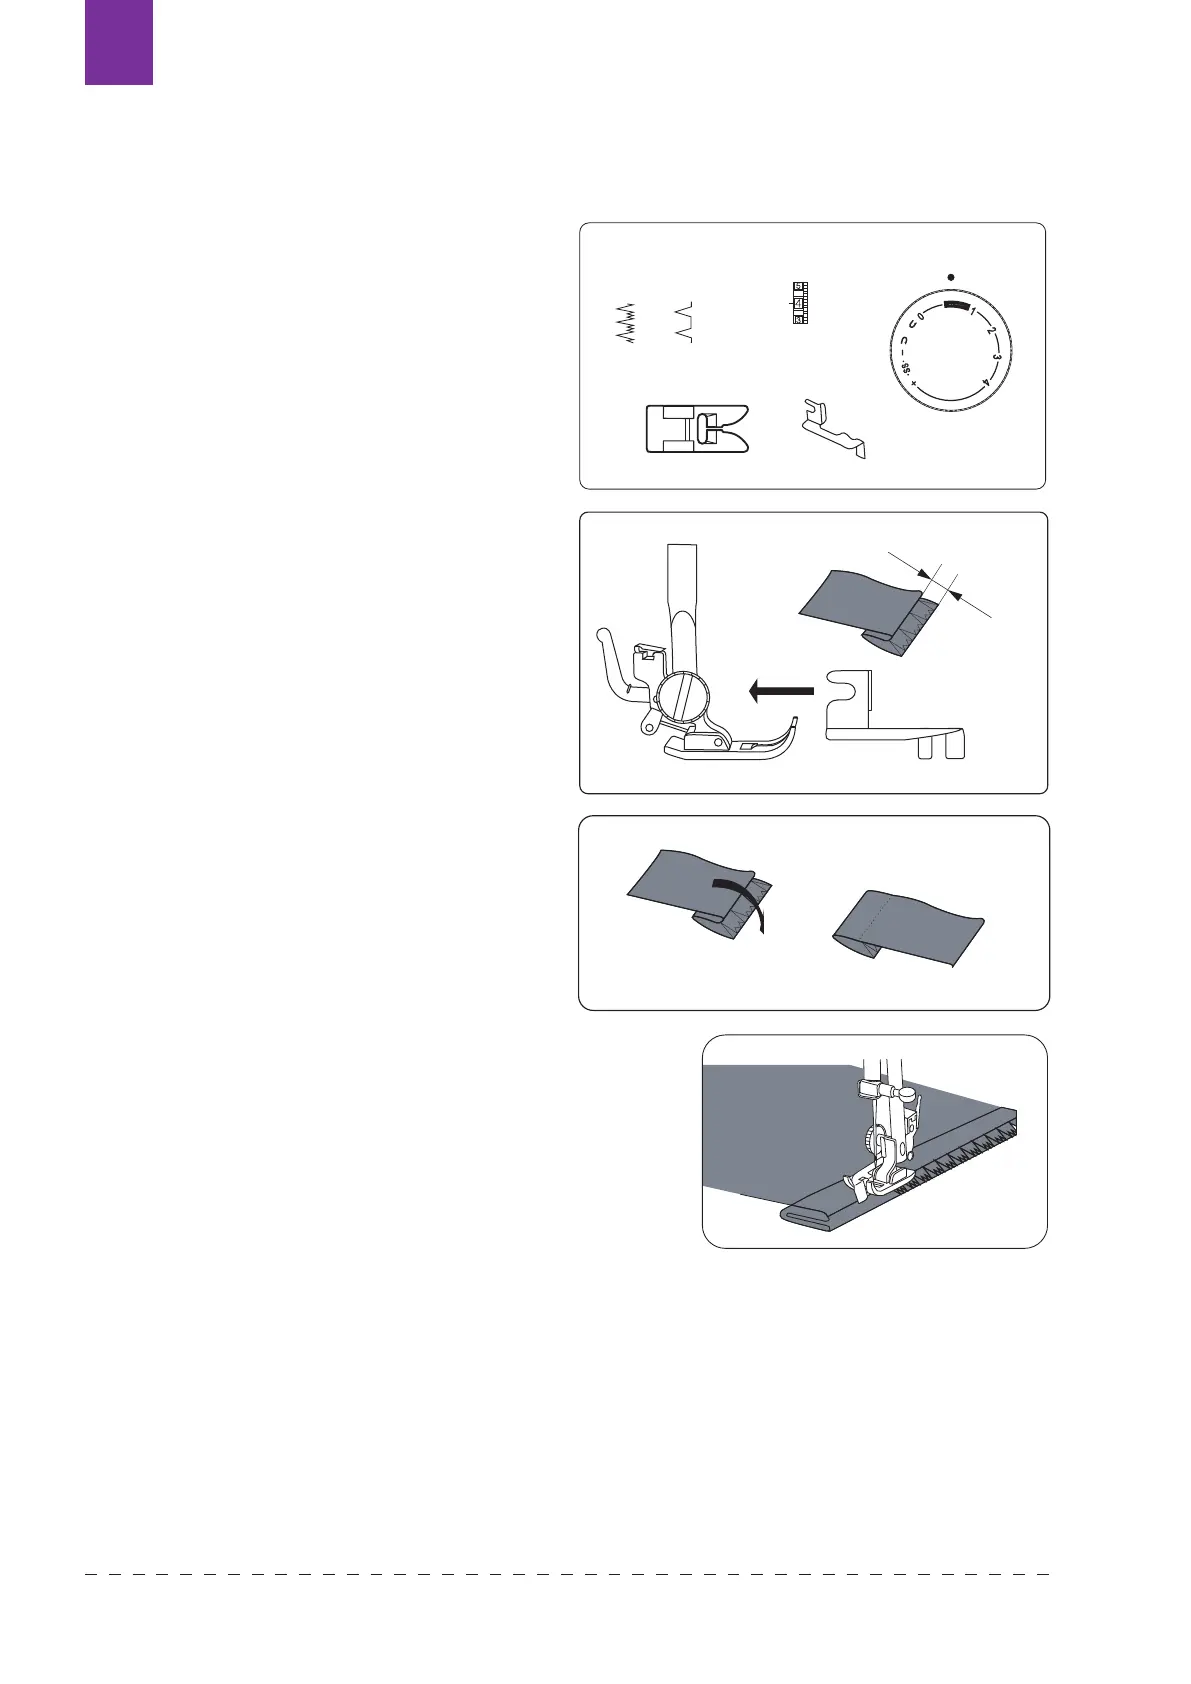
BLIND HEM STITCHING
UNIVERSAL FOOT + GUIDE
SAFETY ELASTIC STITCH (E) - Elastic blind
stitch for soft, stretchable fabrics
SAFETY STITCH (F) - Regular blind stitch for
normal rm fabrics.
Used for blind hemming in dresses, trouser
leg -this stitch will sew without stitches
showing on right side of fabric. Remember
to match colour of the thread to sewing
material.
1. Fold up the fabric as illustrated.
Distance shown on the illustration
should be around 0,4-0,7 cm.
2. Lower the presser foot, then loosen
the foot holder screw to place the hem
guide between the screw and the
shank of foot holder. Tighten the screw
making sure the hem guide is placed in
the middle of the presser foot.
3. Raise the presser foot and place the
fabric under the foot.
4. Lower the presser foot and sew very
slowly for better control, straight
sticthes should be sew near to the edge
of teh fabric and zigzag fall on the hen
and pierce the soft fold.
5. While sewing, make sure that fabric is
transported correctly.
6. Turn the fabric over when you have
completed sewing.
0.4~0.7cm
UTILITY STITCHES
Blind stitch
Fold up the fabric as illustrated.
Lower the presser foot, then loosen the foot holder
screw to place the hem guide between the screw
and the shank of foot holder. Tighten the screw
making sure the wall of hem guide is placed in the
middle of the toes of the presser foot.
Raise the presser foot and place the fabric under the
foot so that the soft fold rests against the wall of hem
guide.
Lower the foot, then stitch slowly for better for better
control so that the zigzag stitches fall on the hen
allowance and pierce the soft fold. While sewing,
make sure the soft fold runs along the wall of hem
guide.
Spread the fabric flat with the right side facing up.
+
1~4
0.5~1
E
F
Machine Setting
19
0.4~0.7cm
UTILITY STITCHES
Blind stitch
Fold up the fabric as illustrated.
Lower the presser foot, then loosen the foot holder
screw to place the hem guide between the screw
and the shank of foot holder. Tighten the screw
making sure the wall of hem guide is placed in the
middle of the toes of the presser foot.
Raise the presser foot and place the fabric under the
foot so that the soft fold rests against the wall of hem
guide.
Lower the foot, then stitch slowly for better for better
control so that the zigzag stitches fall on the hen
allowance and pierce the soft fold. While sewing,
make sure the soft fold runs along the wall of hem
guide.
Spread the fabric flat with the right side facing up.
+
1~4
0.5~1
E
F
Machine Setting
Texi Fox 2578