Redstone™ Optical Spectrum Analyzer Chapter 8: Operation
Page 33 STN053070-D02
8.6.2. Moving Fixed Markers
A fixed marker can be moved to a specific position by typing a new number into the Position column in the data
table, see Figure 3231.
8.6.3. Automatically Mark Peaks
Pressing the button “Mark Peaks” will add one fixed marker to each peak in the currently active trace that has
previously been automatically detected with the Peak track analysis tool (see Section 8.9.6 Peak Track). The
first marker will be added to the highest peak in the spectrum, the second marker to the second highest peak,
etc. Note that this will add fixed markers to the found peaks in the currently active trace; the positions of these
markers will not change until you move them.
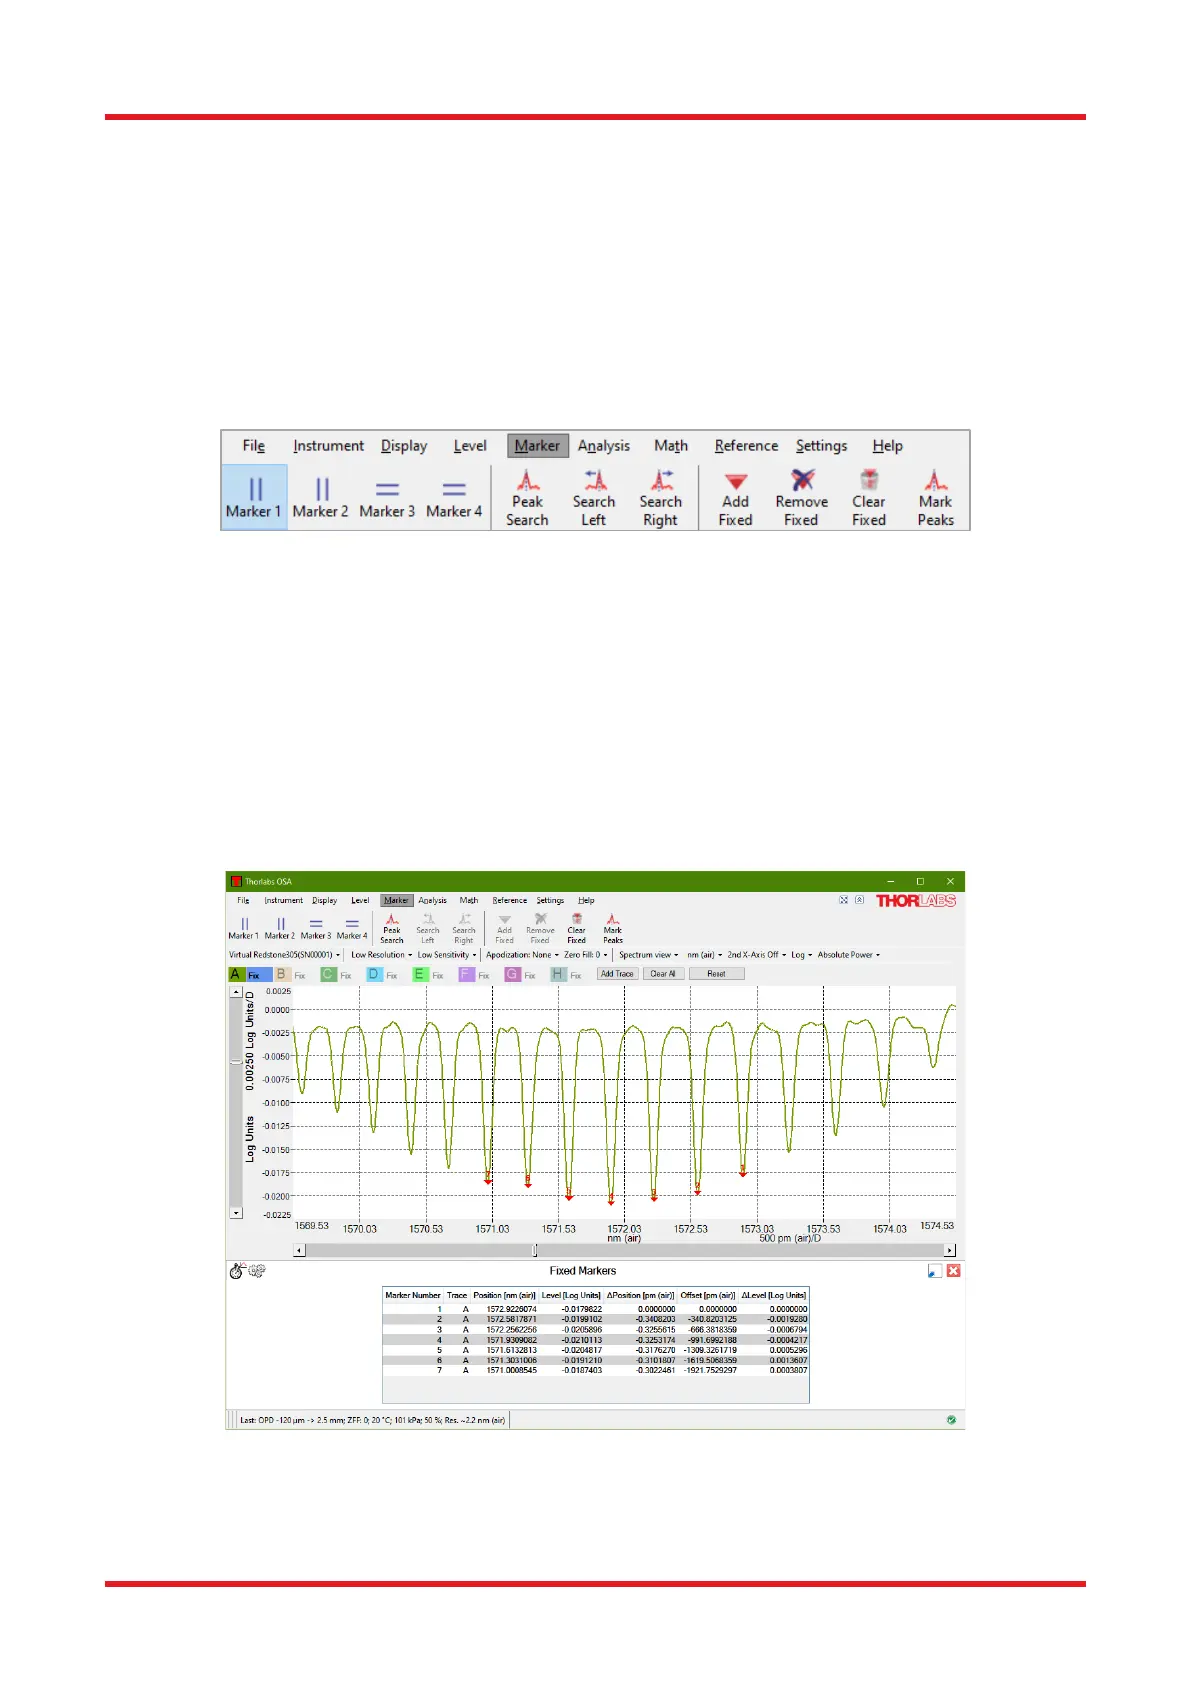
Figure 31. Marker Menu
8.6.4. Value of Markers
As long as at least one fixed marker is enabled, a data table will be shown in the area below the main data
display area (see Figure 3231) or in a separate floating window. The data table lists all currently shown fixed
markers with its identifying number, the trace to which the fixed marker is connected, position, and the value of
the connected trace at the fixed marker’s position. Further data columns are also displayed, such as “ΔPosition”
(relative position of the marker to the preceding marker, in current x-axis units), “Offset” (relative position of the
marker to the first marker, in current x-axis units), and “ΔLevel” (relative level of the Active Trace at the marker
to the preceding marker, in current y-axis units). Right-clicking in the data table will bring up a context menu
through which it is possible to bring a marker into view or remove it, copy a line or the entire table to the clipboard,
or save the data table to file. A fixed marker can be moved by editing the value in the position column.
Figure 32. Fixed Marker Data Table Shown Below Main Data Display Area

 Loading...


