Redstone™ Optical Spectrum Analyzer Chapter 8: Operation
Rev C, January 21, 2022 Page 36
• Exp(-A*B)
• -Log10(A/B)
• MinHold(A-B)
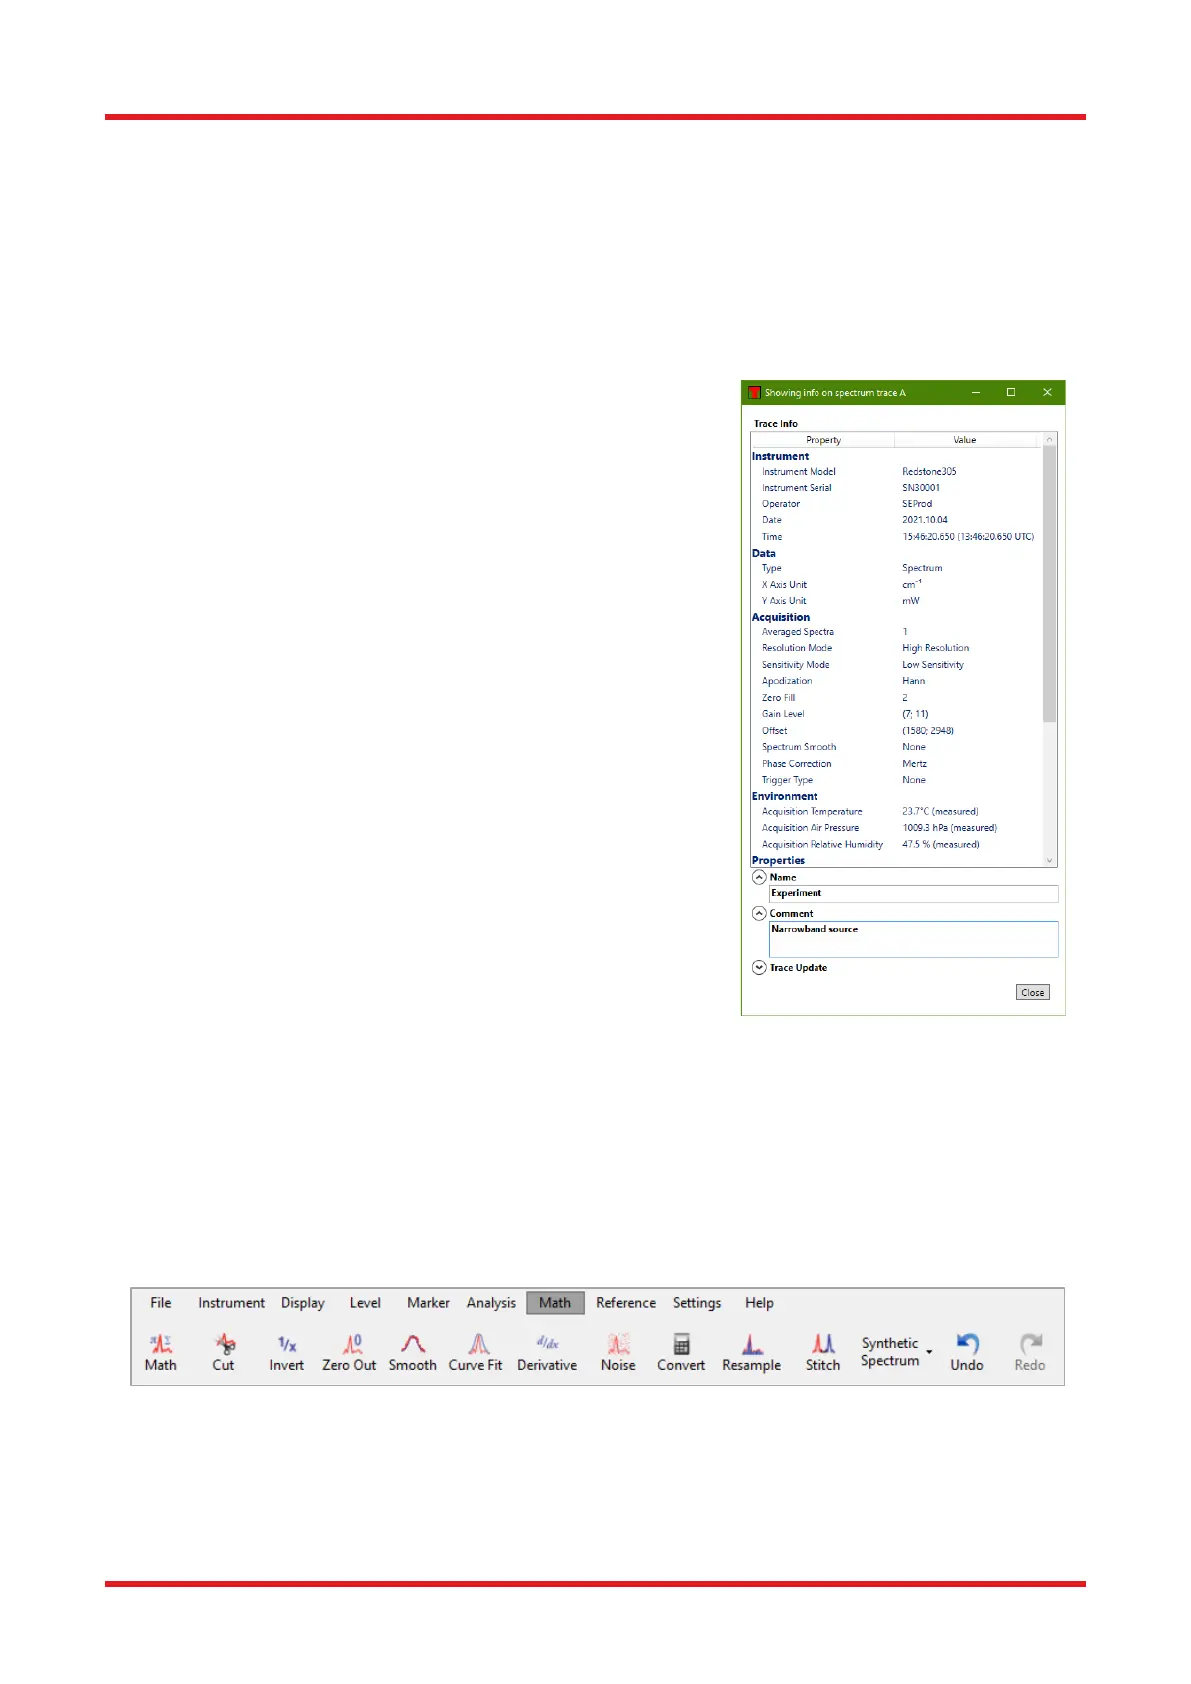
8.7.4. Viewing Properties of a Trace
To see the properties of a trace, click on the icon or the label of the trace that you want to inspect, and select
the menu item “View Info.” This will open a window displaying basic information of the trace, such as the serial
number of the OSA, date and time of the acquisition, and the settings
that were used during the acquisition.
The Trace info window will hover above all other windows as long as
it is open and automatically update whenever the trace is updated.
The Trace info window contains two editable input fields named
“Name” and “Comment.”
• The Name field allows the user to give the trace a short name.
The name can be up to 32 characters long. The name will be
stored when saving the trace to file.
• The Comment field allows the user to give a longer description
of the trace. The comment can be up to 4096 characters long.
The comment will be stored when saving the trace to file.
The name and comment will be stored automatically while typing and
retained when the trace is updated. Clearing the trace will also clear
the name and comment. The name or comment can be shown in the
legend of the main data display area, see Section 8.3.11 Displaying a
Legend in the Data Display Area.
8.7.5. Reordering Traces
The traces will always be drawn from the left to the right, i.e., Trace A
will always be drawn first followed by Trace B, Trace C etc. If one trace
covers another you may wish to change the order of the traces. This
can be done by dragging and dropping the Trace Labels into the
desired order. Put the mouse cursor over the icon of the trace you
want to change, press and hold the left mouse button, and move the
mouse cursor to the right or the left. As you move the mouse cursor, the traces will be reordered in the Trace
controls bar and in the graph. Release the left mouse button when you are content with the new order of the
traces.
8.7.6. Math Operations
The buttons on the math menu all work on the currently Active trace and are disabled while collecting data. The
math operations can be undone by pressing the “Undo” button. The buttons’ functions are explained below.
Figure 35. Math Menu
Math: This button brings up a dialog box (shown in Figure 3635) that allows mathematical operations to be
performed on one or several spectra/interferograms. For example, the user may multiply a spectrum by a scalar,
add two spectra together, or divide one spectrum by another. The expression to be calculated is typed into the
dialog box, which uses the following rules for formatting:

 Loading...


