66
Chapter 6
Customize Your Network Settings
• 802.11ax only: Select if you are using 802.11ax wireless clients.
Note: When 802.11ax only mode is selected, only 802.11ax wireless stations can connect to the mesh device. It is
strongly recommended that you to keep the default settings.
Channel: Select an operating channel for the wireless network. It is recommended
to leave the channel to Auto if you are not experiencing the intermittent wireless
connection issue.
When PSC (Preferred Scanning Channel) is enabled, only channels with higher
connectivity will be reserved to ensure 6 GHz device connections.
Channel Width: Select the channel width from the drop-down list. The default setting is
Auto, which can adjust the channel width for your clients automatically.
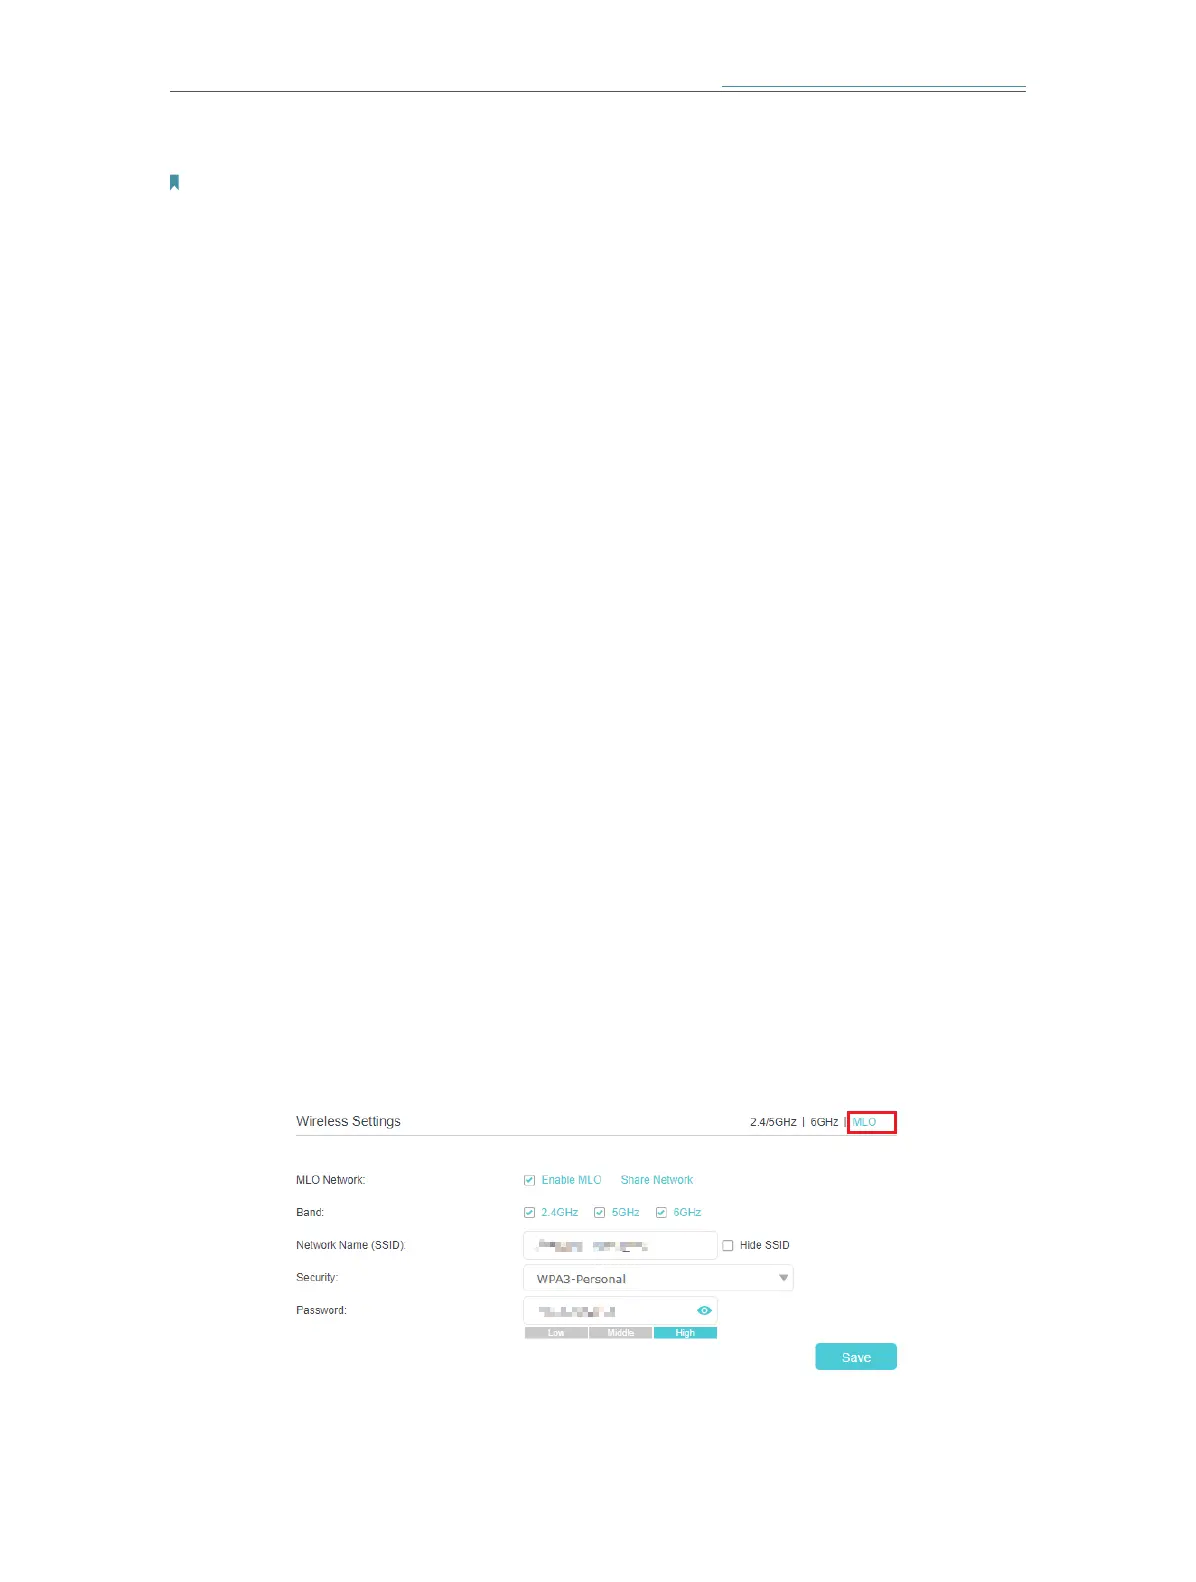
¾ To create your MLO network:
MLO (Multi-Link Operation) network enables the connected Wi-Fi 7 clients
to simultaneously send and receive data across different frequency bands,
greatlyimproving the transmission rate and reliability.
1. Go to Setting > Wireless > Wireless Settings (AP Mode) or Advanced > Wireless >
Wireless Settings (Router Mode), and switch to the MLO section.
2. Enable MLO Network.
3. View the radio bands that the MLO network takes effect.
4. Specify an SSID in Network Name (SSID).
5. Select the Security type. Specify a password if the security type you selected
requires it. This value is case-sensitive.
6. You can also click Share Network to share the SSID and password with your guests.
7. If you select Hide SSID, your SSID won’t display when you scan for local wireless
networks on your wireless device and you need to manually join the MLO network.
8. Click Save to save your settings.
¾ To enable network roaming: