Sending Functions
ADVANCED OPERATION GUIDE 2-21
2
Scan Density
Use the procedure below to adjust the scanning density when sending
scanned originals. You can adjust the scan density either automatically or
manually.
The table below shows the available settings.
The procedure for adjusting the scanning density when sending a scanned
image is explained below.
1
Place the originals on the platen.
2
Press the Send key.
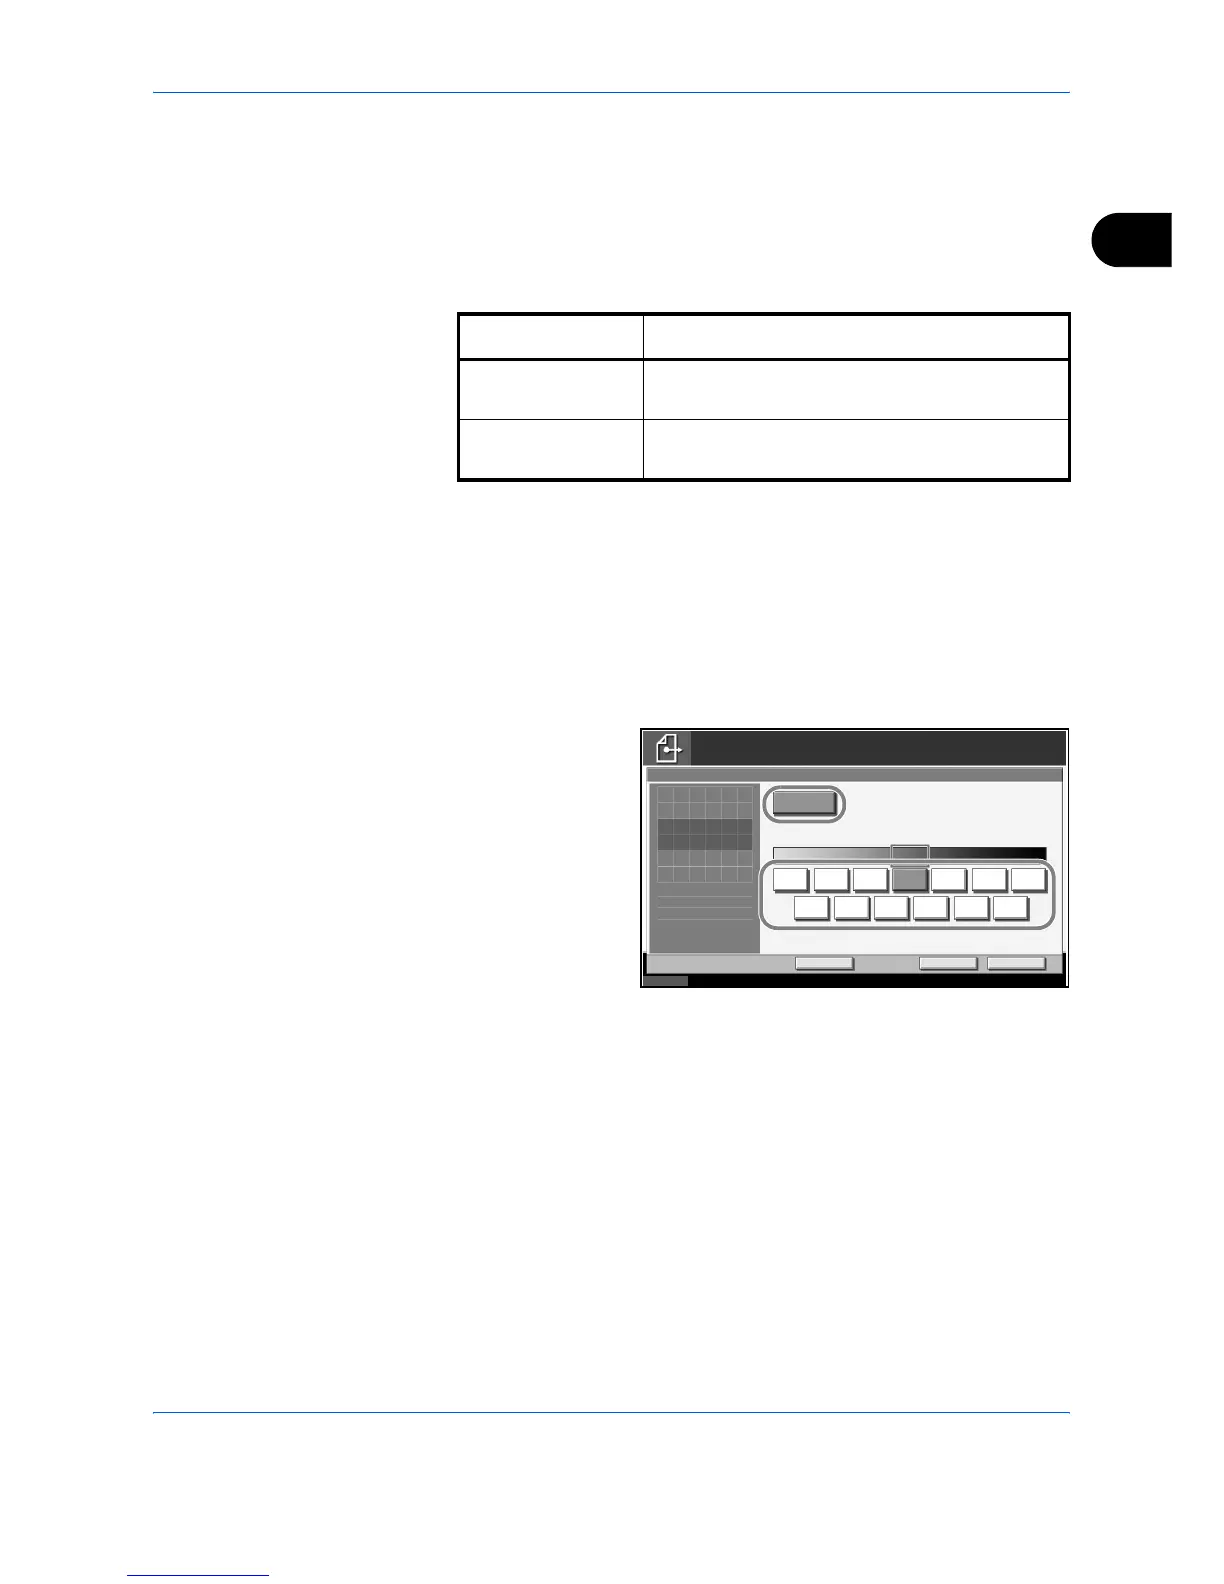
3
Press [Color/Image] and then [Density].
4
When selecting
manual density
adjustment, press [-
3] to [+3] (Lighter -
Darker) to adjust
density.
When selecting auto
density adjustment,
press [Auto].
5
Press [OK].
6
Specify the destination, and press the Start key to start sending.
Item Detail
Manual density
adjustment
Can set density using 7 or 13 levels.
Auto density
adjustment
Can set the optimal scan density according to
the density of original.
Status 10/10/2007 10:10
Ready to send.
Destination
Add Shortc ut Cancel O K
Darker
Dens ity
Auto
0 +1 +2 +3-1-2-3
1
Norm alLighter
-2.5 -1.5 -0. 5 +0.5 +1 .5 +2. 5
Enter Destination.
Press [OK] to display
the image.