System Menu
6-20 ADVANCED OPERATION GUIDE
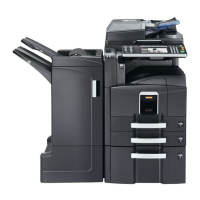
Output Tray
Select output tray respectively for copy jobs, print jobs from Custom Box,
computers, and FAX RX data. The options are as follows.
NOTE: Optional job separator, and document finisher are required.
FAX RX data output can be specified when the optional fax kit is installed.
Use the procedure below to select the output tray.
1
Press the System Menu key.
2
Press [Common Settings] and then [Next] of Output Tray.
3
Press [Change] of Copy/Custom Box, Printer, or FAX Port 1 or FAX Port 2.
NOTE: FAX Port 1 appears when the optional fax kit is installed. If you
have 2 optional fax kits installed, Fax Port 2 appears. You can specify the
output tray for the second kit (Dual FAX).
4
Select Output Tray.
For [Finisher Tray],
select [Face Up]
(print surface up) or
[Face Down] (print
surface down) for
paper orientation at
output.
5
Press [OK].
Output Tray Descriptions
Top Tray Delivery on Top Tray of the machine.
Finisher Tray*
* Select [Face Up] (print surface up) or [Face Down] (print surface
down) for paper orientation at output.
Delivery on Tray set to the optional
document finisher or built-in finisher.
Job Separator Delivery on the optional job separator.
Common Settings - Copy /Cust om B ox
Cancel OK
Status 10/10/2007 10:10
Select output tray for copy jobs.
Top Tray Finisher Tray
Face Up
Output Face
Face Down