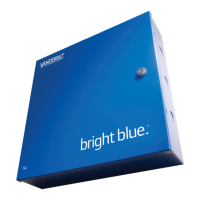
Power method 1 - Single Power Supply
Utilize a single UL Listed Power Limited power supply:
▪ Connect power cables from the power supply to Main Power In VBB in order to power bright blue
▪ Connect additional cables from the same power supply to Data Channel 1 – 2 Power In Devices 1 – 8 to
Power In Devices 9 – 16 as needed power peripheral devices.
Power method 2 - Multiple Power Supplies
Utilize multiple UL Listed Power Limited power supplies:
▪ Connect one power supply to Main Power In to power bright blue
▪ Connect additional power supplies to Data Channel 1 – 2 Power In Devices 1 – 8 to Power In Devices 9 –
16 as needed power peripheral devices.
LED power indicators are provided for each Power In connection and Main Power In VBB connection
Configuration Guidelines
▪ The bright blue controller has 2 data channels to connect devices via an RS-485 communication protocol
and 2 reader interfaces (Channel 0) supporting Wiegand or Magstripe reader heads. Each RS-485 data
channel port can support up to 16 devices. A total of 32 devices for all channels can be connected to bright
blue.
▪ bright blue channels will provide power to the connecting devices. Each RS-485 data channel is divided
into 2 rows that will provide power and communication to 8 devices. Each row will be labeled for devices 1 -
8 and 9 - 16 respectively.
▪ Each row of the RS-485 data channels provides either 12VDC or 24VDC to the connected devices
depending on what type of power supply is provided for that row of the data channel.
▪ bright blue allows different types of RS-485 devices (VBB-RI, AD-300, VIP, AD-400 Wireless) to use the
same data channel.
▪ Every device must be connected back to the proper device number where the RS-485 communication and
power will be provided.
▪ A UL Listed Power Limited, Power Supply capable of 4 hours standby power will be needed for each of the
4 sections that will provide power to the external devices.
▪ Please refer to power requirements for each device connecting to bright blue.
▪ Devices may be powered independently of bright blue with a local power source.
Installation and Configuration Steps
1 Mount bright blue controller to wall.
2 Connect all peripheral devices (VBB-RI, VBB-NRI, Wiegand Readers, AD-300, VIP, PIM or PIM-400). See
specific device chapters for details.
3 Connect 12 VDC or 24VDC power supply to Main Power In VBB of bright blue controller.
4 Connect power to Data Channel 1 – 2 Power In Device 1 – 8 to Power In Device 9 – 16 as needed.
5 Turn on the power supply to bright blue and any additional power supplies.
6 Configure the bright blue IP address, date and time. See the bright blue IP Configuration and bright
blue Date and Time setup section for details.