Manual VIPA CPU 21x Chapter 3 Deployment CPU 21x
HB103E - Rev. 05/45 3-7
• Go to www.vipa.de > Service > Download > GSD- und EDS- Files >
Profibus and download the file Cx000023_Vxxx.
• Extract the file to your work directory. The vipa_21x.gsd (german)
respectively vipa_21x.gse (english) can be found at the directory
VIPA_System_200V.
• Start the Siemens hardware configurator and close every project.
• Go to Options > Install new GSD file
• Navigate to the directory System_200V and choose the corresponding
file vipa_cpu21x.gsd (german) or vipa_cpu21x.gse (english)
Now the modules of the VIPA System 200V are integrated in the hardware
catalog at Profibus-DP \ Additional field devices \ I/O \ VIPA_System_200V.
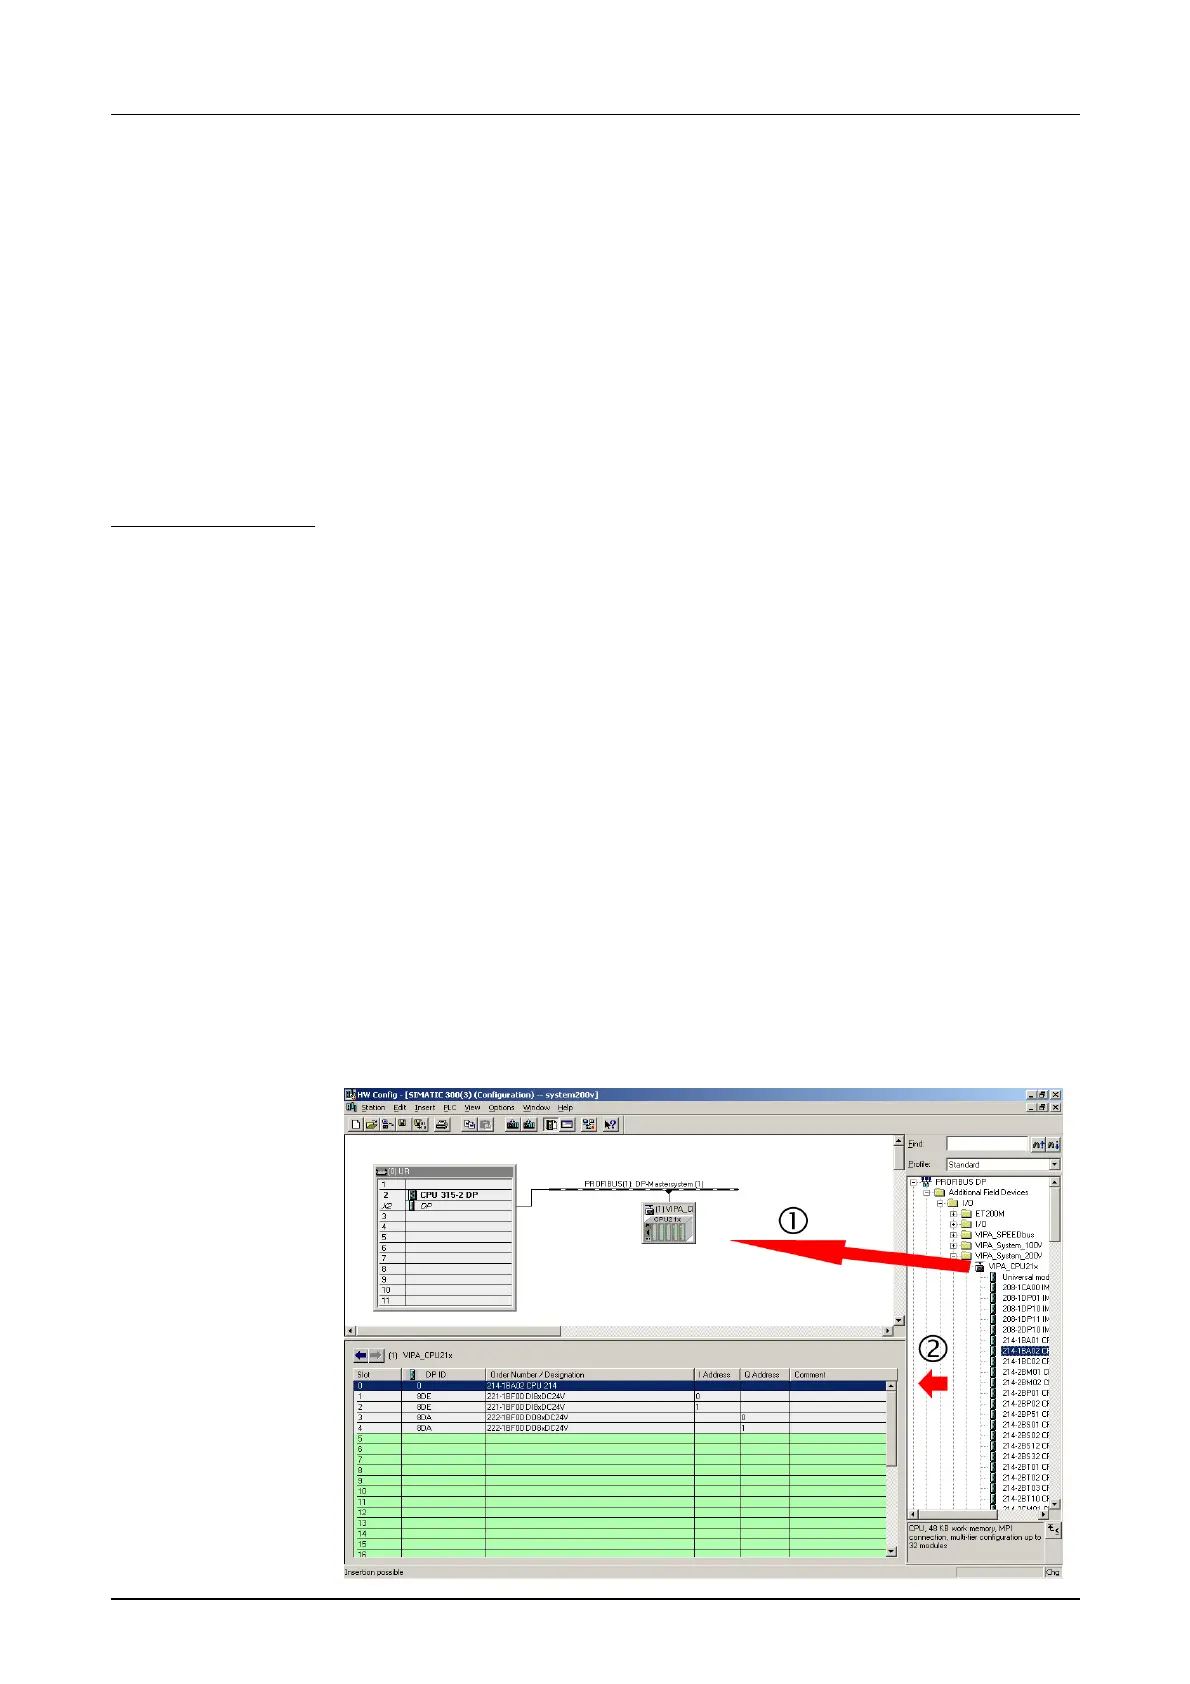
• Start the Siemens hardware configurator with a new project and insert a
profil rail from the hardware catalog.
• Place at the 1
st
possible slot the CPU 315-2DP (6ES7 315-2AF03 V1.2)
from Siemens.
• If your CPU 21x provides a DP master, you may now connect it to
Profibus and include your DP slaves.
The System 200V modules have to be configured after project engineering
of the CPU 21x as described below:
• Create a Profibus subnet (if not yet available).
• Attach the System "VIPA_CPU21x" to the subnet. The respective
entries are located in the hardware catalog under PROFIBUS DP >
Additional Field Devices > IO > VIPA_System_200V. Assign Profibus
address 1 to this slave.
• Place the VIPA CPU 21x that you want to deploy at the 1
st
plug-in
location of the configurator by taking if from the hardware catalog.
• Include your System 200V modules in the location sequence behind it.
• Save your project.
Including the
GSD- file
Project engineering
CPU 21x
Project engineering
System 200V
modules
 Loading...