Tech. Dok. / L23 880 02 / 01.00.02 © MICHAEL WEINIG AG
Basic setting
4-6 Profimat 23 E
Right-hand spindle
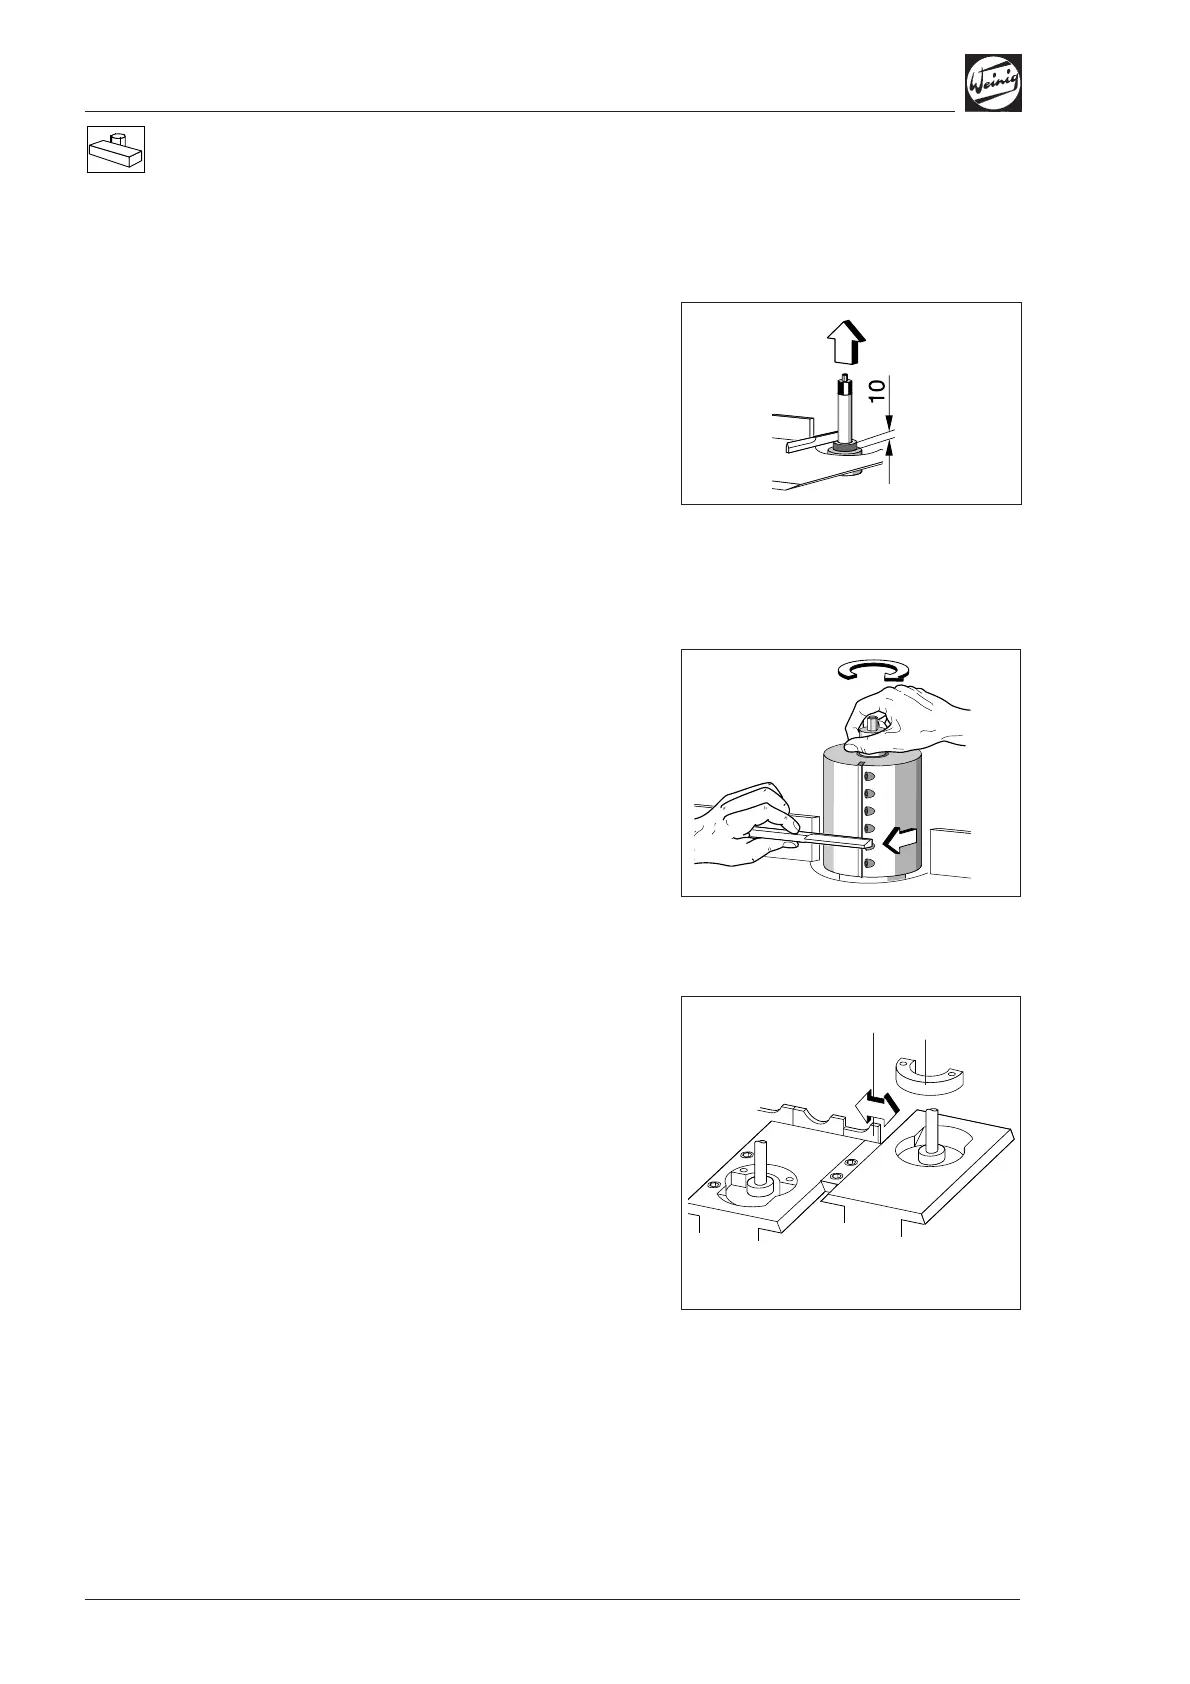
Axial basic setting
• Position spindle ring 10 mm (0.394") on
spindle.
• Position setting straight edge on spindle ring.
• Release clamp and adjust spindle in axial
direction until setting straight edge is aligned
with table.
• Set numerical indicator to 10 mm (0.394")
(see page 4-1).
Note any chip removal on the last bottom
spindle.
Radial basic setting
• Fit dimensioned tool; radius 62.5 mm (2.460")
in this case.
• Hold setting straight edge against fence.
• Release spindle clamp and adjust spindle
radially in relation to tool.
• Set numerical indicator to 62.5 mm (2.460")
(see page 4-1).
The numerical indicator can be set to 0 if
measured (calibrated) tools are not used.
Table plates, fences
• Use insert (1) (optional) for small tool cutting
circles; remove insert for large tool cutting
circles.
• Set fence (2) within 3 mm (0.118") of the tool
cutting circle. Release clamping screws on rear
of fence support for this purpose.
(2)
(1)