Tech. Dok. / L23 880 02 / 01.00.02 © MICHAEL WEINIG AG
Basic setting
4-10 Profimat 23 E
3
62,5
0062 5
0062 5
(1) (2)
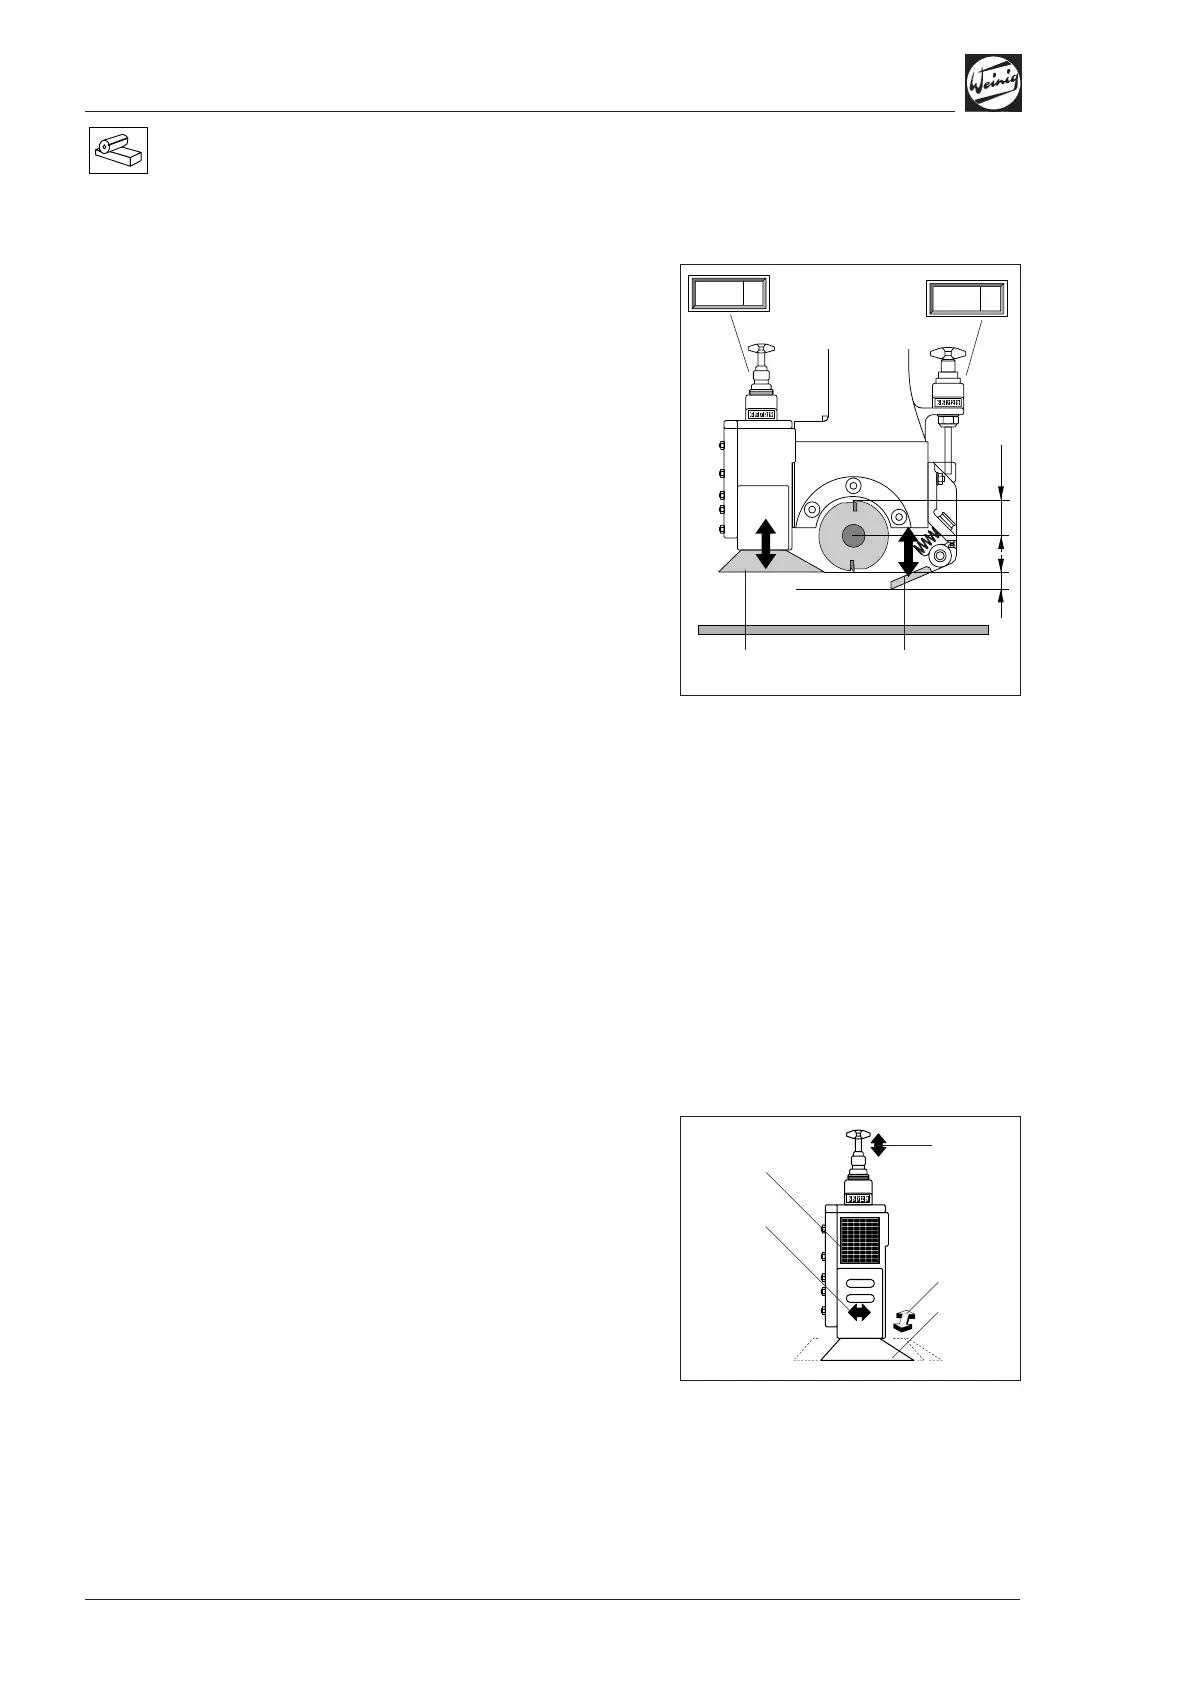
Basic setting of top pressure
elements
• Set pressure shoe (1) after the spindle to the
smallest tool cutting circle by holding the
setting straight edge against the underside of the
pressure shoe.
• Release clamping screw on numerical indicator
(optional) and set indicator to tool radius, in this
case 62.5 mm (2.46").
• Then set chipbreaker (2) before tool so that it is
3 mm (0.125") below the tool.
• Hold setting straight edge underneath chip-
breaker and adjust pressure element in relation
to setting straight edge.
• Set chipbreaker 3 mm (0.125") lower in
accordance with numerical indicator (if
installed). This automatically sets a pretension
of 3 mm (0.125").
• Release clamping screw on numerical indicator
and set tool radius, in this case 62.5 mm
(2.460").
Pressure shoe (1) and chipbreaker (2) can now be
set to new tool cutting circles without delay in
accordance with the numerical indicator.
When the basic settings have been made for the
top spindle and upper pressure elements, the
entire assembly (spindle, chipbreaker, feed) must
be set to the required workpiece height.
Pressure shoe after top spindle
• Set pressure shoe (1) to minimum tool cutting
circle up/down (2) and to maximum tool cutting
circle forwards/backwards (3) for profile tools.
• If a profile guide is fitted, it must be set
forward/backward in relation to the profile.
Ensure that the pressure shoe does not press
against the machine fence when setting is
complete.
• Set hold-down pressure on pressure shoe as
shown in table (5).
(5)
(2)
(1)
(3)
(4)