6Setups
124
1.
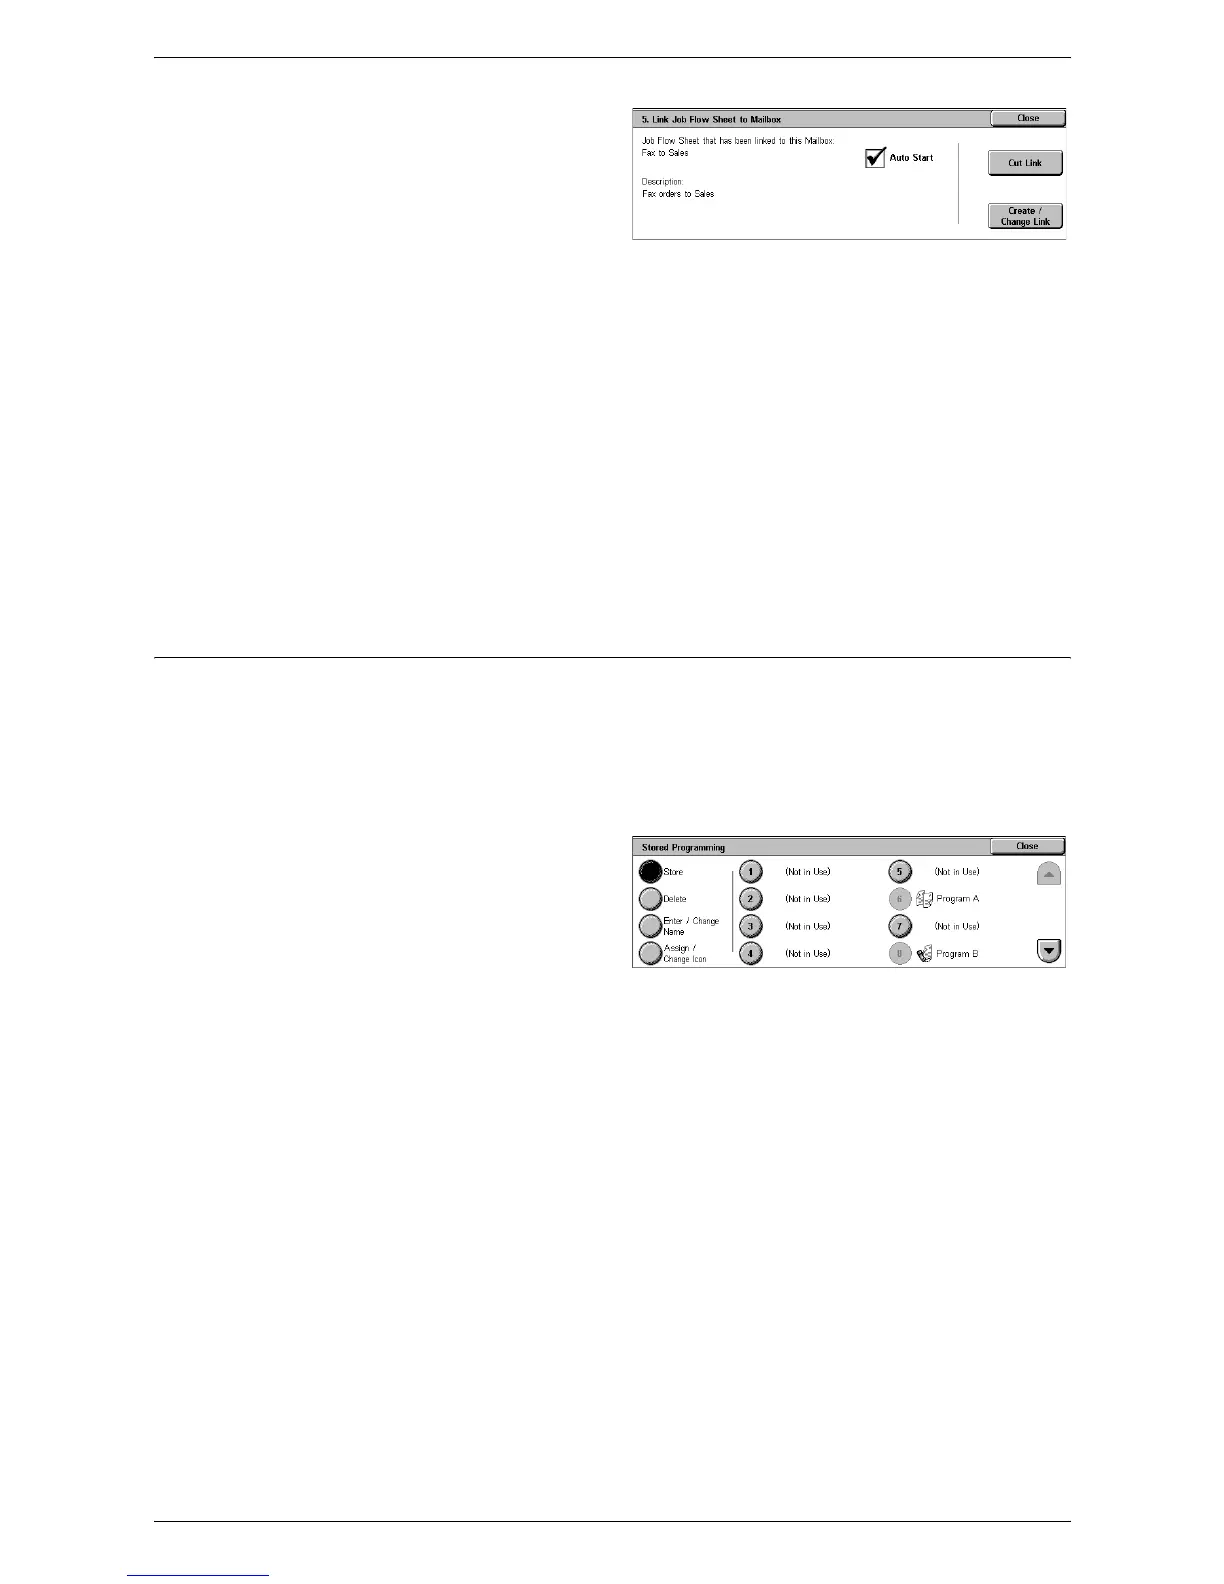
Select [Link Job Flow Sheet to
Mailbox] on the [Mailbox XXX –
Create/Delete] screen.
2.
Change the required settings.
3.
Select [Close].
Cut Link
Removes linkage with a job flow sheet if any linkage has already been made.
Create/Change Link
Allows you to select a job flow sheet to be linked with the mailbox. For the displayed
[Sheet Filtering], [Create], and [Edit/Delete] buttons, refer to
Create Job Flow Sheet on
page 125
.
NOTE: The [Auto Start] check box and the [Start] button also appear on the [Link Job
Flow Sheet to Mailbox] screen when the mailbox has been linked with any job flow
sheet. Checking the [Auto Start] check box causes the linked job flow sheet to be
automatically executed when a new document is saved in the mailbox. Selecting
[Start] causes the execution of the linked job flow sheet to be started.
Stored Programming
This feature allows you to register a series of operations with job numbers.
Registering Operations with a Job Number
You can store up to 58 consecutive operations for each job number. To register the
required operations with a job number, follow the steps below.
1.
Select [Stored Programming] in
the [Group] menu.
2.
Select [Store], and then select a
job number that reads “Not in
Use”.
3.
Perform the operations to be stored for the job number.
NOTE: You can store operations performed on the control panel, except operations
performed in the [Setup] menu on the [Tools] screen.
4.
Press the <Start> or <Clear All> button on the control panel.
Store
Selecting this button and then selecting a job number allows you to register a series of
operations with the job number. To complete registering operations, press the <Start>
or <Clear All> button on the control panel.
Delete
Selecting this button and then selecting a job number deletes the operations registered
with the job number.
Enter/Change Name
Selecting this button and then selecting a job number allows you to enter a name for
the job number using the screen keyboard. The name can be up to 18 characters long.