Considerations before installation Yamatake Corporation
3-2 ST3000 Smart Transmitter Series 900 Electronic Differential Pressure/Pressure Transmitter
3-2 : Considerations for SFC
Install SFC battery pack
If the SFC battery pack was removed for shipping and/or storage, you will have to
install the battery pack and charge the batteries before you can operate the SFC.
The procedure in Table 3-1 outlines the steps for installing and charging the battery
pack.
Table 3-1 Installing and Charging SFC Battery Pack
Step Action
1 Turn SFC face down on working surface. Use metric hex wrench (2.5
mm) to remove screw in battery compartment cover and remove
cover.
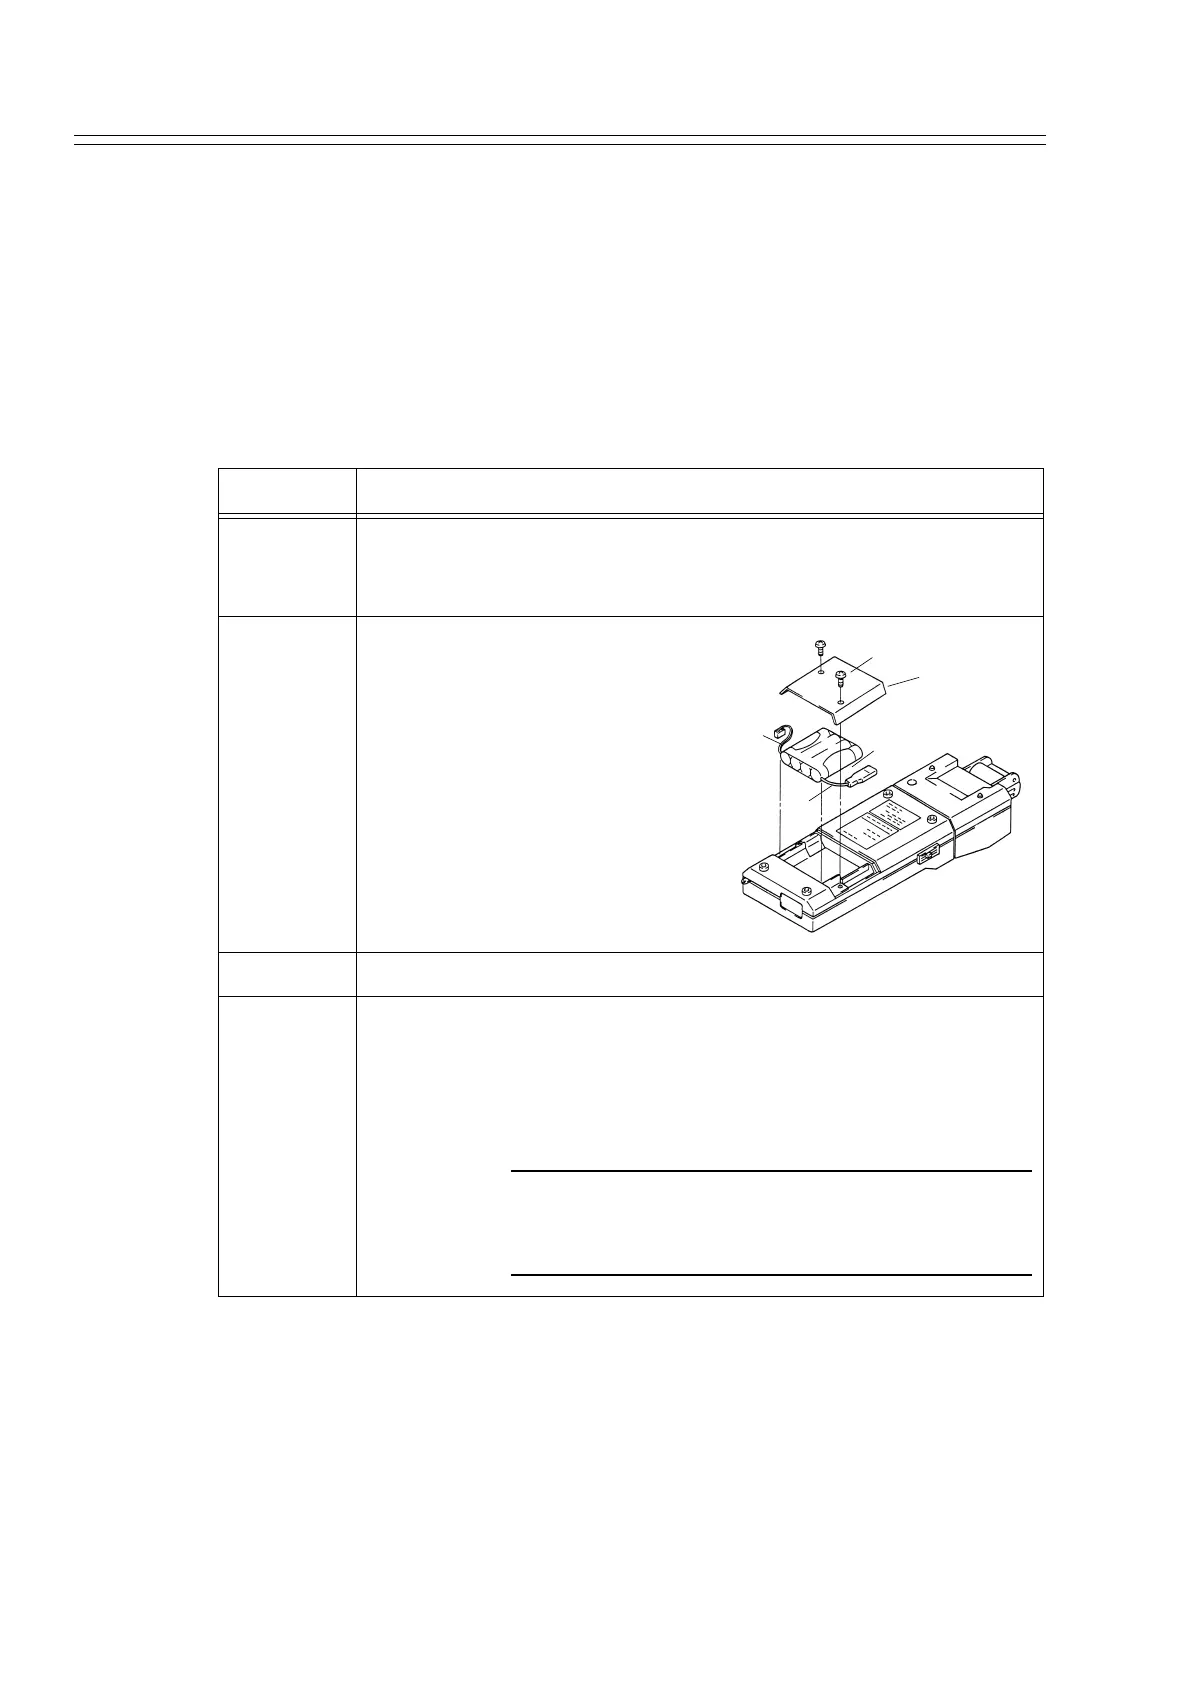
2 Insert battery pack in compart-
ment and connect plug in com-
partment to pin on battery pack.
Example-Battery pack installa-
tion.
3 Replace cover and tighten hex screws.
4 Connect lead from battery charger to recessed connector on left side
of SFC
WARNING
The SFC battery charger is not intrinsically safe.
Always recharge the SFC battery pack in a nonhaz-
ardous location.
Screw
Cover
Battery
(1)Red
2)Black