3-4
IM 04P03B01-01E
3.4 Setting Recording Zones for Each Channel
(Zone Recording)
A recording zone can be set for each measurement channel.
Procedure
1. Hold down the
MENU
key for 3 seconds to enter Setting mode.
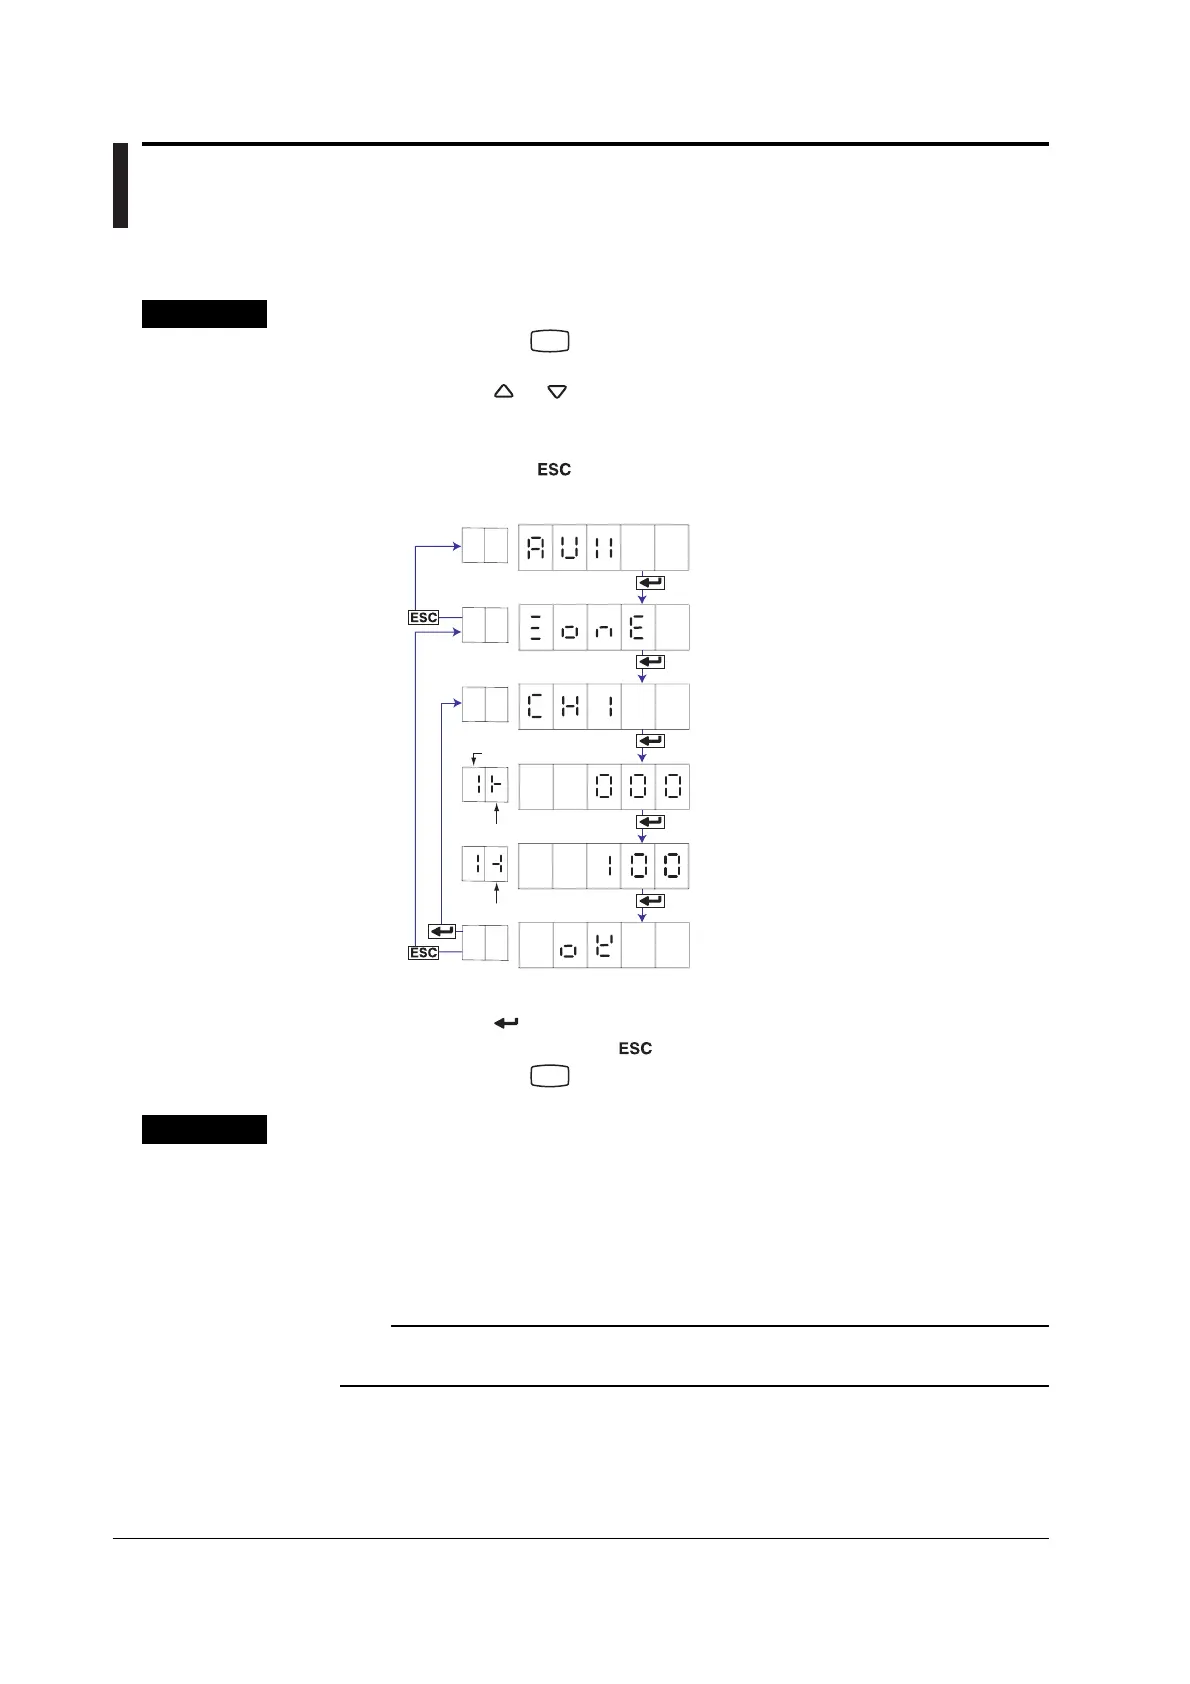
2. Carry out the procedure shown in the figure below.
Press the
or key to select the value.
For the procedure on how to enter values or characters, see page 19 in the
Operation Guide
.
If you press the
key, the operation is cancelled, and the display returns to a
higher level menu.
Select the channel number.
Select “ZONE.”
Set the leftmost position of the recording
zone.
Set the rightmost position of the recording
zone.
The settings are activated.
Select the “AUX.”
(AUX)
(ZONE)
(CH1)
(OK)
Channel number
Leftmost position
Rightmost position
3. Press the key to set other channels.
If you are done, press the key.
4. Hold down the
MENU
key for 3 seconds to return to Operation mode.
Explanation
Recording Zone
The recording zone can be set in the following range.
Leftmost position: 0 mm to 95 mm
Rightmost position: 5 mm to 100 mm
Set a larger value for the rightmost position than the leftmost position.
Set at least 5 mm for the recording zone width.
Note
If the recording zone is set to a value less than 40 mm, scale printout of periodic printout cannot
be executed.
 Loading...