2-9
IM 04P03B01-01E
Frequently Used Setup Operations (Setting Mode)
2
2.2 Setting the Alarm
An alarm can be set for each channel.
If you change the input range, set the alarm again.
Procedure
1. Hold down the
MENU
key for 3 seconds to enter Setting mode.
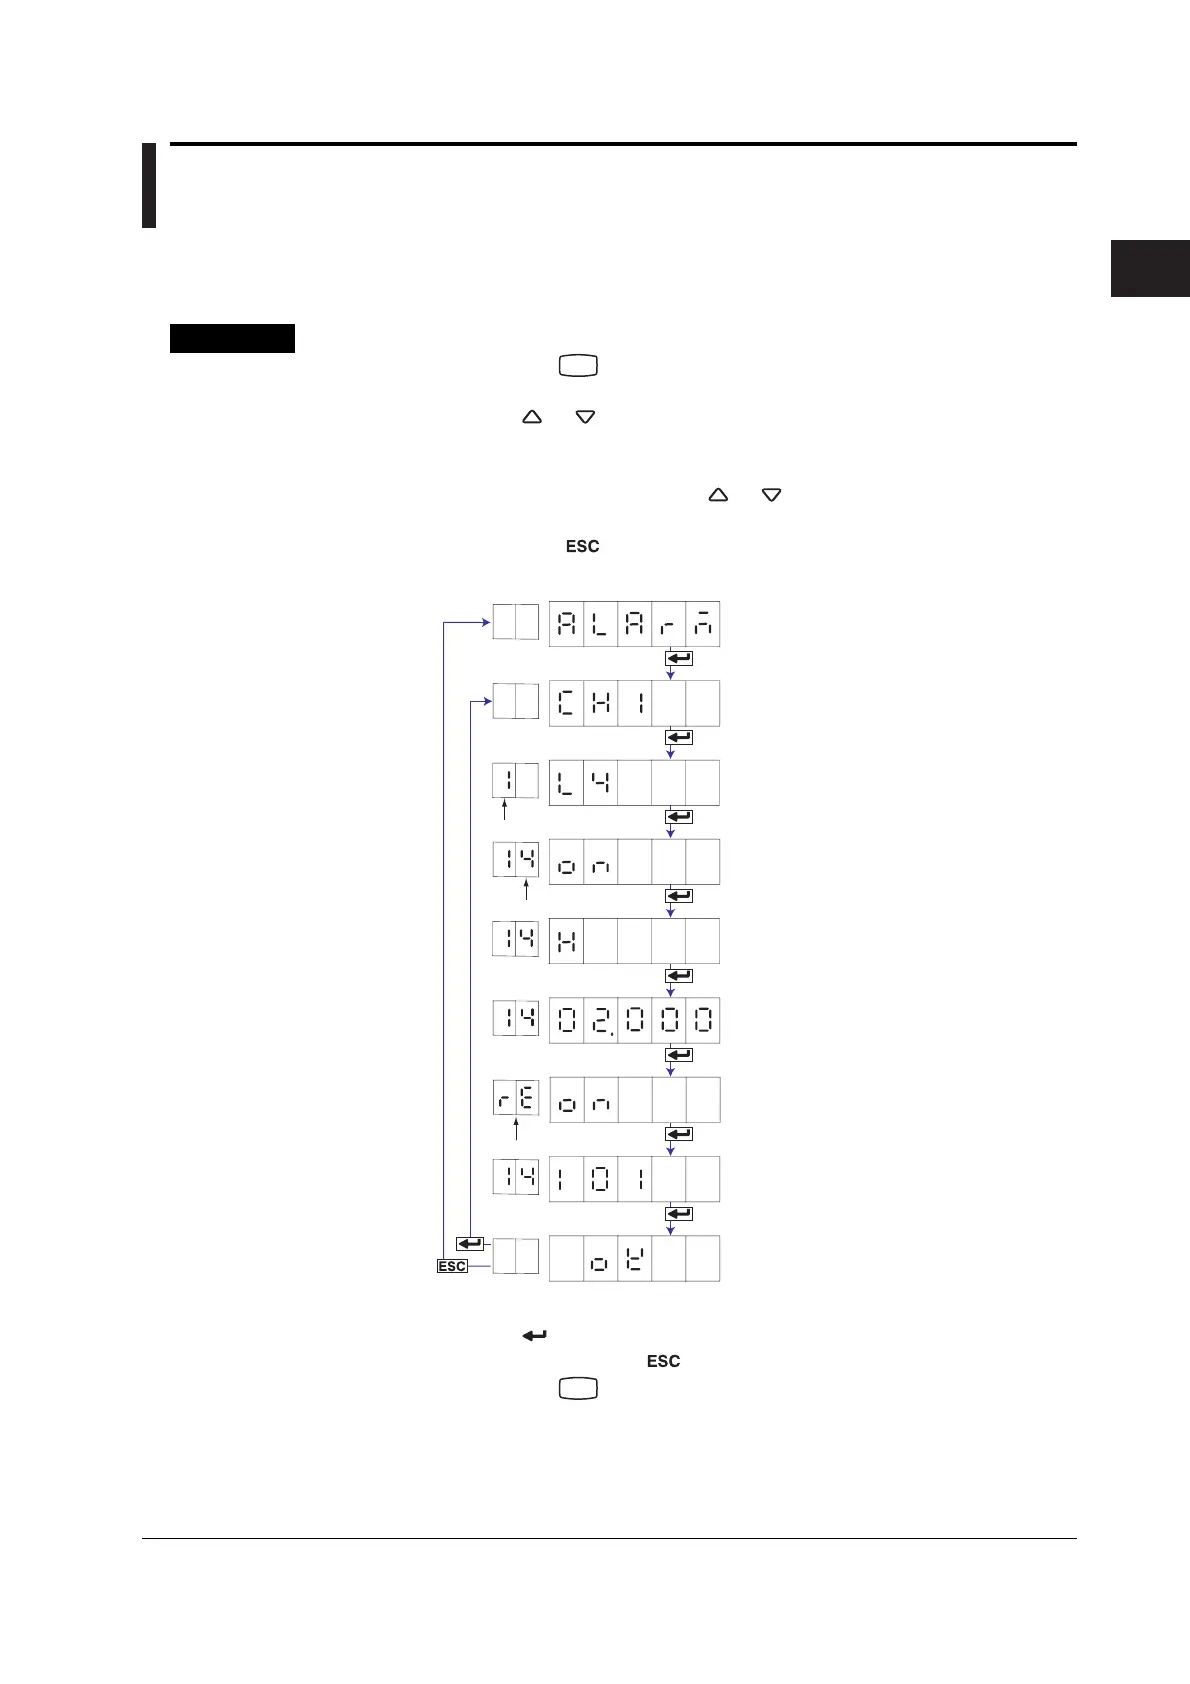
2. Carry out the procedure shown in the figure below.
Press the or key to select the value.
For the procedure on how to enter values or characters, see page 19 in the
Operation Guide
.
To change the polarity, press the or key when the leftmost digit of the
value is blinking.
If you press the
key, the operation is cancelled, and the display returns to a
higher level menu.
(ALARM)
(CH1)
(L4)
(ON)
(H)
(ON)
(I01)
(OK)
Select the level number between 1 and 4.
Select the channel number.
Select ON to set the alarm.
(Displays the following when the alarm
is ON)
Select the alarm type.
Set the value used to turn ON the alarm.
(When the alarm output is ON)
Specify the alarm output relay number.
The settings are activated.
Select the “ALARM.”
Channel number
Level number
Relay output
Select ON to set the alarm relay output.
This setting is valid only on models with
the /A1, /A2, or /A3 option.
3. Press the key to set other channels.
If you are done, press the key.
4. Hold down the
MENU
key for 3 seconds to return to Operation mode.
 Loading...