■ Protecting the brake resistor cable against short-circuits
The input fuses for the drive also protect the resistor cable against short-circuits when the
resistor cable is identical with the input cable .
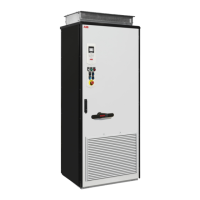
Mechanical installation of custom brake resistors
All brake resistors must be installed outside the drive. Obey the resistor manufacturer’s
instructions.
Electrical installation of custom brake resistors
■ Measuring the insulation of the custom brake resistor circuit
WARNING!
Obey the safety instructions of the drive. If you ignore them, injury or death,
or damage to the equipment can occur. If you are not a qualified electrical
professional, do not do installation or maintenance work.
1.
Stop the drive and do the steps in section Electrical safety precautions (page 18) before
you start the work.
2. Make sure that the resistor cable is connected to the resistor and disconnected from the
drive output terminals.
3. At the drive end, connect the R+ and R- conductors of the resistor cable together.
Measure the insulation resistance between the conductors and the PE conductor with
a measuring voltage of 1000 V DC. The insulation resistance must be more than 1 Mohm.
R-
R+
ohm
PE
1 kV DC,
> 1 Mohm
Start-up
Note: New brake resistors may be coated with storage grease. As the brake chopper
operates for the first time, the grease burns off and may produce some smoke. Make sure
there is sufficient ventilation.
■ Parameter settings
Set the following parameters:
•
Disable the overvoltage control of the drive with parameter 30.30 Overvoltage control.
With custom resistors (no option +D151):
Resistor braking 265
 Loading...