44
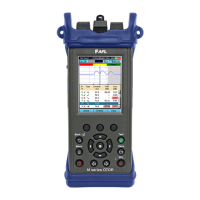
Testing in Expert OTDR Mode
Initiate Expert OTDR test by touching or pressing the Start/Stop button.
1. FlexScan begins testing with the Live Fiber check and if a live ber is NOT detected, proceeds to next step. For
details, see section “Live Fiber Detection” on page 23.
2. If the Launch Quality check is enabled, FlexScan checks loss and reectance of the OTDR connection. For details
see section “Launch Quality Check” on page 23 .
3. If launch quality is ‘good’, FlexScan starts testing at the selected wavelength using settings congured in Expert
OTDR settings screen.
4. If dual-wavelength test is enabled, FlexScan continues testing at 2nd wavelength.
5. Event analysis is completed when testing at selected wavelength(s) completes.
6. When testing is completed, FlexScan displays test results that may be viewed in one of four views as follows:
– LinkMap View. For details, see section “Understanding LinkMap
®
View Features” on page 35.
– Event Table View. For details, see section “Understanding Event Table View Features” on page 37.
– Trace View. For details, see section “Understanding Trace View Features” on page 38.
– Test Info View. This View displays summary of OTDR settings used for this test.
Test Sequence in Expert OTDR Mode