13 Maintaining the FPD+
To Install a Capillary Column to the FPD+
Maintaining Your GC 207
To Install a Capillary Column to the FPD+
1 Gather the following:
• Column measuring tool, see “Consumables and Parts for the FPD+” on page 204.
• Column cutter
• 1/4-inch and 7/16-inch wrenches
• Column nut
• Ferrule
• Capillary column
• Lint-free gloves
2 Launch the GC maintenance wizard: Maintenance > Column > Perform Maintenance >
Install Column > Start Maintenance. Wait for the GC to become ready.
The wizard will guide you through the maintenance steps described below.
Be careful! The oven and/or detector may be hot enough to cause burns. If the detector is
hot, wear gloves to protect your hands.
Wear safety glasses to protect your eyes from flying particles while handling, cutting, or
installing glass or fused silica capillary columns. Use care in handling these columns to
prevent puncture wounds.
Wear clean, lint-free gloves to prevent contamination of parts with dirt and skin oils.
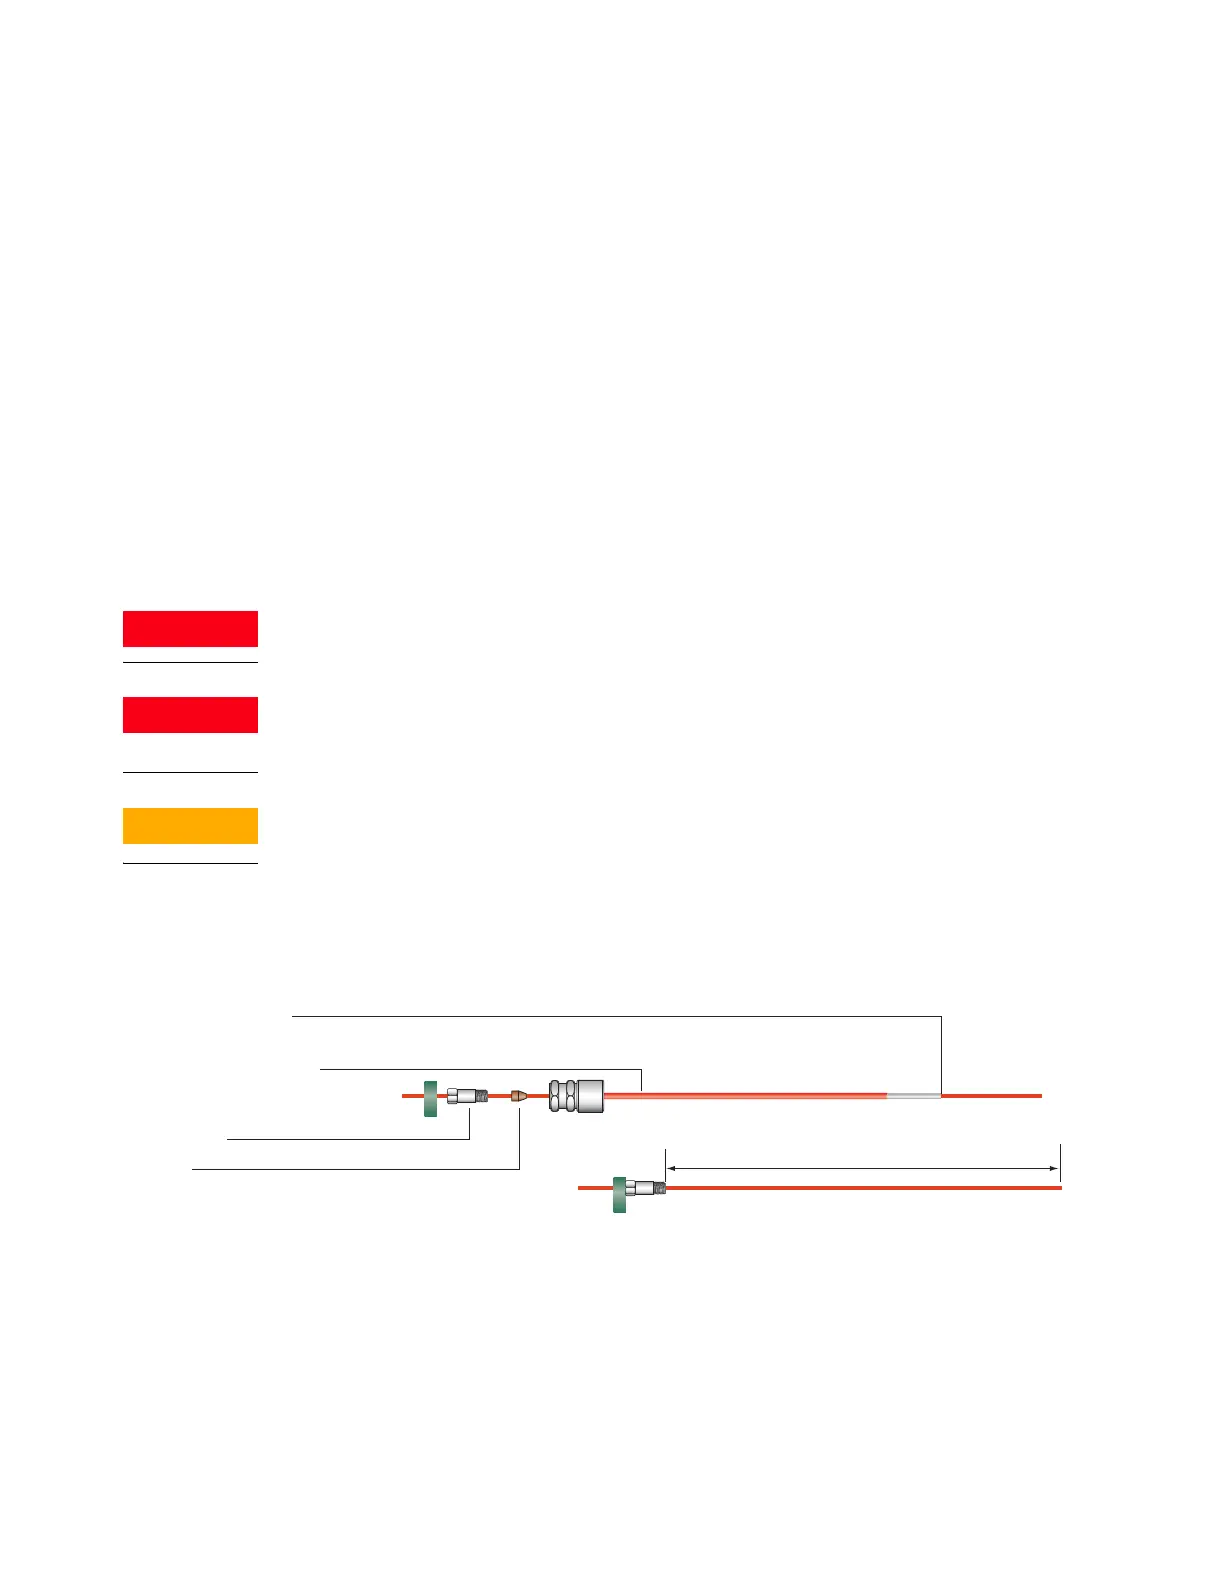
3 Assemble a septum, column nut, and ferrule on the end of the column.
4 Insert the end of the column through the column measuring tool so that the end protrudes
beyond the tool.
5 Tighten the column nut until it grips the column. Tighten the nut an additional 1/8 to 1/4
turn with a pair of wrenches. Snug the septum against the base of the column nut.
6 Use a wafer cutter at 45 ° to score the column.
7 Snap off the column end. The column may protrude about 1 mm beyond the end of the
tool. Inspect the end with a magnifying loupe to make certain that there are no burrs or
jagged edges.
137.5 mm
Score column here
Ferrule
Column nut
Column measuring tool

 Loading...


