74
6.5.2.1 Cleaning the steam generator
If the water is hard (above about 6 dH) there is a risk of limescale
deposits forming on the elements of the steam generator. The
elements should be checked and cleaned once or twice a year.
• Remove the cover below the ball valve. Empty the steam
generator by opening the ball valve.
• Remove the hose and the check valve.
• Remove the entire steam generator from the pipe system of
the machine. Before the steam generator can be opened, the
insulation must be removed and then the clamping ring.
• Remove any limescale deposits on the elements with
limescale remover or mechanically (take care, since the
elements are welded to the end panel).
• Before re-assembling the steam generator, replace the O-ring
EHWZHHQWKHKDOYHVRIWKHWDQN7KHQ¿WWKHFODPSLQJULQJ
Tighten carefully to avoid damaging the O-ring.
• 5H¿WWKHLQVXODWLRQDQGVHFXUHLWZLWKDGKHVLYHWDSH
• Fit the cover to the ball valve, making sure that the ball valve
is closed.
• Install the steam generator on the pipe system. The gasket
between the steam generator and the pipe system of the
machine must be replaced.
• 5H¿WWKHKRVHDQGQRQUHWXUQYDOYH
• If there is leakage from the check valve, dismantle the check
valve and clean the sealing surfaces in the valve body and
on the O-ring. On re-assembly, the locking screw must be
screwed in until it bottoms in the valve body.
If the problem with the deposits is severe, we recommend
LQFUHDVLQJWKHGRVDJHDPRXQWVHH³&KHFNLQJWKHGRVDJH
amount”).
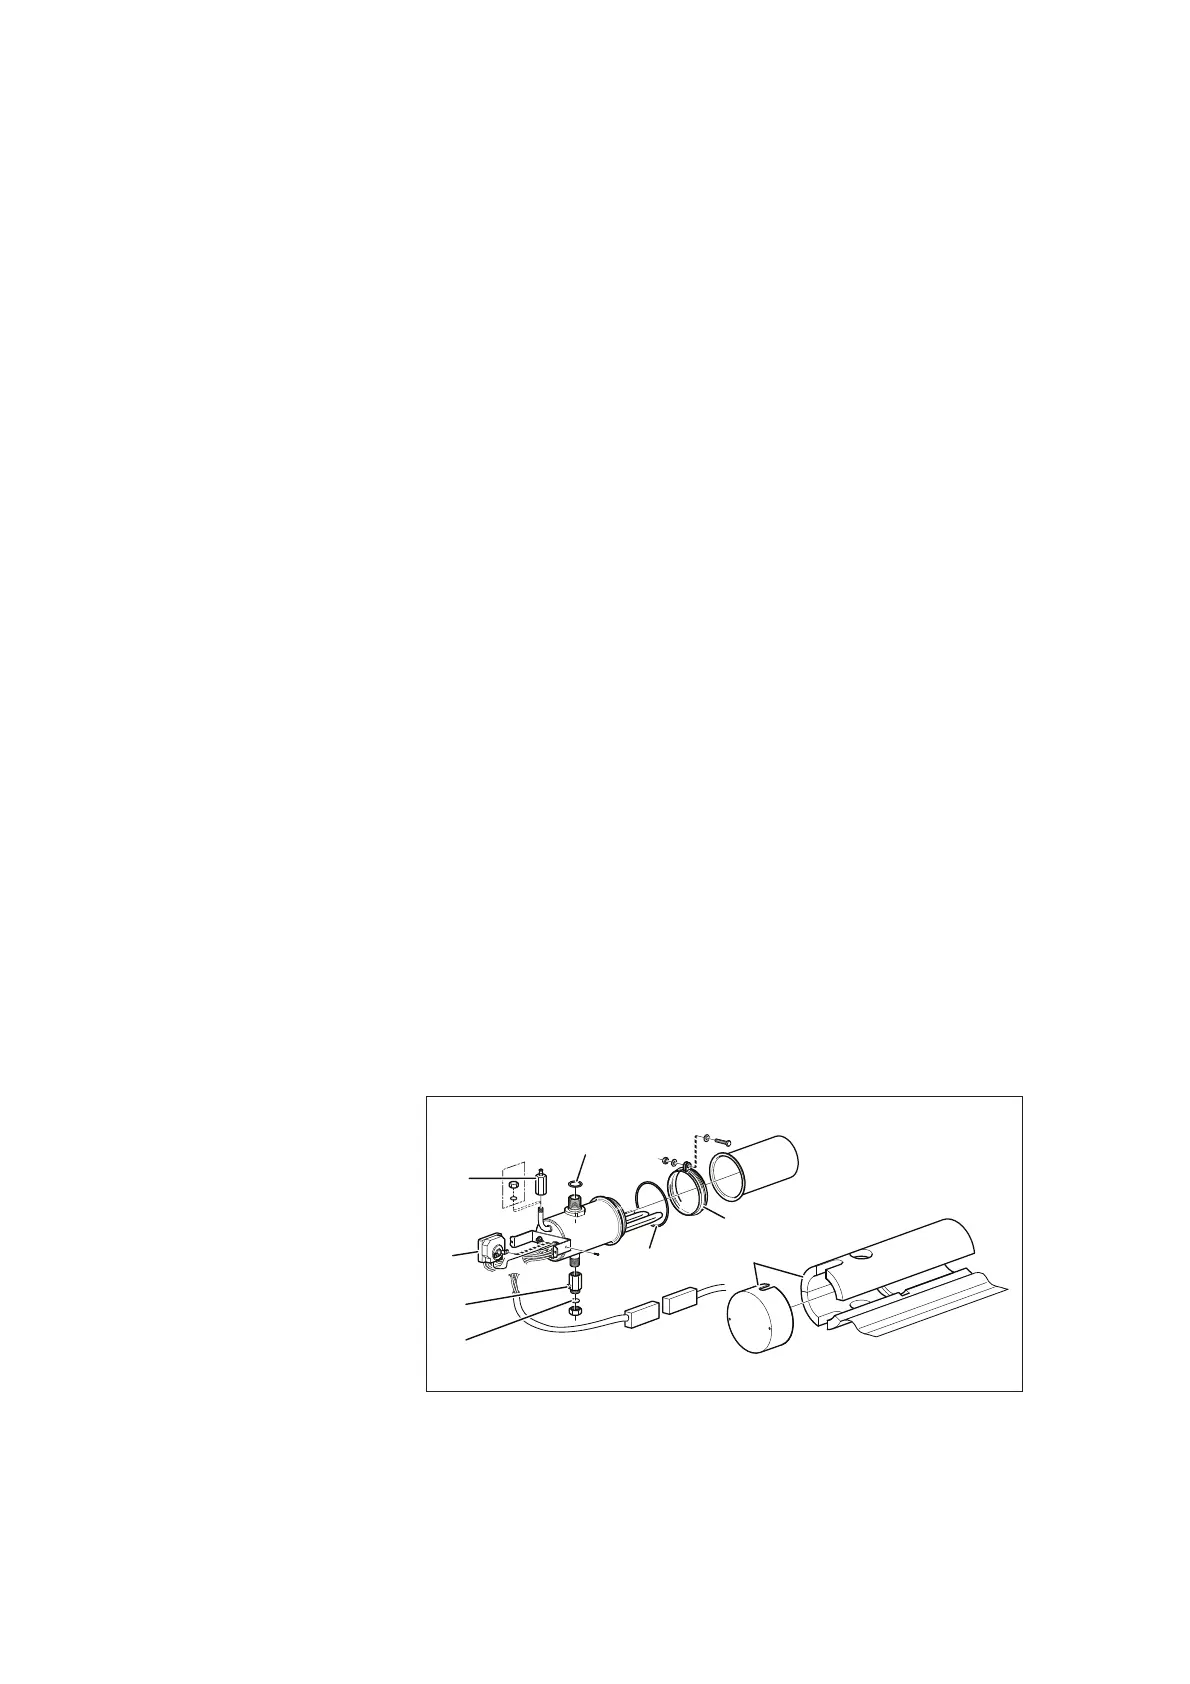
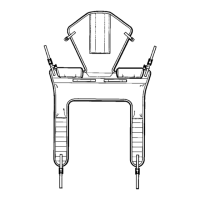
1
2
7
6
8
3
4
5
001440
Figure 8. Components in the steam generator
1. Check valve 5. Cover
2. Sealing 6. O-ring
3. Overheat protection 7. Clamping ring
4. Ball valve 8. Insulation