77
6.7.3 Replacing a hose in the dosing pump (6.3)
Wear and tear in combination with chemicals can accelerate
deterioration of the hose. All changes to the hose’s condition can
alter the amount of agent added and thereby have a negative
impact on the process. Replace the hose(s) regularly.
WARNING!
Only to be carried out by authorized staff.
WARNING!
Before starting work, make sure that the machine
is disconnected from the electric power supply.
• Remove the cover of the dosing pump.
• 5HOHDVHRQHRIWKHKRVH¿[LQJVDQGSXOOWKHKRVHXSZDUGV
while spinning the impeller by hand at the same time.
• When the hose is free from the impeller: install the new hose.
• 6HFXUHRQHRIWKHKRVH¿[LQJVDQGSUHVVGRZQWKHKRVH
while spinning the impeller by hand at the same time.
• When the hose is down in the pump housing, put back the
RWKHUKRVH¿[LQJDVZHOODQGUH¿WWKHFRYHU
Note!
Do not take out the impeller.
1
2
3
4
000219
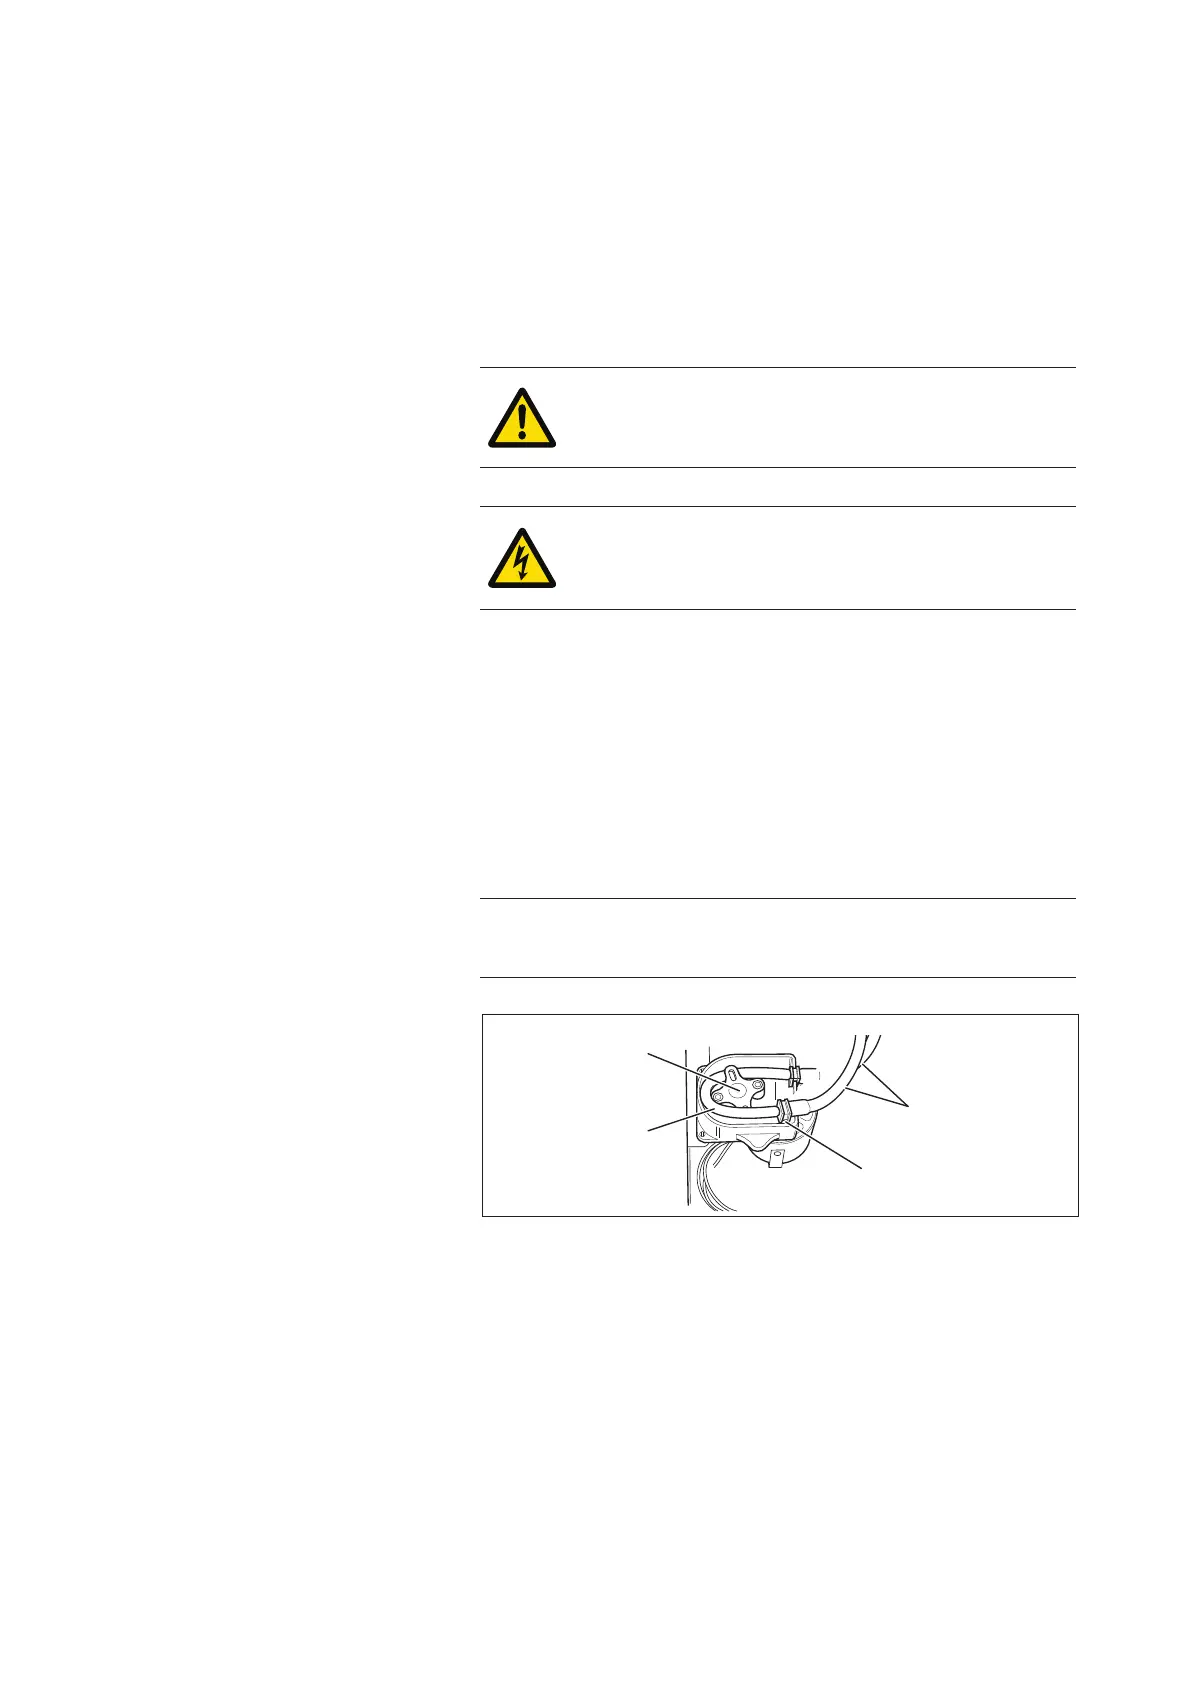
Figure 9. Dosing pump
1. Impeller
2. Hose
3. Transport hose
+RVH¿[LQJ