Automatic Divider-rounder model Syncro
55/79
Use and maintenance manual (translation of the original instructions) - MASA6_en_2 of 23/03/2021
4.4.6 CLEANING THE INSIDE OF THE HEAD
Before beginning, activate the safety measures indicated in par. 4.1. Wear abrasion-resistant gloves,
shoes with reinforced toe, dust-proof face mask, and protective goggles.
At the end of each working day, it is necessary to clean the internal surfaces of the head to remove all residual
dough, which may otherwise compromise the quality of the subsequent processing. Proceed as follows:
Stop the machine and disconnect it from the mains power supply, by unplugging it from the mains
socket;
Open the front access doors;
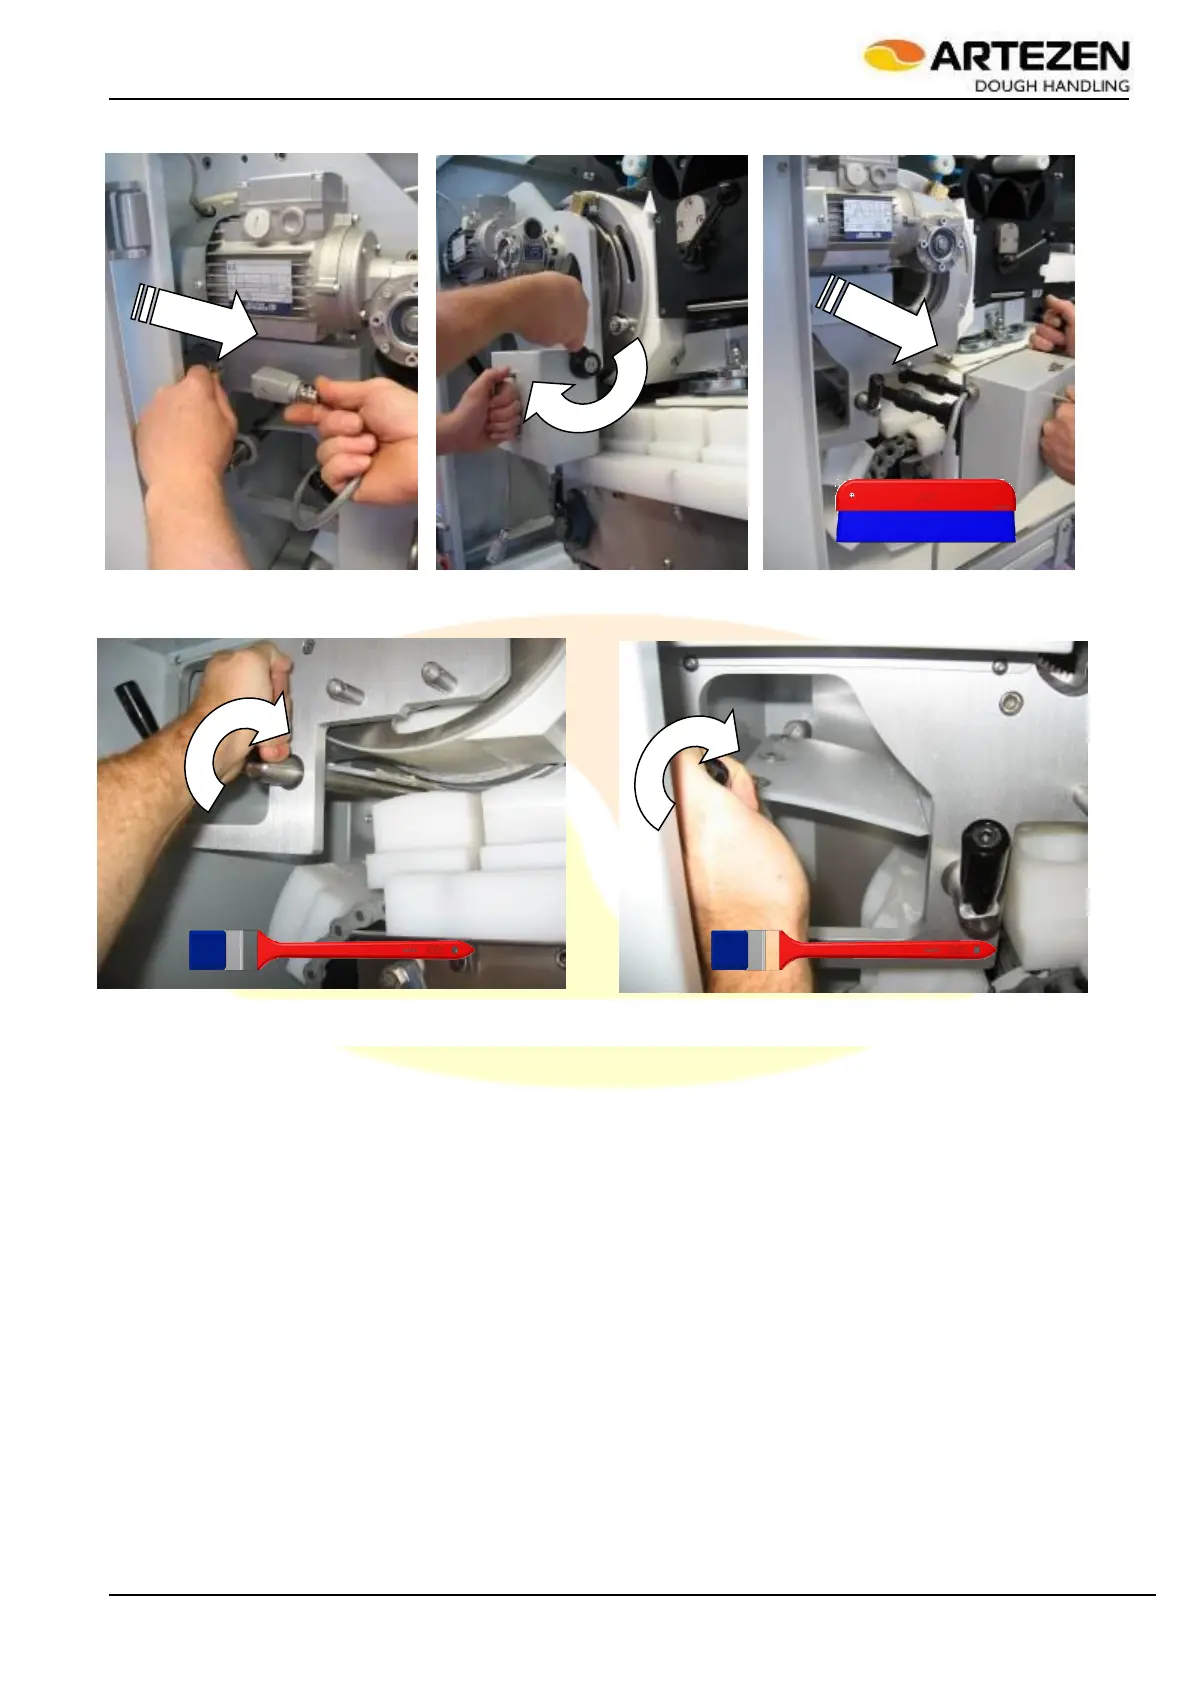
Look at the images in Figure 37 here below. Remove the cover from the head unit (Pos. 1) by means of
the sliding handle, as shown in the figure. The internal parts of the head unit will be accessible. At this
point, it will be possible to extract the two “star dosing devices” for cleaning (Pos. 4), the six dough
accompanying rollers (Pos. 5), and the brush of the flour duster (Pos. 3). All these items can be
removed without the use of tools, thus facilitating the daily cleaning of the machine. At the end of the
cleaning operation, carefully put them back in the appropriate compartments, then close the access
cover. The cover should be handled carefully to avoid damaging it during storage;
Open the cover (Pos. 2) of the "dough compression piston" by turning the lever connected to it: in this
situation, the plastic piston will also be accessible, which can also be completely disassembled to clean
it thoroughly. The dough compression piston is kept in place by a connection pin (pos. 6), which must be
slid it out to extract the piston. Extracting the plastic piston also allows thoroughly cleaning the inside of
the “dough compression chamber” (that is the chamber inside which the “dough compression piston”
runs). To put back the piston, insert it inside the chamber, slide it horizontally to the right, insert the pin
after aligning the through hole of the plastic piston with the connection hole on the part fixed to the
hydraulic cylinder. Next, close the cover.
Figure 36 - Cleaning the dough removing rollers and drum scraper