Model 8640B TM 9-4935-601-14-7&P
SECTION III
OPERATION
3-1. INTRODUCTION
3-2. This section describes the functions of the controls
and indicators of the Model 8640B Signal Generator. It
explains how to set the frequency, amplitude, and
modulation controls, and covers such operator
maintenance as fuse and indicator lamp replacement
and fan filter cleaning.
3-3. PANEL FEATURES
3-4. Front panel controls, indicators, and connectors are
shown and described in Figure 3-2. Rear panel controls
and connectors are shown and described in Figure 3-3.
3-5. OPERATOR'S CHECKS
3-6. Use the operator's checks in Figure 3-4 to verify
proper operation of the Signal Generator's main
functions.
3-7. OPERATING INSTRUCTIONS
3-8. Figures 3-5 and 3-6 explain how to set the
frequency, amplitude, and modulation controls. Figure
3-5 also explains how to use the frequency counter and
phase lock controls.
3-9. OPERATOR'S MAINTENANCE
3-10. Fuse. The main ac line fuse is located on the
rear panel next to the line power cable jack. To remove
the fuse, first remove the line power cable from its jack.
Slide the fuse compartment cover to the left, then pull
the handle marked FUSE PULL and remove the fuse.
CAUTION
Be sure to select the correct fuse
rating for the selected line voltage
(see LINE VOLTAGE SELECTION in
Section II); fuse ratings are listed on
the fuse compartment.
3-11. Fan. The cooling fan's filter is located on the rear
panel. To service the fulter use a No. 2 Pozidriv
screwdriver (HP 8710-0900) to remove the four screws
that hold the filter to the rear panel. Then clean it, using
a solution of warm water and soap, or replace it, using
the part number listed in the table of replaceable parts in
Section VI.
3-12. The fan motor has factory lubricated, sealed
bearings and requires no periodic maintenance.
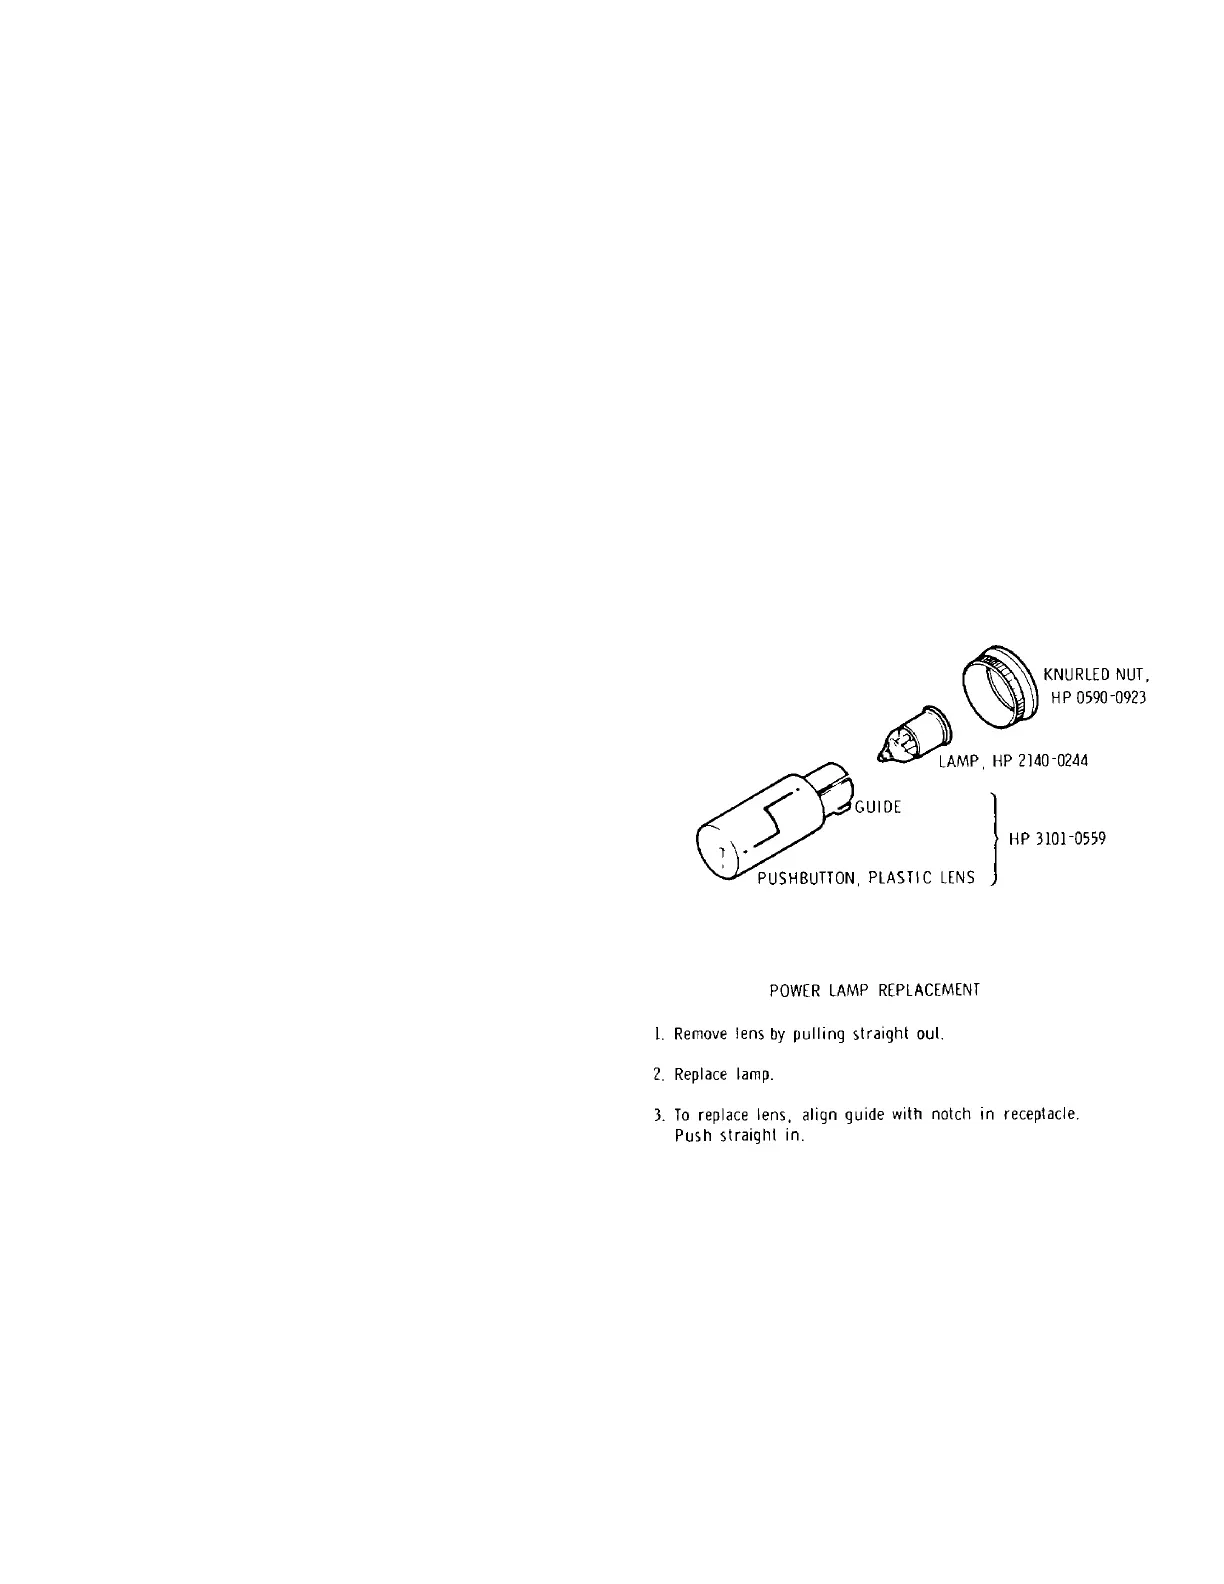
3-13. Lamp Replacement. Figure 3-1 explains how to
replace the lamp located in the line power switch.
3-14. Meter Zeroing. To mechanically zero the front
panel meter, set LINE switch to OFF and place
instrument in its normal operating position. Turn
adjustment screw cw until indicator indicates zero, then
turn adjustment slightly ccw to free mechanism from
adjusting peg.
Figure 3-1. Lamp Replacement.
3-1
Artisan Technology Group - Quality Instrumentation ... Guaranteed | (888) 88-SOURCE | www.artisantg.com