Testing the media server installation
86 Installing and Configuring the Avaya S8700 Series Media Server
S8700 Media Server LEDs
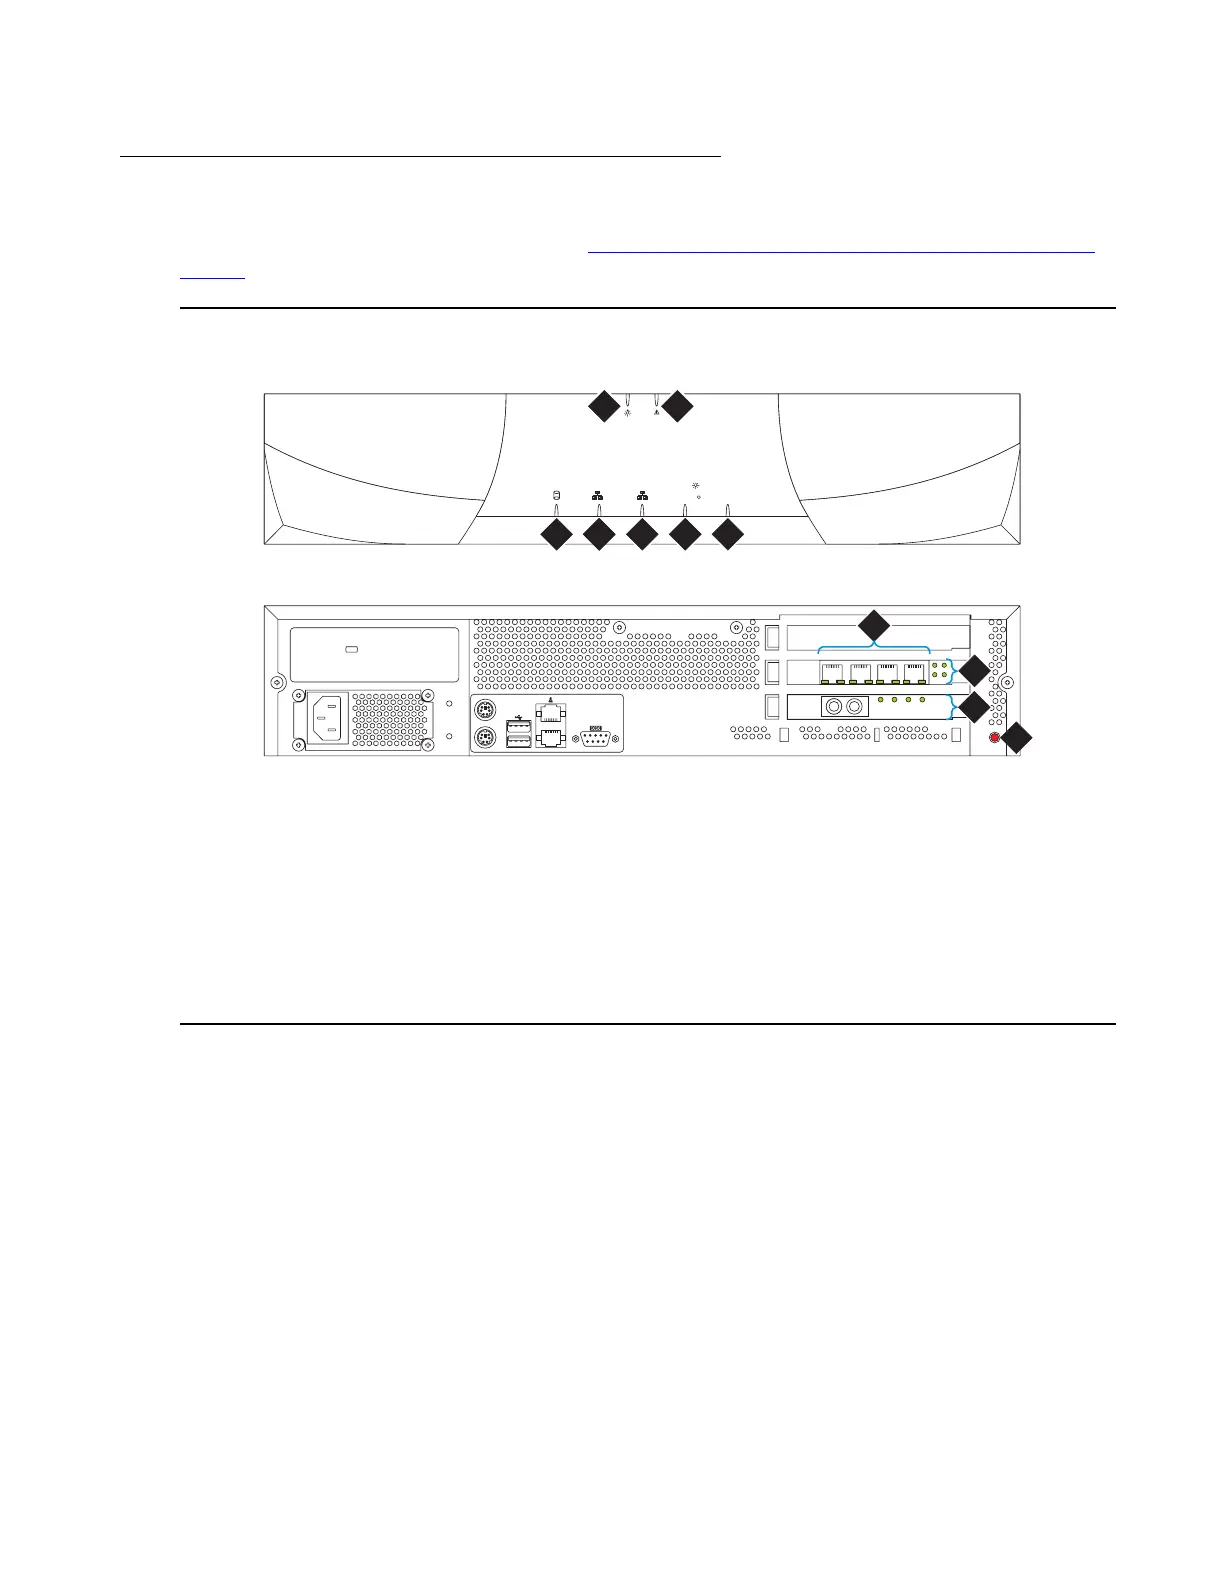
The media server has the LEDs shown in Figure 10: LEDs on front and back of S8700 Media
Server:
Figure 10: LEDs on front and back of S8700 Media Server
Testing the media server LEDs
You can test some of the LEDs on the front of the media server through the Maintenance Web
Interface. This makes sure that the Active/Standby and U2 LEDs (on the front of the media
server) and the transmit LED on the DAJ1 duplication memory card (on the back of the media
server) are controllable and not burned out and that the media server is not hung.
Note:
Note: The U2 LED is controlled by the S8700 Media Server but does not have an
assigned function.
Figure notes:
1. Power
2. Configuration fault
3. Hard drive activity
4. Network activity (CNA)
5. Service—configuration health
6. Active or standby mode indicator
7. U2 (not defined)
8. 4 NIC ports (the numbers indicate their
assigned Ethernet ports)
9. LEDs for the NIC ports (some NICs may
not have LEDs)
10. LEDs for fiber optic duplication
connectivity
11. Status LED (not used)
1
SERVICE
U2
STANDBY
ACTIVE
2
1
55 44 33
22
DAI - 1
DUP
MEMORY
LINE
RECEIVE
TRANS
LINK
STAT
AVAYA
1 2
3 44 5
6
7
9
10
11
8
scdlled KLC 030502

 Loading...