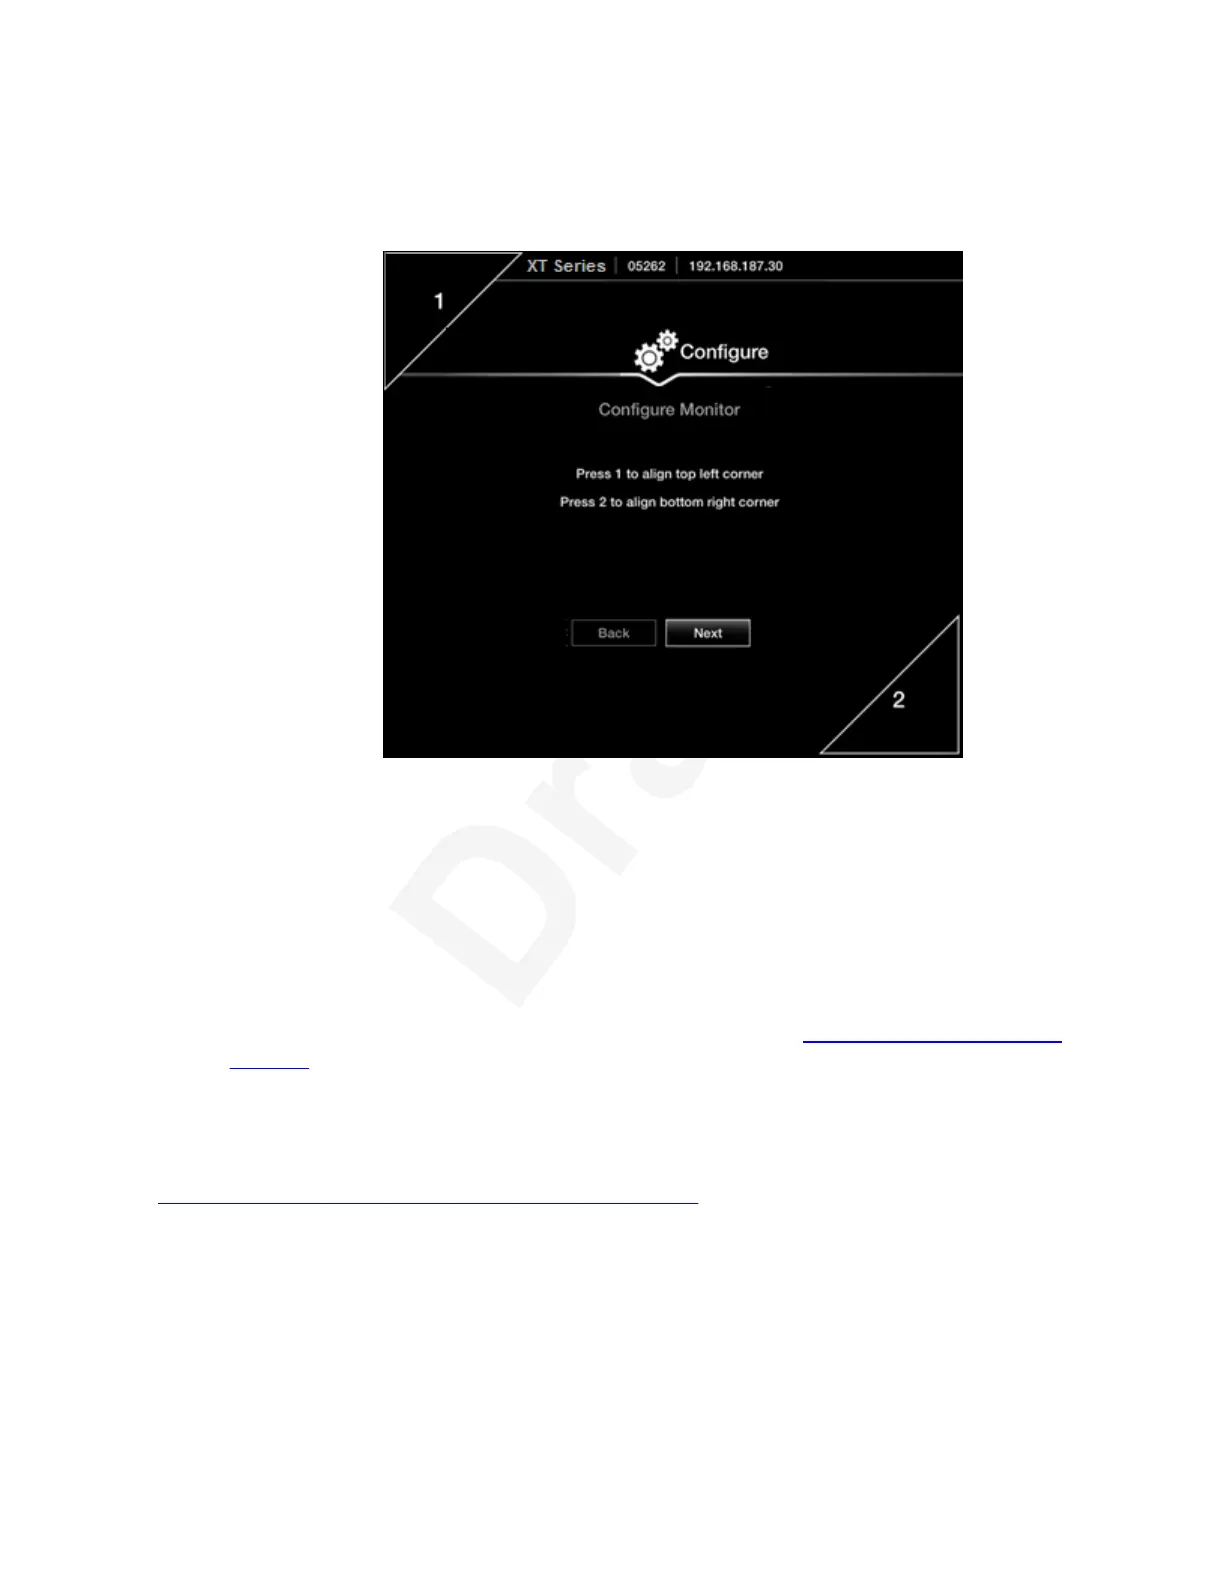
2. Decide if the monitor's image needs adjusting, by verifying if the white border of the1
triangles in the top left and bottom right corners are fully visible on all sides.2
If the image is centered correctly, skip this procedure and select Next.3
4
Figure 22: Examining the image position5
3. Press 1 to highlight the triangle in the top left corner in blue.6
4. Use the arrow keys to position the image, so all sides of the white border of the triangle are7
visible in the screen, then press ok/menu.8
5. Press 2 to highlight the triangle in the bottom right corner in blue.9
6. Adjust the image position in the same way, until all sides of the triangle border are visible,10
then press ok/menu.11
7. To continue with the Quick Setup Wizard, select Next (see
Configuring Basic Network12
Settings on page 39).13
If your monitor is 4K and your system is an Avaya Scopia
®
XT7000 Series, graphic14
adjustment is not applied.15
Related links16
Configuring Basic Settings with the Quick Setup Wizard on page 3517
Configuring Basic Network Settings18
About this task19
This procedure describes how to set up the basic network settings and the IP address of the XT20
Series as part of the Quick Setup Wizard. To modify advanced network settings, see Deployment21
Guide for Avaya Scopia
®
XT Series.22
Applying basic settings
December 2017 Avaya Scopia
®
XT Series User Guide 39
Avaya - Proprietary. Use pursuant to the terms of your signed agreement or Avaya policy.
DRAFT—December 15, 2017—1:33 PM (UTC)