1
Figure 59: Connecting to an XT Series endpoint by its IP address (Example uses Scopia2
XT Desktop icon)3
c. Enter the IP address of the endpoint on your laptop.4
d. Select OK.5
3. If the XT Series endpoint is protected with a password, enter the password displayed on6
the endpoint screen.7
The content is displayed on the screen of the XT Series endpoint or the content is shared8
with remote participants.9
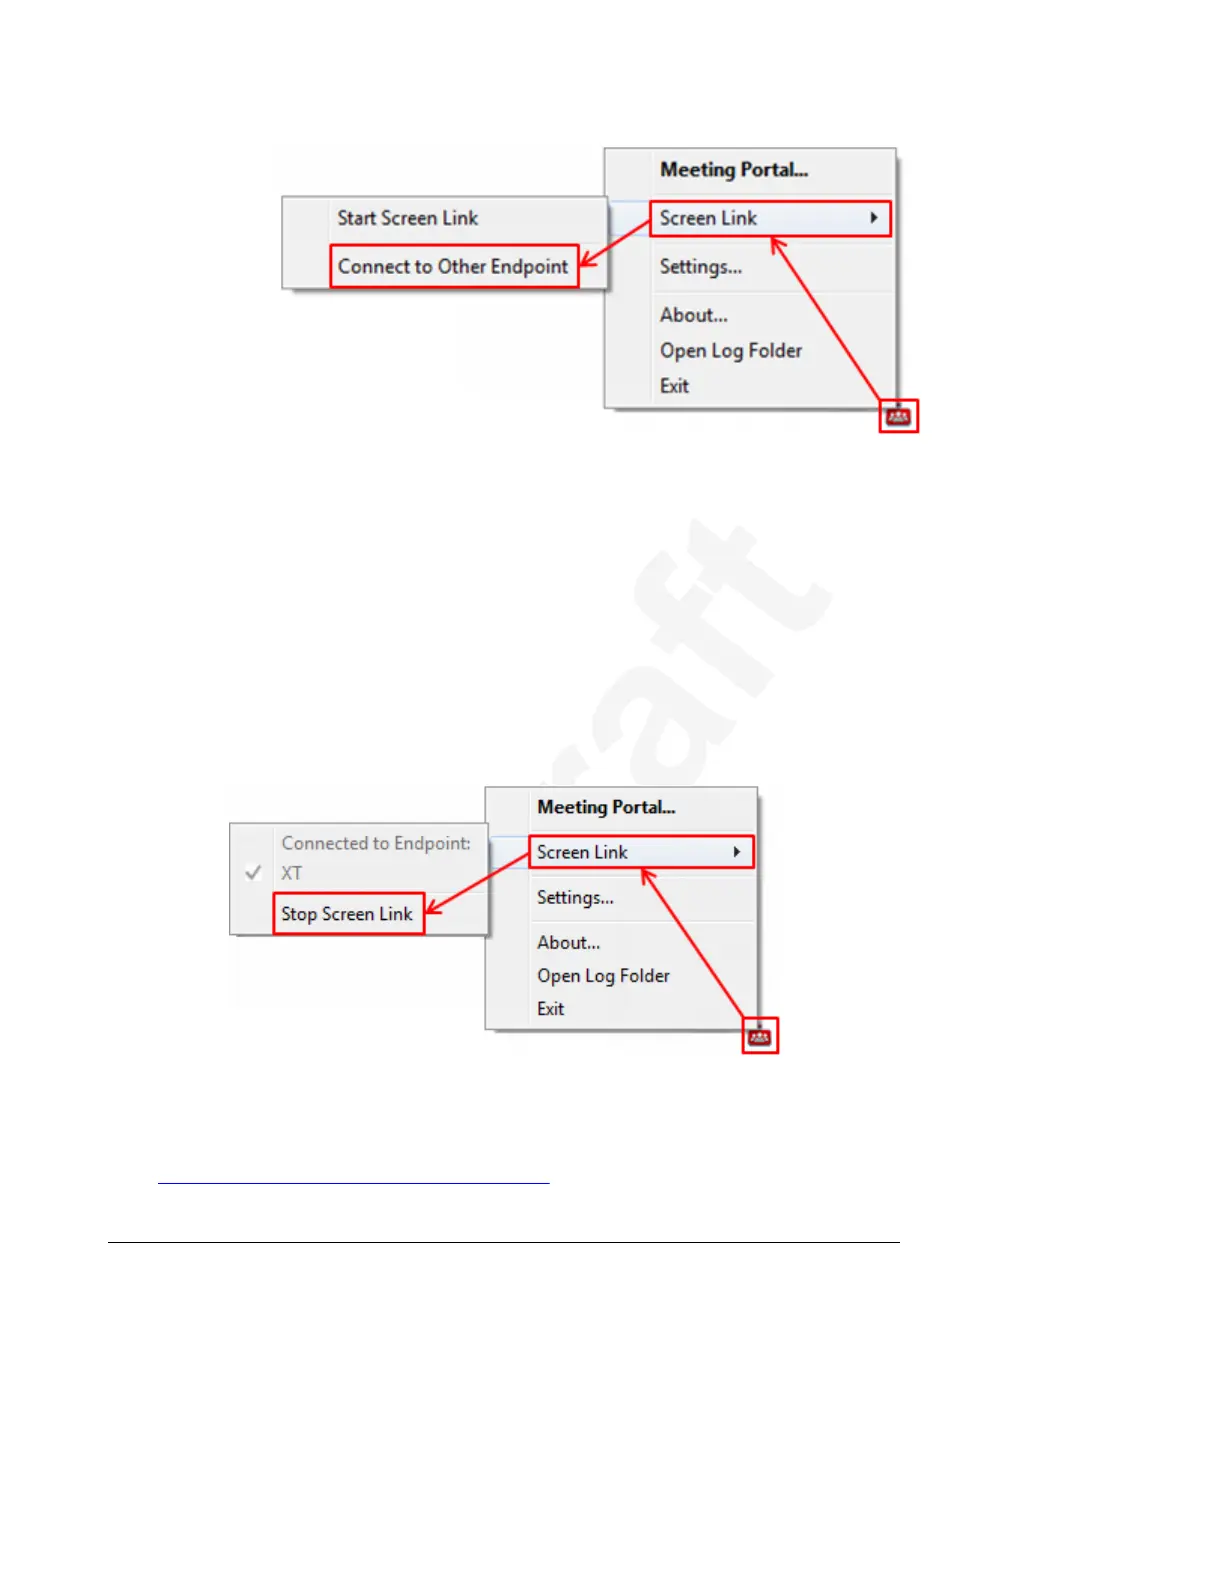
4. To stop presenting your content on the endpoint screen, right-click the Scopia XT Desktop10
or Avaya Equinox icon and select Screen Link > Stop Screen Link.11
12
Figure 60: Stopping to share content using the XT Series endpoint (Example uses Scopia XT13
Desktop icon)14
Related links15
Presenting Content from Your Computer on page 6816
17
Connecting a Computer to the XT Series using the DVI port18
About this task19
Connect a computer to share a presentation or other content with other participants. You can20
display the content to participants in a local conference room, as well as to remote participants21
Participating in Meetings
December 2017 Avaya Scopia
®
XT Series User Guide 72
Avaya - Proprietary. Use pursuant to the terms of your signed agreement or Avaya policy.
DRAFT—December 15, 2017—1:33 PM (UTC)