The Recording screen indicates the amount of time you can record based on the available1
space on your USB storage device.2
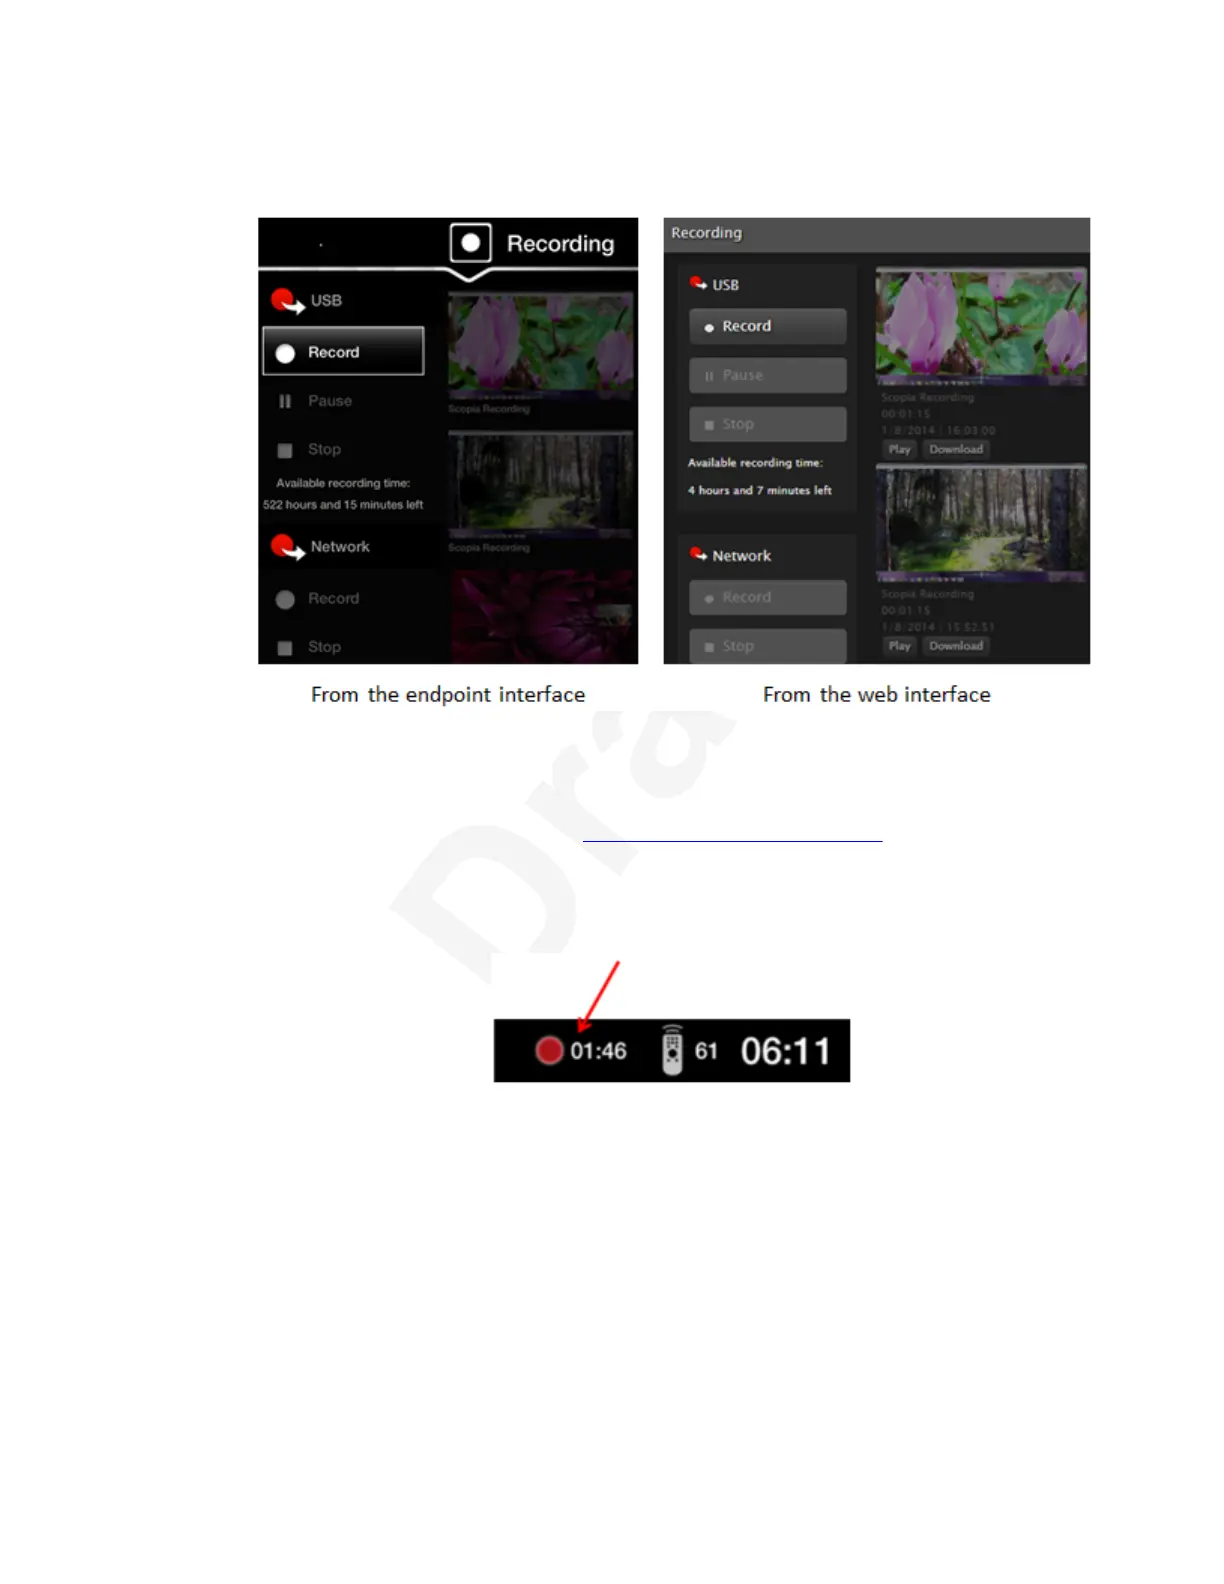
3
Figure 85: Start a recording4
2. To start recording, select the Record option under your preferred recording location (USB5
or the network). For more information about the location options available to you, see the6
Before you begin section above or Setting Recording Preferences on page 103.7
The recording icon appears at the top of the monitor, next to the remaining time available8
for the recording. You can pause or stop the recording by selecting those buttons in the9
recording screen.10
11
Figure 86: Recording icon and time remaining on this USB drive12
If you started the recording at any time after the videoconference started, the recording13
automatically stops when the videoconference ends. Otherwise, stop the recording by14
selecting Stop.15
3. To playback recorded videoconferences stored on a local USB storage device, from the16
endpoint interface select the recording and press ok/menu to play. From the XT Series17
web interface, find the recording and select Play to view it directly in the browser (Chrome18
or Firefox only), or Download to save the MP4 file locally. You can also upload a video19
from the Web interface to the local USB storage.20
Moderating Meetings
December 2017 Avaya Scopia
®
XT Series User Guide 96
Avaya - Proprietary. Use pursuant to the terms of your signed agreement or Avaya policy.
DRAFT—December 15, 2017—1:33 PM (UTC)